Asus U1E U1 user's manual (English) - Page 25
Checking Battery Power, Charging the Battery Pack - bios
 |
View all Asus U1E manuals
Add to My Manuals
Save this manual to your list of manuals |
Page 25 highlights
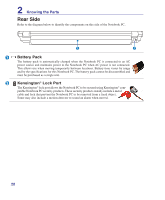
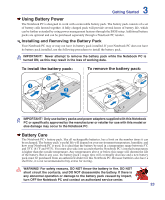
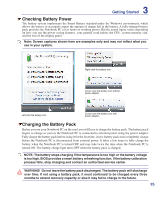
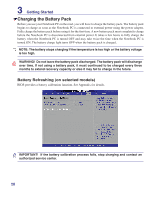
3 Getting Started Checking Battery Power The battery system implements the Smart Battery standard under the Windows environment, which allows the battery to accurately report the amount of charge left in the battery. A fully-charged battery pack provides the Notebook PC a few hours of working power. But the actual figure varies depending on how you use the power saving features, your general work habits, the CPU, system memory size, and the size of the display panel. Note: Screen captures shown here are examples only and may not reflect what you see in your system. Right-click the battery icon Cursor over the battery icon without power adapter. Left-click the battery icon Cursor over the battery icon with power adapter. Charging the Battery Pack Before you use your Notebook PC on the road, you will have to charge the battery pack. The battery pack begins to charge as soon as the Notebook PC is connected to external power using the power adapter. Fully charge the battery pack before using it for the first time. A new battery pack must completely charge before the Notebook PC is disconnected from external power. It takes a few hours to fully charge the battery when the Notebook PC is turned OFF and may take twice the time when the Notebook PC is turned ON. The battery charge light turns OFF when the battery pack is charged. NOTE: The battery stops charging if the temperature is too high or the battery voltage is too high. BIOS provides a smart battery refreshing function. If the battery calibration process fails, stop charging and contact an authorized service center. WARNING! Do not leave the battery pack discharged. The battery pack will discharge over time. If not using a battery pack, it must continued to be charged every three months to extend recovery capacity or else it may fail to charge in the future. 25
-
 1
1 -
2
-
3
-
4
-
5
-
6
-
7
-
8
-
9
-
10
-
11
-
12
-
13
-
14
-
15
-
16
-
17
-
18
-
19
-
 20
20 -
 21
21 -
 22
22 -
 23
23 -
 24
24 -
 25
25 -
 26
26 -
 27
27 -
 28
28 -
 29
29 -
 30
30 -
31
-
32
-
33
-
34
-
35
-
36
-
37
-
38
-
39
-
40
-
41
-
42
-
43
-
44
-
45
-
46
-
47
-
48
-
49
-
50
-
51
-
52
-
53
-
54
-
55
-
56
-
57
-
58
-
59
-
60
-
61
-
62
-
63
-
64
-
65
-
66
-
67
-
68
-
69
-
70
-
71
-
72
-
73
-
74
-
75
-
76
-
77
-
78
-
79
-
80
-
81
-
82
-
83
-
84
-
85
-
86
-
87
 |
 |
