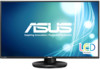
Asus VN279QLB VN279QLB Series User Guide for English Edition - Page 19
Turning on the monitor, To connect the audio cable, To use the earphone, To use the USB 3.0 ports
 |
View all Asus VN279QLB manuals
Add to My Manuals
Save this manual to your list of manuals |
Page 19 highlights
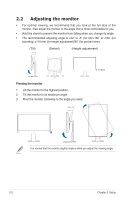
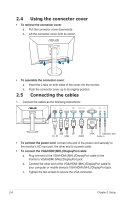
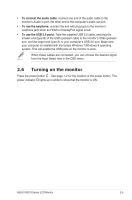
• To connect the audio cable: connect one end of the audio cable to the monitor's Audio-in port, the other end to the computer's audio-out port. • To use the earphone: connect the end with plug type to the monitor's earphone jack when an HDMI or DisplayPort signal is fed. • To use the USB 3.0 ports: Take the supplied USB 3.0 cable, and plug the smaller end (type B) of the USB upstream cable to the monitor's USB upstream port, and the larger end (type A) to your computer's USB 3.0 port. Make sure your computer is installed with the lastest Windows 7/Windows 8 operating system. That will enable the USB ports on the monitor to work. When these cables are connected, you can choose the desired signal from the Input Select item in the OSD menu. 2.6 Turning on the monitor Press the power button . See page 1-2 for the location of the power button. The power indicator lights up in white to show that the monitor is ON. ASUS VN279 Series LCD Monitor 2-5
-
 1
1 -
2
-
3
-
4
-
5
-
6
-
7
-
8
-
9
-
10
-
11
-
12
-
13
-
 14
14 -
 15
15 -
 16
16 -
 17
17 -
 18
18 -
 19
19 -
 20
20 -
 21
21 -
 22
22 -
 23
23 -
 24
24 -
25
-
26
-
27
-
28
 |
 |
