Audiovox CE710CR Owners Manual - Page 14
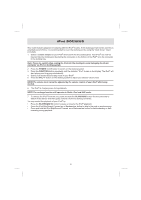
iPod DOCKING
 |
UPC - 044476051296
View all Audiovox CE710CR manuals
Add to My Manuals
Save this manual to your list of manuals |
Page 14 highlights
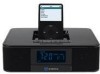
iPod DOCKING This model includes adaptors for adopting different iPod® models. If the docking port will not be used for an extended period of time, it is recommended to cover the docking port by using the "Dock Cover" insert (included). 1. Select a suitable adaptor for your iPod® and insert it into the docking area. Your iPod® can now be inserted into the docking port by placing the connector on the bottom of the iPod® onto the connector in the docking bay. Note: Please be careful when seating the iPod into the docking to avoid damaging the 30-pin connector on iPod or docking system. 2. Press the POWER On/Off button to switch on the docking system. 3. Press the FUNCTION button repeatedly until the indicator "iPod" shows on the display. The iPod® will start playing and charging automatically. 4. Select your desired EQ and play mode in your iPod®. 5. Press the VOL +/- button on the docking system to adjust your desired volume level. NOTE:The volume level cannot be adjusted by the volume control of your iPod® after being docked. 6. The iPod® is charging even during playback. NOTE:The recharge function still operates in Radio, iPod and AUX mode. 7. To remove the iPod® from the unit, press and hold the PLAY/PAUSE button for three seconds to switch off the device and then gently remove it from the docking connector. You may control the playback of your iPod® by: • Press the PLAY/PAUSE button to pause or resume the iPod® playback; • Press the iPod Skip/Search Forward or Backward button to skip to the next or previous song; • Press and hold the iPod Skip/Search Forward or Backward button for fast-forwarding or fastrewinding during playback. 10
-
 1
1 -
2
-
3
-
4
-
5
-
6
-
7
-
8
-
 9
9 -
 10
10 -
 11
11 -
 12
12 -
 13
13 -
 14
14 -
 15
15 -
 16
16 -
 17
17 -
 18
18 -
 19
19 -
20
-
21
-
22
-
23
-
24
-
25
-
26
-
27
-
28
-
29
-
30
-
31
-
32
-
33
-
34
-
35
-
36
-
37
-
38
-
39
-
40
-
41
-
42
-
43
-
44
-
45
-
46
-
47
-
48
-
49
-
50
-
51
-
52
-
53
-
54
-
55
-
56
-
57
-
58
-
59
-
60
 |
 |