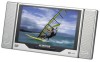
Audiovox D1020 Operating Instructions - Page 30
channel Broadcast TV and the 125-Channel Cable TV Stan
 |
UPC - 044476018718
View all Audiovox D1020 manuals
Add to My Manuals
Save this manual to your list of manuals |
Page 30 highlights
I. System Operation 1. Press POWER to switch the unit on or off. The switch indicator will light red and the unit will go to the mode last used and stored in memory. 2. Press DVD/TV/AV to select your desired mode. When switching the mode, the DVD player can memorize the present play - ing point. 3. Press VOLUME UP/DOWN to raise or lower the sound level Also used to make picture adjustments in the picture select mode. 4. Each time PICture is pressed, the on screen picture adjustment display cycles through "adjustment bars for VOLUME, CONTRAST, BRIGHTNESS, COLOR and TINT. Then use VOLUME UP/DOWN to raise or lower the level. This display will automatically turn off if no adjustments are made within about 6 seconds, or if any other button is pressed. 5. Press MUTE to cut off all sound; pressing this button again restores sound to the previously set level. MUTE may also be released by pressing the VOLUME UP/DOWN. 6. Press SRS 3D to activate surround sound with the indicator on. J. Watching TV 1. Connect the coax cable line to the supplied Right angle adapter. Insert the supplied Right angle adapter into the coax input located on the bottom left side of the unit. (Refer to Page 12, Item #7.) 2. With power applied to the system and the TV mode selected, press TV/CATV on the remote control to select the regular 69channel Broadcast TV and the 125-Channel Cable TV (Standard Cable, HRC Cable, and IRC Cable) with on-screen display. Note: Please contact your local cable provider to verify what cable standard you are on. 28
-
 1
1 -
2
-
3
-
4
-
5
-
6
-
7
-
8
-
9
-
10
-
11
-
12
-
13
-
14
-
15
-
16
-
17
-
18
-
19
-
20
-
21
-
22
-
23
-
24
-
 25
25 -
 26
26 -
 27
27 -
 28
28 -
 29
29 -
 30
30 -
 31
31 -
 32
32 -
 33
33 -
 34
34
 |
 |
