Audiovox MMD10 Owners Manual - Page 16
F. Loading and Playing a Disc - remote control
 |
View all Audiovox MMD10 manuals
Add to My Manuals
Save this manual to your list of manuals |
Page 16 highlights
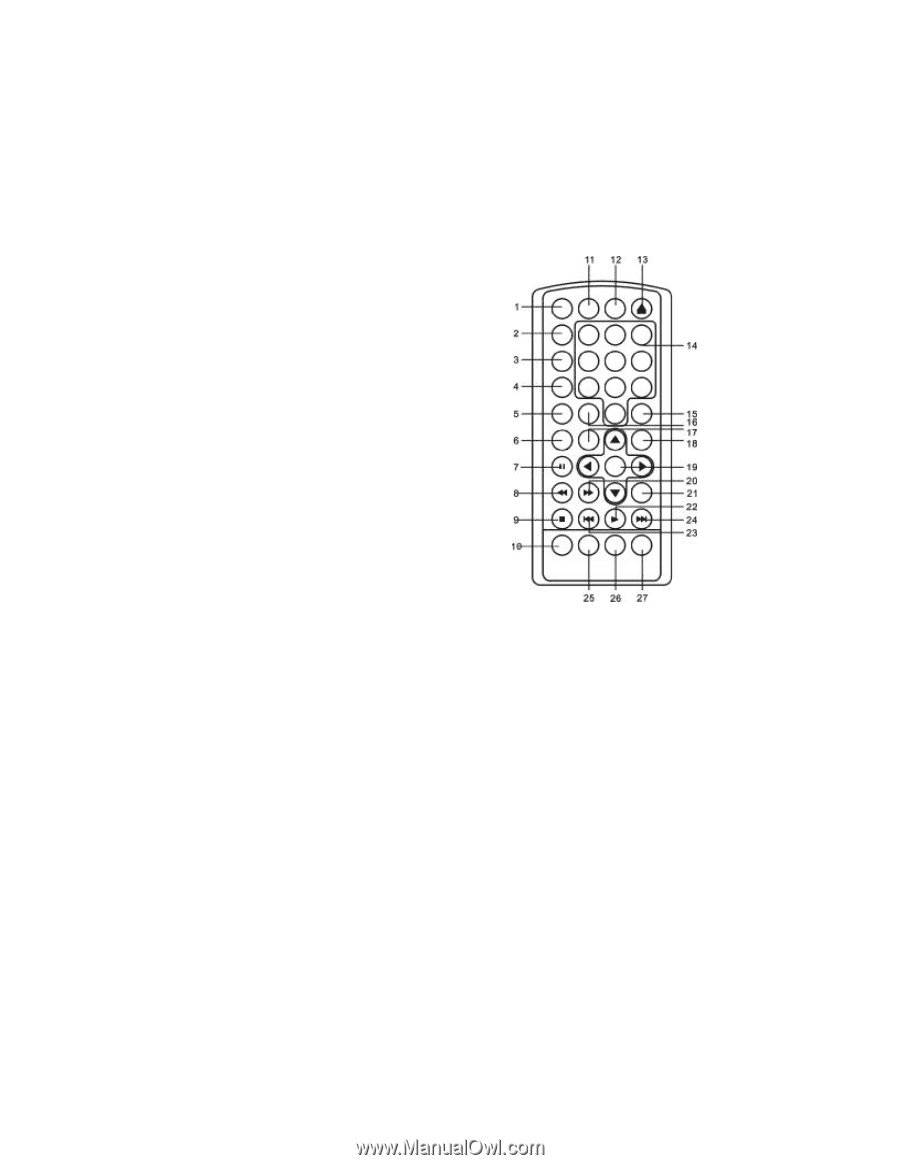
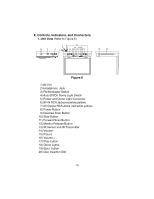
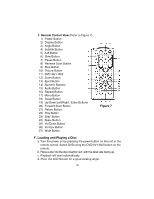
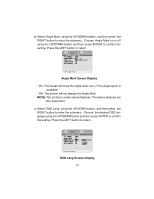
2. Remote Control View (Refer to Figure 7) 1) Power Button 2) Display Button 3) Angle Button 4) Subtitle Button 5) A-B Button 6) Slow Button 7) Pause Button 8) Reverse Scan Button 9) Stop Button 10) Picture Button 11) DVD /AV1 /AV2 12) Zoom Button 13) Eject Button 14) Numeric Buttons 15) Audio Button 16) Repeat Button 17) Menu Button 18) Setup Button 19) Up/Down/Left/Right / Enter Buttons 20) Forward Scan Button 21) Return Button 22) Play Button 23) Skip- Button 24) Skip+ Button 25) Vol Down Button 26) Vol Up+ Button 27) Wide Button Figure 7 F. Loading and Playing a Disc a. Turn the power on by pressing the power button on the unit or the remote control. Select DVD using the DVD/AV1/AV2 button on the remote. b. Place a disc into the disc insertion slot with the label side facing up. c. Playback will start automatically. d. Pivot the LCD Screen for a good viewing angle. 16
-
 1
1 -
2
-
3
-
4
-
5
-
6
-
7
-
8
-
9
-
10
-
 11
11 -
 12
12 -
 13
13 -
 14
14 -
 15
15 -
 16
16 -
 17
17 -
 18
18 -
 19
19 -
 20
20 -
 21
21 -
22
-
23
-
24
-
25
-
26
-
27
-
28
-
29
-
30
-
31
-
32
-
33
-
34
-
35
-
36
-
37
-
38
 |
 |