Audiovox SIR-BB3 User Guide - Page 7
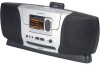
Interconnect Diagram - antenna
 |
UPC - 044476025044
View all Audiovox SIR-BB3 manuals
Add to My Manuals
Save this manual to your list of manuals |
Page 7 highlights
2. After making sure the connectors are properly lined up, gently press down on the shuttle to mate the connectors together. The shuttle should now be nestled securely in the Boom Box compartment. Lower the PNP cover into position over the Shuttle; This will prevent accidental Shuttle disconnect. Apply power to the SIR-BB3 by pressing the Power ON/OFF button; the LED indicator lights green. If the Shuttle does not turn on at the same time, press the red Power On/Off button in the upper left corner of the Shuttle front panel. 4. Removing the Shuttle From the SIR-BB3 Interconnect Diagram SHUTTLE BOOM BOX SIR-BB3 ANTENNA JACK (ANT) ANTENNA STORAGE SHELF DC POWER ADAPTER JACK DC POWER ADAPTER (DC 12V 2.2A) Press the EJECT button on top of the Boom Box to raise the cover. Gently grasp the Shuttle from the top and pull straight up to disengage. 5. Installing/Positioning the Antenna For best reception, the supplied antenna should be placed near a window if in the house or, if outdoors, in an open area and as high as possible; some repositioning may be required to achieve optimum results. The following guidelines are recommended: -7- SHUTTLE ANTENNA TO AC WALL OUTLET a. In a major city, where Sirius ground repeaters are present, you can usually place the antenna away from a window and still achieve the desired results. b. You can also place the antenna outside (on the roof structure), provided it is clear of any overhead obstructions. Because of the orbiting characteristics of the Sirius Satellites, the strength of the received signal may change over 128-7266A 7 of 12
-
 1
1 -
 2
2 -
 3
3 -
 4
4 -
 5
5 -
 6
6 -
 7
7 -
 8
8 -
 9
9 -
 10
10 -
 11
11 -
 12
12
 |
 |
