Audiovox VBP5000 Owners Manual
Audiovox VBP5000 - VBP 5000 - DVD Player Manual
 |
UPC - 044476012518
View all Audiovox VBP5000 manuals
Add to My Manuals
Save this manual to your list of manuals |
Audiovox VBP5000 manual content summary:
- Audiovox VBP5000 | Owners Manual - Page 1
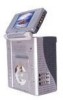
VBP5000 VIDEO IN A BAG SYSTEM WITH 5.6" LCD MONITOR VCP & DVD PLAYER - Audiovox VBP5000 | Owners Manual - Page 2
and added to the system setup* allowing you to utilize three monitors at once (two external and one attached). The connection of the additional monitor is plug and play. *NOTE: The AC Adaptor will only support Two Monitors. Please read the entire instruction manual supplied with this product prior - Audiovox VBP5000 | Owners Manual - Page 3
person to drive a motor vehicle which is equipped with a television viewer or screen that is located in the motor vehicle at any point forward of the back the vehicle. In the interest of safety, this system should never be installed where it will be visible, directly or indirectly, by the - Audiovox VBP5000 | Owners Manual - Page 4
and all straps must be fastened correctly to secure the system in the vehicle in the event of an accident. Operate the "Video in a Bag" System with the bag open to ensure proper ventilation of the VBP5000 system (Monitor/VCP/DVD Player). The system is intended to be mounted for rear seat viewing - Audiovox VBP5000 | Owners Manual - Page 5
qualified service personnel if your system is in need of repair. 6. CLEANING UNIT When cleaning, make sure the system is unplugged from the power source. Do not use any solvents or cleaning materials (liquid, abrasive or aerosol) when cleaning the Video Monitor doing so may scratch the screen. Use - Audiovox VBP5000 | Owners Manual - Page 6
producers designed, some playback features may not be available. Also refer to the instructions supplied with the discs. 8. VIDEO CASSETTE Do not force a cassette into the compartment when the power cord is unplugged. An inverted cassette cannot be inserted. After playing a videocassette, remove it - Audiovox VBP5000 | Owners Manual - Page 7
C. CONTENTS 1. 1 x Detachable Monitor & VCP & DVD Player Combo 2. 1 x DIN Cable 3. 1 x AC to DC Adapter 4. 1 x Cigarette Lighter Adapter 5. 1 x Remote Control with 2 AAA Batteries 6. 1 x Pouch 7. 1 x Mounting Bag with 4 Straps 8. 1 x Storage Bag 9. 1 x Instruction Manual D. INDOOR PLACEMENT (IN A - Audiovox VBP5000 | Owners Manual - Page 8
's hinged base so that they are aligned in a straight line. The Video Monitor is inserted into the slot on the main unit at a 45°. Hinged Base 45° Figure 3 E. IN-CAR INSTALLATION NOTE: When used in a vehicle, always keep the VBP5000 fastened in the mounting bag. 1. BETWEEN TWO SEATS Figure 4 5 - Audiovox VBP5000 | Owners Manual - Page 9
the straps tightly so that the mounting bag is secured. d. Swing the monitor upwards and adjust the screen for the de- sired viewing angle. *Optional Second Video Monitor Part #VBDV56 Figure 5 e. Refer to Figure 5. The monitor can be detached from the sys- tem by depressing the button below the - Audiovox VBP5000 | Owners Manual - Page 10
the DIN cable into the MONITOR PORT on the side of the detached monitor, and insert the other end into the MONITOR PORT on the side of the main unit. *Optional Second Video Monitor Part #VBDV56 Figure 6 h. Refer to Figure 6. You can contact an AUDIOVOX retailer for additional monitor(S) Part #VBDV56 - Audiovox VBP5000 | Owners Manual - Page 11
onto the seat back by looping the shoulder strap of the bag around the headrest of the seat. b. Take one of the supplied straps from the storage bag, and con- nect the latch to the lower the mounting bag is secured. d. Swing the monitor upwards and adjust the screen for the desired viewing angle. 8 - Audiovox VBP5000 | Owners Manual - Page 12
On the Back Seat a b Figure 8 a. The Monitor can be inserted into the slot with the screen facing either front (refer to Figure 8a) or rear (refer to Figure 8b). Care- fully place the system with the DVD facing up on the back seat. Guide the vehicles safety belt through the short strap sewn on - Audiovox VBP5000 | Owners Manual - Page 13
unit. Repeat this process if an optional second monitor is used (2nd DIN cable is supplied with the optional monitor). Contact an Audiovox's retailer for an additional monitor, and insert it into the slot of the main unit, or fasten it in the pouch onto the headrest, or just hold it in your hand and - Audiovox VBP5000 | Owners Manual - Page 14
F. POWER SUPPLY 1. Powering the system indoors (Refer to Figure 10) Figure 10 Take the AC to DC adapter from the storage bag. Plug one end of the AC to DC adapter into the DC 12V jack on the side of the main unit, then plug the other end into the 110V AC power receptacle. 2. POWERING THE SYSTEM IN - Audiovox VBP5000 | Owners Manual - Page 15
. The Video Monitor is inserted into the slot on the main unit at a 45° (refer to Figure 3 ). Take the AC to DC adapter from the storage, plug one end into the DC 12V jack on the side of the monitor, then plug the other end into the 110V AC power receptacle. 4. POWERING THE DETACHED MONITOR IN THE - Audiovox VBP5000 | Owners Manual - Page 16
with the DIN cable, DC 12V power, Audio/Video and IR signals will all be supplied through the DIN cable to the connected monitor. So there is no need for another power source to be connected to the DC 12V jack on the right side of the detached monitor. In this situation, the AC to DC adapter can - Audiovox VBP5000 | Owners Manual - Page 17
2) Refer to Figure 15. In the vehicle, the cigarette lighter adapter can drive up to 3 monitors combined with the main unit and connected to the main unit with the DIN cable. *Optional Video Monitors Figure 15 14 - Audiovox VBP5000 | Owners Manual - Page 18
OPEN Button 13) DVD STOP Button 14) DVD PREVIOUS Button 15) DVD PLAY Button 16) DVD NEXT Button MONITOR LEFT SIDE 17) POWER ON/OFF BUTTON (Monitor) 18) RIGHT AUDIO IN (Monitor) 19) LEFT AUDIO IN (Monitor) 20) VIDEO IN (Monitor) 21) MONITOR JACK (Input) 22) DC 12V INPUT (Monitor) MAIN UNIT BOTTOM 23 - Audiovox VBP5000 | Owners Manual - Page 19
2. REMOTE CONTROL VIEW (Refer to Figure 17) 1) POWER Button 2) DISPLAY Button 3) DVD ANGLE Button 4) DVD SUBTITLE Button 5) DVD AUDIO Button 6) DVD ZOOM Button 7) DVD UP/DOWN/LEFT/RIGHT/ ENTER Buttons 8) DVD MENU Button 9) DVD Return Button 10) DVD A-B Button 11) DVD NEXT Button 12) DVD PREVIOUS - Audiovox VBP5000 | Owners Manual - Page 20
button on the Main Unit, then press the 'Power' button on the side of the Monitor. Press the 'OPEN' button on the Main unit to open the DVD Player, insert a disc and close the DVD Player. The system will start playing automatically. If the 'POWER' button is pressed 'ON' when there is already a disc - Audiovox VBP5000 | Owners Manual - Page 21
divided into sections called titles and chapters. When you play a DVD, a root menu of the disc will appear on the screen of your TV or Monitor. The contents of the menu vary from disc to disc. Press MENU during playing to display the menu, and press ENTER or PLAY to start - Audiovox VBP5000 | Owners Manual - Page 22
' the 3rd time to display the Elapsed Time for the chapter. The heading will disappear automatically in about 3 seconds. Chapter Elapsed Time Screen Display d. Press 'DISPLAY' the 4th time to display the Remaining Time for the chapter. The heading will disappear automatically after 3 seconds. Press - Audiovox VBP5000 | Owners Manual - Page 23
Angle Screen Display 3) SUBTITLE During disc playback press 'SUBTITLE' to select the subtitle language you desire, with the current Subtitle ' is displayed. The Subtitle display will disappear automatically if the 'SUBTITLE' button is not pressed again within 3 seconds. Subtitle Screen Display 20 - Audiovox VBP5000 | Owners Manual - Page 24
select another audio language. The audio display will disappear automatically if the 'AUDIO' button is not pressed again for 3 seconds. Audio Language Screen Display 5) ZOOM During playback press 'ZOOM' to enlarge the picture by 1.5, 2, or 4X with the current zoom multiple (1) displaying. Press 'UP - Audiovox VBP5000 | Owners Manual - Page 25
'A-B' to set the Starting Point A. A - B Repeat Starting Point Screen Display b. Press 'A-B' to set the Ending Point B and the player will re- peatedly play the part between Point A and Point B. A - B Repeat Ending Point Screen Display c. Press 'A-B' a 3rd time to Cancel A-B Repeat. Normal play - Audiovox VBP5000 | Owners Manual - Page 26
a. During playback press 'REPEAT' once to repeatedly play the current chapter. Chapter Repeat ON Screen Display b. During playback press' REPEAT 'again to repeatedly play the current title. Title Repeat ON Screen Display c. During playback press' REPEAT' a 3rd time to cancel the re- peat playback - Audiovox VBP5000 | Owners Manual - Page 27
the current time running on the disc. Press the DISPLAY button on the remote to display the DISPLAY Banner. The options below show you what happens when of that track. SINGLE ELAPSED 00:00:00 01/02 SINGLE ELAPSED Screen Display b. Press 'DISPLAY '2 twice and SINGLE REMAIN appears along with the - Audiovox VBP5000 | Owners Manual - Page 28
playing on the CD. TOTAL ELAPSED 00:00:00 01/02 TOTAL ELAPSED Screen Display d. Press 'DISPLAY' four times and TOTAL REMAIN appears along with the time left on the CD. TOTAL REMAIN 00:00:00 01/02 TOTAL REMAIN Screen Display e. Press 'DISPLAY' a fifth times and "OFF" will appear momentarily - Audiovox VBP5000 | Owners Manual - Page 29
DVD player. SELECTING FOLDERS AND SONGS When an MP3 disc is inserted in the player, the SMART NAV screen will appear automatically. The SMART NAV screen or DOWN arrow buttons on the Remote Control to navigate through the folder list on the right side of the SMART NAV screen. 2. Once the folder you - Audiovox VBP5000 | Owners Manual - Page 30
3) USING THE REPEAT FEATURE The default mode for the Repeat feature is OFF. Pressing REPEAT consecutively changes the repeat options: • REP-ONE- repeats the songs that is playing. • FOLDER REP- repeats the folder that is playing. • FOLDER- turns off repeat and returns to regular play mode. 4) - Audiovox VBP5000 | Owners Manual - Page 31
chosen and the number of songs you have chosen appear at the top of the screen. For example, if you choose the number five song within the folder and it AND TIME REMAINING Press the 'DISPLAY' button on the remote to display disc information. The options below show you what happens when you press the - Audiovox VBP5000 | Owners Manual - Page 32
ELAPSED" and the of actual amount of time the disc has been playing, will be displayed on-screen until you press DISPLAY again. TIME ELAPSED 00 : 01 : 32 .. MP3 MP3 MP3 MP3 MP3 TIME ELAPSED Screen Display b) Press 'DISPLAY' a Second time and TIME REMAIN will appear along with the amount of time - Audiovox VBP5000 | Owners Manual - Page 33
TV DISPLAY using UP/DOWN, and then press RIGHT to enter the submenu. Select the TV display mode on the screen using UP/DOWN, and press ENTER to confirm the setting. Press LEFT to return. * NORMAL/PS: When the player is connected to a normal TV, and a - Audiovox VBP5000 | Owners Manual - Page 34
UP/DOWN and then press ENTER to confirm the setting. Press the LEFT button to return. ANGLE MARK Screen Display * ON: The screen will show angle mark. (If angle option is available) * OFF: The screen will not display the Angle Mark. c. Select 'MAIN PAGE' using UP/DOWN, and then press ENTER to return - Audiovox VBP5000 | Owners Manual - Page 35
2) When there's no disc inside the player, select 'PREFERENCES' using UP/DOWN, and then press 'ENTER' to enter the preferences page. AUDIO Preference Screen Display a. Select 'AUDIO' using UP/DOWN, and then press 'RIGHT' to enter the submenu. Select the audio language you desire using UP/DOWN, and - Audiovox VBP5000 | Owners Manual - Page 36
. Select the Disc Menu Language you desire using UP/DOWN, then press 'ENTER' to confirm the setting. Press 'LEFT' to return. DISC MENU Preference Screen Display Note: Language and subtitle selection is only available for discs that are recorded in the above listed languages. If not, the player will - Audiovox VBP5000 | Owners Manual - Page 37
. NOTE: For 1st time use, the default password 3308. e. Select 'PASSWORD' using UP/DOWN, and then press RIGHT to enter the submenu. PASSWORD CHANGE Screen Display Press 'ENTER' to enter the Password Change Page. Input the Old Password or the Default Password, the New Password, and the Confirmed New - Audiovox VBP5000 | Owners Manual - Page 38
you can record this default password in another area and delete it from this manual. Some discs can be limited depending on the age of users while some to make the setting re turn to the factory-set mode. DEFAULT PRESET Screen Display g. Select 'MAIN PAGE' using UP/DOWN, and then press ENTER to - Audiovox VBP5000 | Owners Manual - Page 39
I. BASIC VIDEO CASSETTE OPERATION Power Turn the unit ON/OFF DVD/AUX/VCP Choose the VCP mode Play To playback tape Stop/Eject To stop tape (press once), to eject tape (press Rewind twice) a. Press it - Audiovox VBP5000 | Owners Manual - Page 40
side of the main unit, which takes priority over the built-in DVD player. Adjust the volume control and the brightness control on the monitor for individual preference. 2. Plug the video output from your game system into the yellow VIDEO jack and the AUDIO L and AUDIO R into the applicable jacks on - Audiovox VBP5000 | Owners Manual - Page 41
AC to DC adapter can drive only 1 main unit and 2 monitors, either combined or detached). Connect the PORT on the additional monitor to either MONITOR 1 port or MONITOR 2 port on the left side of the main unit with the supplied DIN cable. After plugging in the main unit, DC 12V power, Audio/Video - Audiovox VBP5000 | Owners Manual - Page 42
to any monitor (Refer to Figure 18) Match the color-coded plugs to the appropriate DVD OUT jacks or VCP OUT jacks on the side of the main unit: Yellow (VIDEO) to Yellow, White (AUDIO L) to White, and Red (AUDIO R) to Red. M. SPECIFICATION Color system: NTSC Screen size: 5.6" Disc format: DVD/CD/MP3 - Audiovox VBP5000 | Owners Manual - Page 43
generated static or noise, to correction of antenna problems, to costs incurred for installation, removal or reinstallation of the product, or to damage to tapes, discs, speakers, accessories, or electrical systems. This Warranty does not apply to any product or part thereof which, in the opinion of - Audiovox VBP5000 | Owners Manual - Page 44
For Customer Service Visit Our Website At WWW.audiovox.com Product Information, Photos, FAQ's Owner's Manuals © 2003 Audiovox Electronics Corp., 150 Marcus Blvd., Hauppauge, N.Y. 11788 128-6647
-
 1
1 -
 2
2 -
 3
3 -
 4
4 -
 5
5 -
 6
6 -
 7
7 -
8
-
9
-
10
-
11
-
12
-
13
-
14
-
15
-
16
-
17
-
18
-
19
-
20
-
21
-
22
-
23
-
24
-
25
-
26
-
27
-
28
-
29
-
30
-
31
-
32
-
33
-
34
-
35
-
36
-
37
-
38
-
39
-
40
-
41
-
42
-
43
-
44
 |
 |

VBP5000
VIDEO IN A BAG SYSTEM WITH
5.6" LCD MONITOR VCP & DVD PLAYER