Audiovox VBP5000 Owners Manual - Page 15
Audiovox VBP5000 - VBP 5000 - DVD Player Manual
 |
UPC - 044476012518
View all Audiovox VBP5000 manuals
Add to My Manuals
Save this manual to your list of manuals |
Page 15 highlights
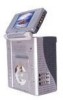
3. POWERING THE DETACHED MONITOR INDOORS (Refer to Figure 12) Figure 12 The monitor can be detached from the system by depressing the button below the screen with one hand and removing the video monitor* with the other hand. *NOTE: During the Removal and Reinstallation of the Video Monitor, rotate the monitor and the monitor's hinged base so that they are aligned in a straight line. The Video Monitor is inserted into the slot on the main unit at a 45° (refer to Figure 3 ). Take the AC to DC adapter from the storage, plug one end into the DC 12V jack on the side of the monitor, then plug the other end into the 110V AC power receptacle. 4. POWERING THE DETACHED MONITOR IN THE VEHICLE (Refer to Figure 13) Figure 13 12
-
 1
1 -
2
-
3
-
4
-
5
-
6
-
7
-
8
-
9
-
 10
10 -
 11
11 -
 12
12 -
 13
13 -
 14
14 -
 15
15 -
 16
16 -
 17
17 -
 18
18 -
 19
19 -
 20
20 -
21
-
22
-
23
-
24
-
25
-
26
-
27
-
28
-
29
-
30
-
31
-
32
-
33
-
34
-
35
-
36
-
37
-
38
-
39
-
40
-
41
-
42
-
43
-
44
 |
 |

3. POWERING THE DETACHED MONITOR INDOORS
(Refer to
Figure 12)
Figure 12
The monitor can be detached from the system by depressing the
button below the screen with one hand and removing the video
monitor
*
with the other hand.
*NOTE:
During the Removal and Reinstallation of the Video Moni-
tor, rotate the monitor and the monitor’s hinged base so that they
are aligned in a straight line.
The Video Monitor is inserted into the
slot on the main unit at a 45
°
(refer to Figure 3 ).
Take the AC to DC adapter from the storage, plug one end into the
DC 12V jack on the side of the monitor, then plug the other end into
the 110V AC power receptacle.
4. POWERING THE DETACHED MONITOR IN THE VEHICLE
(Re-
fer to Figure 13)
Figure 13
12