Audiovox VBPEX56 Owners Manual - Page 6
F. Powering the Unit, Option 1, Option 2 - din cable
 |
UPC - 044476008245
View all Audiovox VBPEX56 manuals
Add to My Manuals
Save this manual to your list of manuals |
Page 6 highlights
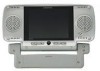
F. Powering the Unit NOTE: When the VBPEX5 is connected to either a VBP3000 or VBP4000 using the supplied DIN cable, there is no need for a power source to be connected to the DC 12V IN jack. Option 1 Indoor Power (Refer to Figure 4) Figure 4 c Using the AC/DC adapter supplied with the VBPEX5, plug the connector end into the DC 12V IN jack on the side of the Monitor. Plug the AC/DC adapter into a 120 VAC power receptacle. This can be done with the Monitor inside or outside the pouch. Option 2 Vehicle Power (Refer to Figure 5) Figure 5 Using the cigarette lighter adapter supplied, plug the connector end into the DC 12V IN jack on the side of the Monitor. Plug the cigarette lighter adapter into the cigarette lighter socket. This can be done with the Monitor inside or outside the pouch. 3 5 3
-
 1
1 -
 2
2 -
 3
3 -
 4
4 -
 5
5 -
 6
6 -
 7
7 -
 8
8 -
 9
9 -
 10
10 -
 11
11 -
 12
12
 |
 |
