Audiovox VD1400HT Owners Manual - Page 8
Rear Panel, Using the Remote Control
 |
View all Audiovox VD1400HT manuals
Add to My Manuals
Save this manual to your list of manuals |
Page 8 highlights
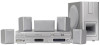
Parts and Functions Rear Panel 21 22 23 24 25 26 27 28 AC 21) Power cord 22) S-VIDEO (DVD) output jack 23) Right Front speaker terminals 24) Centre speaker terminals 25) Left Front speaker terminals 26) AV1 IN (AUDIO) jacks 27) Left/Right AUDIO OUT jacks 28) FM ANTENNA jacks 29) VHF/UHF/CATV IN/OUT jacks R AUDI O L V ID EO FM A N T. 3 0 0 (Ω) AM LO OP AN T. IN O UT V HF /UH F/ CATV 37 36 35 34 33 32 31 30 29 30) AM LOOP ANTENNA terminal 31) TV OUT (VIDEO) jack 32) VIDEO IN (VCR) jack 33) Left Rear speaker terminals 34) Subwoofer speaker terminals 35) Right Rear speaker terminals 36) OPTICAL OUT jack (DVD) 37) DIGITAL AUDIO OUT jack (DVD) Using the Remote Control • Point the Remote Control at the REMOTE SENSOR located on the Unit. • When there is a strong ambient light source, the performance of the infrared REMOTE SENSOR may be degraded, causing unreliable operation. • The recommended effective distance for remote operation is about 16 feet (5 meters). To install Batteries 1. Open the battery door. 2. Insert two "AA" or UM-3 size batteries. Battery Replacement When batteries become weak, the operating distance of the Remote Control is greatly reduced and you will need to replace the batteries. Notes: • If the Remote Control is not going to be used for a long time, remove the batteries to avoid damage caused by battery leakage corrosion. • Do not mix old and new batteries. Do not mix ALKALINE, standard (CARBON-ZINC) or rechargeable (NICKEL-CADMIUM) batteries. - 7 - (Continued on next page)
-
 1
1 -
2
-
 3
3 -
 4
4 -
 5
5 -
 6
6 -
 7
7 -
 8
8 -
 9
9 -
 10
10 -
 11
11 -
 12
12 -
 13
13 -
14
-
15
-
16
-
17
-
18
-
19
-
20
-
21
-
22
-
23
-
24
-
25
-
26
-
27
-
28
-
29
-
30
-
31
-
32
-
33
-
34
-
35
-
36
-
37
-
38
-
39
-
40
-
41
-
42
-
43
-
44
-
45
-
46
-
47
-
48
-
49
-
50
-
51
-
52
-
53
-
54
-
55
-
56
-
57
-
58
-
59
-
60
-
61
-
62
-
63
-
64
-
65
-
66
-
67
 |
 |
