Audiovox XMC-10A Installation Guide - Page 13
that could crimp, kink or twist the cable; use
 |
UPC - 044476036958
View all Audiovox XMC-10A manuals
Add to My Manuals
Save this manual to your list of manuals |
Page 13 highlights
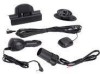
positions on the surface until an audio output is heard. The desired antenna position should be marked with masking tape or by another non-scratch method. d. After determining the optimum position, turn off Xpress XM power, disconnect the power adapter from the vehicle cigarette lighter receptacle and disconnect the antenna cable. e. Plan the routing of the antenna cable to the cradle. Make sure you avoid any obstructions that could crimp, kink or twist the cable; use protective grommets wherever rough openings are encountered. f. Route the cable from the antenna position to the interior of the vehicle, working the cable under the rear window molding; make adjustments and take up slack whenever necessary. ANTENNA -13- ROUTING THE CABLE 128-7472 13 of 16
-
 1
1 -
2
-
3
-
4
-
5
-
6
-
7
-
 8
8 -
 9
9 -
 10
10 -
 11
11 -
 12
12 -
 13
13 -
 14
14 -
 15
15 -
 16
16
 |
 |
