Avanti ERU240P1B Instruction Manual
Avanti ERU240P1B Manual
 |
View all Avanti ERU240P1B manuals
Add to My Manuals
Save this manual to your list of manuals |
Avanti ERU240P1B manual content summary:
- Avanti ERU240P1B | Instruction Manual - Page 1
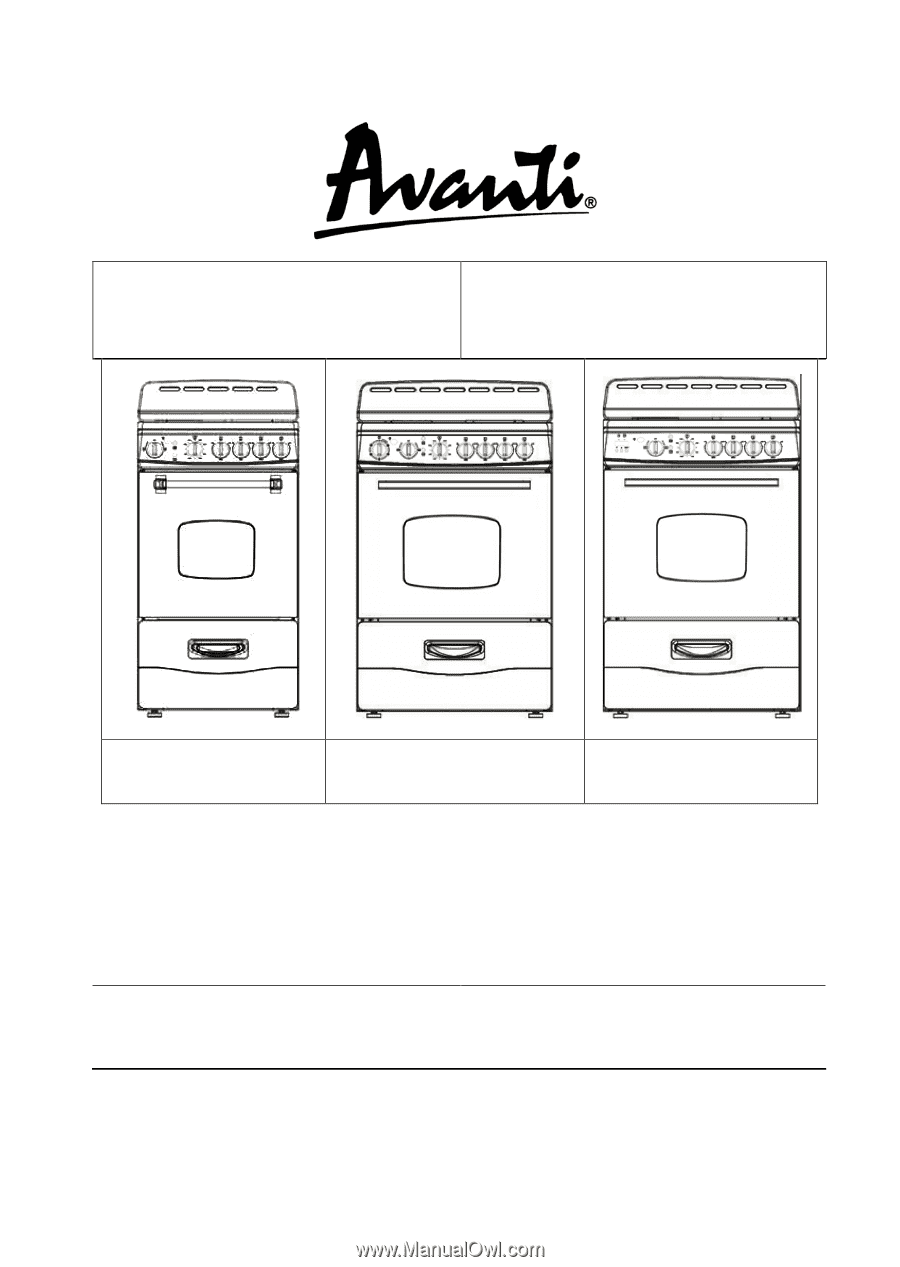
/ Modelés: ERU240P0W ERU240P1B Model / Modelo / Modelé: ERU240P3S Actual design / color may vary./Diseño / color real puede variar. / Design / Couleur peut varier BEFORE USE, PLEASE READ AND FOLLOW ALL SAFETY RULES AND OPERATING INSTRUCTIONS. Avanti has a policy of continuous improvement on its - Avanti ERU240P1B | Instruction Manual - Page 2
Reflector Bowls Lift-up Cooktop Removable Storage Drawer Replacing the Oven Light Troubleshooting Guide Service for Your Appliance Wiring Diagram Your Avanti Products Warranty Instrucciones en Español Instructions en Français Registration Information and Registration Card 2 3 4 5 6 7 8 - 9 10 10 11 - Avanti ERU240P1B | Instruction Manual - Page 3
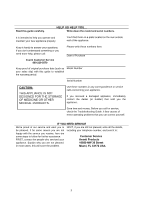
understand something or you need more help, please call: Avanti Customer Service 800-220-5570 Please write these numbers here: Date of service, check the Troubleshooting Guide. It lists causes of minor operating problems that you can correct yourself. IF YOU NEED SERVICE We're proud of our service - Avanti ERU240P1B | Instruction Manual - Page 4
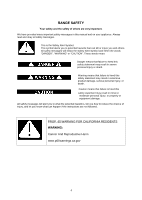
are very important. We have provided many important safety messages in this manual and on your appliance. Always read and obey all safety messages. This and let you know what can happen if the instructions are not followed. PROP. 65 WARNING FOR CALIFORNIA RESIDENTS WARNING: Cancer And Reproductive Harm - Avanti ERU240P1B | Instruction Manual - Page 5
is specifically recommended in this manual. All other servicing should be referred to a the appliance. · Electrical Grounding Instructions - The appliance must be service on the range. Replacement parts are available from factory authorized parts distributors. Contact the nearest Avanti service - Avanti ERU240P1B | Instruction Manual - Page 6
THE ANTI-TIP BRACKET The range will not tip during normal use. However, the range can tip if you apply too much force or weight to the open door without the anti-tip bracket fastened down properly. To reduce the risk of tipping the appliance, the appliance must be secured byproperly installed anti- - Avanti ERU240P1B | Instruction Manual - Page 7
PARTS & FEATURES 1. Backsplash with integrated oven vents 2. Cooktop 3. Control panel 4. Oven Handle 5. Oven Door 6. Storage Drawer 7. Storage Drawer Handle 8. Leveling Legs (4) 7 - Avanti ERU240P1B | Instruction Manual - Page 8
injury when using the range, follow these basic precautions: · Read all instructions before using the range. · WARNING: TO REDUCE THE RISK OF TIPPING any part of the appliance unless specifically recommended in the manual. All other servicing should be referred to a qualified technician. · Storage - Avanti ERU240P1B | Instruction Manual - Page 9
are oven vent openings and surfaces near these openings, oven doors, and window of oven doors. This Unit Is For Indoor Use Only -SAVE THESE INSTRUCTIONS- 9 - Avanti ERU240P1B | Instruction Manual - Page 10
INSTRUCTIONS WARNING HAVE THIS RANGE INSTALLED BY A QUALIFIED INSTALLER. Improper installation, adjustment, alteration or maintenance can cause injury or property damage. Consult a qualified installer or service range - DO NOT DISCARD) · 1 Instruction Manual · 1 Backsplash Assembly (Backsplash and - Avanti ERU240P1B | Instruction Manual - Page 11
avoid possible injuries to your body or to the range, do not attempt ant repairs by yourself. Such work should be carried out by qualified service personnel only. · Burn Hazard! The oven and cooking accessories may become very hot during operation. Make sure children are kept out of reach and warn - Avanti ERU240P1B | Instruction Manual - Page 12
cabinets. · Place your electric range on a floor that is strong enough to support it when it is fully assembled as above picture. To level your electric range of the appliance unless it is specifically recommended in this manual. All other servicing should be referred to a qualified technician. · To - Avanti ERU240P1B | Instruction Manual - Page 13
13 - Avanti ERU240P1B | Instruction Manual - Page 14
3- Wire Power Cord Installation · Remove the Terminal Block Access Plate on the back of range by removing the 1 fixing screws. · Assemble the strain relief in the hole on bracket. · Insert the power cord through the strain relief and tighten. · Allow enough slack to easily attach the cord terminals - Avanti ERU240P1B | Instruction Manual - Page 15
Ø LEVELING THE RANGE The range must be level to obtain proper operating. The four screws type leveling legs located on the corners at the bottom of range should be adjusted by turning them clockwise to make the range higher or counter-clockwise to lower the range until the range is level. Use a - Avanti ERU240P1B | Instruction Manual - Page 16
OPERATING YOUR RANGE Ø CONTROL PANEL MODELS: ERU200P0W / ERU200P3S MODELS:ERU240P0W / ERU240P1B MODEL: ERU240P3S 1. Kitchen Timer (Digital or Mechanical Knob depending on your specific model.) 2. Oven Light Switch 3. Indicator Lights 4. Oven Temperature Knob 6. Rear Left Burner Control Knob 7. - Avanti ERU240P1B | Instruction Manual - Page 17
Ø USING THE TIMER DIGITAL KITCHEN TIMER 1: Clock Time Indicator 2: Digital Display 3: Down Button 4: Up Button 5: Set/Quit Button 6: Cook Timer Indicator When you first plug in the range or power has returned after 10 hours you will see 12:00 in the display and hear an alarm tone. Clock: To set the - Avanti ERU240P1B | Instruction Manual - Page 18
not operate. You must first select the appropriate cooking mode (Broil or Oven/Bake) and then select the desired temperature as described in the instructions below. Ø USING THE OVEN (BAKE) 1. Turn the knob Broil/Oven Control knobto select 2. Turn the knob Oven Temperature Knobclockwise to select the - Avanti ERU240P1B | Instruction Manual - Page 19
with stop-locks so that when placed correctly on the rack supporters, they will stop before coming completely out from the oven, and When placing cookware on the rack, pull the rack out to the bump on the rack support. Place the cookware on the rack, then slide the rack back into the oven. To - Avanti ERU240P1B | Instruction Manual - Page 20
WARNING Make sure that the handles of cookware do not stick out over the edge of the range, to avoid them being knocked over by accident. This also makes it more difficult for children to reach the cooking pots/pans. Ø COOKWARE TIPS The physical characteristics of pots and pans influence the - Avanti ERU240P1B | Instruction Manual - Page 21
CARE AND MAINTENANCE Ø GENERAL INFORMATION · CAUTION: Before any operation of cleaning and maintenance disconnect the appliance from the electrical supply. · It is advisable to clean when the appliance is cold and especially for cleaning the enameled parts. · Avoid leaving alkaline or acidic - Avanti ERU240P1B | Instruction Manual - Page 22
soapy water. Use a soapy steel- wool pad on heavily soiled areas. · To lower the cooktop, lift the cooktop holding from the front edge. Replace the support rod to its previous place. Lower the cooktop in its place. During replacement of the cooktop, be sure that the front edge of cooktop covers - Avanti ERU240P1B | Instruction Manual - Page 23
WITH YOUR ELECTRIC RANGE? You can solve many common appliance problems easily, saving you the cost of a possible service call. Try the suggestions below to see if you can solve the problem before calling the servicer. TROUBLESHOOTING GUIDE PROBLEM Surface units will not maintain a rolling boil or - Avanti ERU240P1B | Instruction Manual - Page 24
here for you. Just call us toll-free. Product Information I 800-323-5029 Part Orders 800-220- 5570 In-Home Repair Service 800-220-5570 AVANTI PRODUCTS CUSTOMER SERVICES Whatever your questions are about our products, I help is available. You may order parts and accessories that will be delivered - Avanti ERU240P1B | Instruction Manual - Page 25
been installed and operated in accordance with the written instructions in this manual. In rental or commercial use, the warranty period is 90 days. All Avanti appliances of 3.5 cubic feet capacity or less must be brought/sent to the appliance service center for repair. FULL 30 - DAY WARRANTY From - Avanti ERU240P1B | Instruction Manual - Page 26
INSTRUCCIONES EN ESPAÑOL Antes de usar su artefacto, debe posicionarlo correctamente e instalarlo tal como se describe en este manual, así que lea el manual cuidadosamente. Para reducir el riesgo de incendio, choque eléctrico o daño cuando use la cocina, siga las precauciones básicas, incluyendo las - Avanti ERU240P1B | Instruction Manual - Page 27
el riesgo de choque eléctrico. Si el cordón eléctrico se encuentra dañado, haga que un Centro de Servicio autorizado por Avanti Products lo reemplace. o El electrodoméstico debe ser propiamente instalado y conectado a tierra por un técnico calificado, de acuerdo a los Códigos Nacionales Eléctricos - Avanti ERU240P1B | Instruction Manual - Page 28
o No intente reparar o reemplazar cualquier pieza o parte de la cocina a no ser que sea recomendado específicamente en este manual. Cualquier otro tipo de servicio o mantenimiento debe ser referido a un técnico calificado. o Para minimizar la posibilidad de choque eléctrico, desconecte la cocina del - Avanti ERU240P1B | Instruction Manual - Page 29
INSTALACION DEL SOPORTE PARA EVITAR QUE LA COCINE SE VOLTEE Para reducir el riesgo que la cocina se voltee o voltee debido al uso inapropiado o al poner demasiado peso sobre la puerta del horno, la cocina debe estar asegurada e instalada correctamente con el soporte para evitar que la cocina se - Avanti ERU240P1B | Instruction Manual - Page 30
30 - Avanti ERU240P1B | Instruction Manual - Page 31
OPERANDO SU COCINA MODELOS:ERU200P0W / ERU200P3S MODELS:ERU240P0W / ERU240P1B MODELO: ERU240P3S 1. Reloj de cocina (Digital o mecánico - depende de su modelo respectivo) 2. Interruptor para la luz interior del horno 3. Luces indicadoras 4. Control de temperatura del horno 5. - Avanti ERU240P1B | Instruction Manual - Page 32
Reloj / Contador de tiempo digital La primera vez que enchufe la cocina o cuando regrese la electricidad después de un apagón, verá que la pantalla electrónica mostrará 12:00 y oirá una alarma. Reloj: Para programar el reloj, apriete el botón SET por 3 segundos, la pantalla mostrará 12:00. - Avanti ERU240P1B | Instruction Manual - Page 33
o Perilla de temperatura del horno Gire la perilla en sentido horario para seleccionar la temperatura deseada hasta un máximo de 500ºF. Para apagar el horno, gire el control de temperatura la posición . o Perilla de control de las hornillas La cocina cuenta con cuatro hornillas. Para operar las - Avanti ERU240P1B | Instruction Manual - Page 34
CONSEJOS PARA USAR LA COCINA Las características físicas de las ollas y sartenes influencian el desempeño de cualquier cocina. Por tanto, debe enfatizar la importancia de usar el equipo de cocina apropiado. o Use equipo de cocina con fondos planos y tapas que ajusten bien, para conservar energía y - Avanti ERU240P1B | Instruction Manual - Page 35
CÓMO USAR EL HORNO El horno se controla mediante dos perillas separadas, la perilla de control de modo se usa para seleccionar el modo de operación utilizado para cocinar y la perilla de temperatura del horno que se usa para ajustar la temperatura de cocción deseada. Cuando la perilla de control de - Avanti ERU240P1B | Instruction Manual - Page 36
Usando su horno El control de temperatura puede ir desde 300ºF hasta 500ºF. Mientras esté en uso, la luz indicadora está encendida. La luz indicadora se mantendrá encendida mientras que el horno está en operación. Para hornear, siga los siguientes pasos: 1. Coloque la rejilla en la posición correcta - Avanti ERU240P1B | Instruction Manual - Page 37
CUIDADO Y MANTENIMIENTO INFORMACION GENERAL · PRECAUCION: antes de empezar cualquier operación de limpieza y mantenimiento, desconecte la cocina artefacto del suministro eléctrico. · Le aconsejamos que limpie la cocina cuando se encuentre fría, especialmente cuando vaya a limpiar las partes - Avanti ERU240P1B | Instruction Manual - Page 38
TAPA DE LA COCINA Ud. puede acceder el área debajo de la superficie de la cocina para efectos de limpieza, al levantar la tapa. Para hacerlo: · Sostenga la tapa por ambas esquinas delanteras y tire hacia arriba. · Una vez que haya levantado, coloque las varillas de soporte en su lugar. · Coloque la - Avanti ERU240P1B | Instruction Manual - Page 39
NOTA: El bombillo de reemplazo del horno no está cubierto por la garantía. PROBLEMAS CON SU COCINA ELECTRICA? Ud. Puede resolver muchos problemas comunes a los electrodomésticos fácilmente, ahorrándose el costo de una posible llamada al servicio técnico. Pruebe las sugerencias mencionadas abajo - Avanti ERU240P1B | Instruction Manual - Page 40
vous plaît appelez: S'il vous plaît écrire ces chiffres ici: Date d'achat Avanti Service à la clientèle 800-220-5570 Numéro de modèle Gardez preuve de la date d'achat d'origine (tel que votre bordereau de vente) avec ce guide pour établir la période de garantie. Numéro de série PRUDENCE: CET - Avanti ERU240P1B | Instruction Manual - Page 41
à quel est le danger potentiel et vous disent comment réduire le risque de blessure, et vous permettent de savoir ce qui peut arriver si les instructions ne sont pas suivies. 41 - Avanti ERU240P1B | Instruction Manual - Page 42
APPAREIL SÉCURITÉ Avant le appareil est utilisé, il doit être correctement positionné et installé comme décrit dans ce manuel, afin de lire attentivement le manuel. Pour réduire le risque d'incendie, choc ou de blessure électrique lors de l'utilisation du l'appareil, Suivez les précautions de bases, - Avanti ERU240P1B | Instruction Manual - Page 43
force ou de poids à la porte ouverte sans le support antirenversement convenablement fixée. Pour réduire le risque de basculement instructions d'installation Vérifier mobilisation de dispositif anti-tip des la cuisson propose par les instructions d'installation Ne pas suivre ces instructions peut - Avanti ERU240P1B | Instruction Manual - Page 44
PIÈCES ET CARACTÉRISTIQUES 1. Dosseret avec orifice du four intégré 2. Table de cuisson 3. Panneau de contrôle 4. Poignée four 5. Porte du four 6. Tiroir de rangement 7. Poignée tiroir de rangement 8. Pieds de nivellement (4) 44 - Avanti ERU240P1B | Instruction Manual - Page 45
la gamme, suivre ces précautions de base: · Lisez toutes les instructions avant d'utiliser la gamme. · ATTENTION: POUR REDUIRE LE RISQUE DE cuite, ou autres ustensiles émaillés peuvent être utilisés pour la gamme de service supérieure sans rupture à cause du changement brusque de température. · Les - Avanti ERU240P1B | Instruction Manual - Page 46
· Ne pas tremper les éléments de chauffage amovibles - Les éléments de chauffage ne doivent jamais être immergés dans l'eau. · Ne pas faire cuire sur table de cuisson brisé - Si cuisinier-haut doit briser, les solutions de nettoyage et les éclaboussures peuvent pénétrer le cuisinier haut cassé et cr - Avanti ERU240P1B | Instruction Manual - Page 47
INSTRUCTIONS D'INSTALLATION ATTENTION AVEZ CETTE GAMME INSTALLÉE PAR UN INSTALLATEUR QUALIFIÉ. L'INSTALLATION, L'AJUSTEMENT, LA MODIFICATION OU L'ENTRETIEN INCORRECTS PEUVENT CAUSER DES BLESSURES OU DES DOMMAGES MATÉRIELS. CONSULTER UN INSTALLATEUR QUALIFIÉ OU UNE AGENCE DE SERVICE. IMPORTANT - - Avanti ERU240P1B | Instruction Manual - Page 48
porte du four. · Ne pas aligner les parois du four avec du papier d'aluminium. Ne pas placer des étagères, des casseroles, des plateaux de support, plateau de cuisson au gril ou autres ustensiles de cuisine sur la base de la chambre du four. · Le fabricant décline toute responsabilité pour les - Avanti ERU240P1B | Instruction Manual - Page 49
horizontalement un minimum de 5 pouces au-delà du fond des armoires. · Placez votre cuisinière électrique sur un plancher qui est assez solide pour supporter quand il est entièrement assemblé comme image ci-dessus. Pour le niveau de votre cuisinière électrique, ajuster les pieds de nivellement au - Avanti ERU240P1B | Instruction Manual - Page 50
Ø CONNEXION ÉLECTRIQUE AVERTISEMENT e s bang c Je endommagé, faites-le remplacer par un centre de service Avanti Produits autorisé. · L'appareil correctement installée et garrondie by une qualifié technicienne conformité avec le National Electrical Code ANSI / NFPA n ° 70 (dernière édition) et - Avanti ERU240P1B | Instruction Manual - Page 51
51 - Avanti ERU240P1B | Instruction Manual - Page 52
la plaque Bornier accès à l'arrière de la plage en retirant les vis de fixation 1. · Assembler la décharge de traction dans le trou sur le support. · Insérez le cordon d'alimentation à travers la décharge de traction et serrer. · Laissez suffisamment de mou pour fixer facilement les bornes du cordon - Avanti ERU240P1B | Instruction Manual - Page 53
, la plage doit être fixé en installant correctement le dispositif anti-basculement emballé avec l'appareil. · Placez le support anti-renversement sur le sol comme le montre la figure. Anti-tip support peut être installé sur côté droit ou gauche. · Faire les emplacements des 2 trous de fourmis-tip - Avanti ERU240P1B | Instruction Manual - Page 54
UTILISATION DE VOTRE APPAREIL Ø PANNEAU DE CONTRÔLE Modèles: ERU200P0W / ERU200P3S Modèles: ERU240P0W / ERU240P1B Modèle:: ERU240P3S 1. Minuterie de cuisine (Numérique ou mécanique Bouton en fonction de votre modèle spécifique.) 2. interrupteur d'éclairage intérieur 3. Indicateurs lumineux 4. - Avanti ERU240P1B | Instruction Manual - Page 55
THERMOSTAT DU FOUR Poussez et tournez le bouton vers la droite pour sélectionner la température désirée jusqu'à 500 ° F. Pour éteindre le four tourner la commande du thermostat sur la position de réglage. CONTRÔLE DU BRÛLER La gamme est livré avec quatre brûleurs. Pour faire fonctionner les brû - Avanti ERU240P1B | Instruction Manual - Page 56
Ø CONSEILS DE CUISINE Les caractéristiques physiques des pots et des casseroles influencent les performances de tous les systèmes de cuisson. Par conséquent, l'accent doit être mis sur l'importance d'utiliser des ustensiles appropriés. · Utilisez des récipients de cuisson à fond plat et de - Avanti ERU240P1B | Instruction Manual - Page 57
Vous devez d'abord sélectionner le mode de cuisson approprié (Gril ou Four / Cuisson), puis sélectionner la température désirée comme décrit dans les instructions ci-dessous. Vous pouvez utiliser votre gamme de cuisson et de gril. Pour cette raison, le four comporte deux éléments de chauffage diff - Avanti ERU240P1B | Instruction Manual - Page 58
ou de placer la nourriture sur eux. Lorsque vous placez une batterie de cuisine sur la grille, tirez la grille jusqu'à la bosse sur le support de grille. Placez la casserole sur la grille, puis faites glisser la grille dans le four. Pour retirer la grille du four, tirez-le vers - Avanti ERU240P1B | Instruction Manual - Page 59
SOINS ET ENTRETIEN Ø INFORMATIONS GÉNÉRALES · ATTENTION: Avant toute opération de nettoyage et d'entretien débrancher l'appareil de l'alimentation électrique. · Il est conseillé de nettoyer lorsque l'appareil est froid et en particulier pour le nettoyage des pièces émaillées. · Évitez de laisser des - Avanti ERU240P1B | Instruction Manual - Page 60
Ø NETTOYAGE DES UNITÉS DE SURFACE ET RÉFLECTEUR BOWLS · Déconnecter le A / C dans la zone d'alimentation principale ou disjoncteur désigné et éteindre la gamme pour vous assurer que les brûleurs sont éteints et laisser refroidir avant de retirer les brûleurs et les bols de réflecteur. · Retrait des - Avanti ERU240P1B | Instruction Manual - Page 61
- savonneuse sur les zones très sales. · Pour abaisser la table de cuisson, soulever la table de cuisson tenant du bord avant. Remplacer la tige de support à sa place précédente. Abaisser la table de cuisson à sa place. Lors du remplacement de la table de cuisson, assurezvous que le bord avant de - Avanti ERU240P1B | Instruction Manual - Page 62
Ne stockez pas de matériaux inflammables dans le four ou dans le tiroir du bas. Ø REMPLACEMENT DE LA LAMPE DU FOUR Avant toute opération de maintenance est démarré impliquant des parties électriques de l'appareil, il doit être débranché de l'alimentation électrique. · Laissez la cavité et broil / br - Avanti ERU240P1B | Instruction Manual - Page 63
èmes de l'appareil commun facilement, vous permet d'économiser le coût d'un appel de service possible. Essayez les suggestions ci-dessous pour voir si vous pouvez résoudre le problème avant d'appeler le réparateur. GUIDE DE DÉPANNAGE PROBLÈME Les éléments de surface ne seront pas maintenir une - Avanti ERU240P1B | Instruction Manual - Page 64
livré directement à votre domicile par chèque personnel, mandat, Master Card ou Visa. In-Home Service de reparations : 1-800-220-5570 Un centre de service Avanti Produits autorisé fournira un service de réparation expert, prévue à un moment qui vous convient. Nos réparateurs formés connaître - Avanti ERU240P1B | Instruction Manual - Page 65
été installé et utilisé conformément aux instructions écrites dans ce manuel. En usage locatif ou commercial, la période de garantie est de 90 jours. Tous les appareils Avanti de 3,5 pieds cubes la capacité ou moins doivent être traduits / envoyé au centre de service de l'appareil pour la réparation - Avanti ERU240P1B | Instruction Manual - Page 66
ERU240P0W ERU240P1B ERU200P0W ERU200P3S ERU240P3S Rating label location 66 - Avanti ERU240P1B | Instruction Manual - Page 67
100 days from the date of purchase and receive these important benefits: Avanti Products LLC P.O.Box 520604 - Miami, Florida 33152 Ø Protect your product: products designed to best meet your future needs. detach here Avanti Registration Card Name Address City State Zip Area Code Phone - Avanti ERU240P1B | Instruction Manual - Page 68
Electric ranges - VER. 06122019 68 PRINTED IN CHINA
-
 1
1 -
 2
2 -
 3
3 -
 4
4 -
 5
5 -
 6
6 -
 7
7 -
8
-
9
-
10
-
11
-
12
-
13
-
14
-
15
-
16
-
17
-
18
-
19
-
20
-
21
-
22
-
23
-
24
-
25
-
26
-
27
-
28
-
29
-
30
-
31
-
32
-
33
-
34
-
35
-
36
-
37
-
38
-
39
-
40
-
41
-
42
-
43
-
44
-
45
-
46
-
47
-
48
-
49
-
50
-
51
-
52
-
53
-
54
-
55
-
56
-
57
-
58
-
59
-
60
-
61
-
62
-
63
-
64
-
65
-
66
-
67
-
68
 |
 |
1
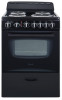
ELECTRIC RANGES
COCINAS ELECTRICAS
CUISINIÈRES ÉLECTRIQUES
INSTRUCTION MANUAL
MANUAL DE INSTRUCCIONES
MANUEL D’INSTRUCTIONS
Models / Modelos / Modelés:
ERU200P0W
ERU200P3S
Models / Modelos / Modelés:
ERU240P0W
ERU240P1B
Model / Modelo / Modelé:
ERU240P3S
Actual design / color may vary./Diseño / color real puede variar. / Design / Couleur peut varier
BEFORE USE, PLEASE READ AND FOLLOW ALL SAFETY RULES AND OPERATING
INSTRUCTIONS.
Avanti has a policy of continuous improvement on its products and reserves the
right to change materials and specifications without notice.
Avanti Products LLC
P.O. Box 520604
Miami, FL 33152
www.avantiproducts.com