Avanti WIMD332PC-IS Instruction Manual - Page 10
Starting your Ice maker, Starting the Ice Making Cycle, Dispensing ice.
 |
View all Avanti WIMD332PC-IS manuals
Add to My Manuals
Save this manual to your list of manuals |
Page 10 highlights
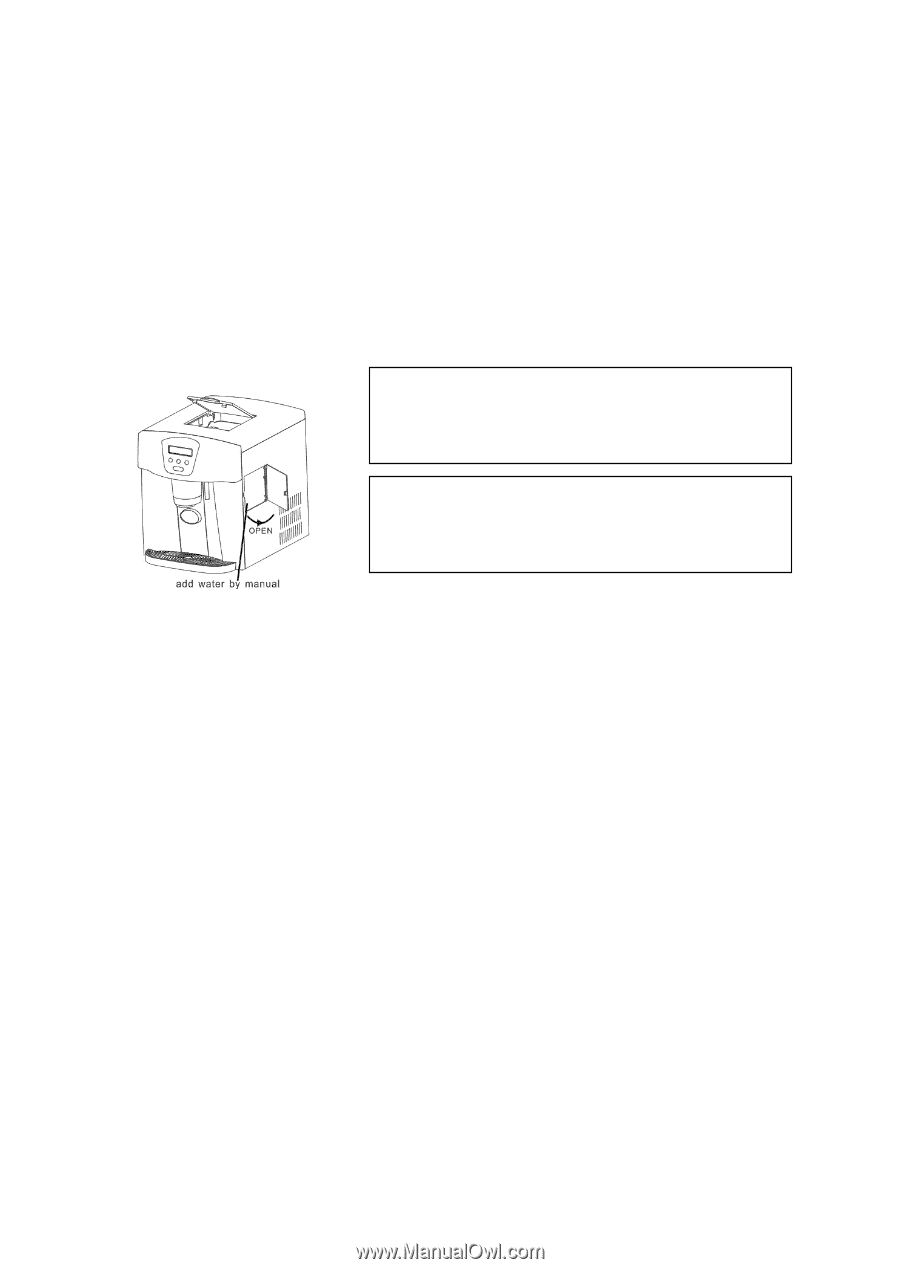
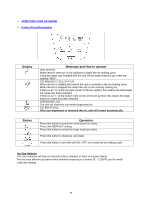
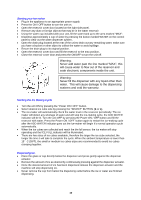
Starting your Ice maker • Plug in the appliance to an appropriate power supply • Press the ON / OFF button to turn the unit on. • Open the reservoir cover door located on the right side panel. • Remove any dust or foreign objects that may be in the water reservoir • Using the water cup included with your unit, fill the water tank up to the area marked "MAX": • Dispense approximately 1 cup of water by pressing the button marked WATER on the control panel to clear out the water dispenser system. • Open the drain plug located at the rear of the unit to drain out any remaining water, make sure you have a bucket or other object to collect the water to avoid spillage. • Return the drain plug to its original position. • Open the reservoir cover door and fill the reservoir to the max position. • Close the reservoir cover door and press the ON/OFF to turn the unit off. Warning: Never add water past the line marked "MAX", this will cause water to flow out of the reservoir and soak electronic components inside the unit. Warning: Never fill the dispenser with any liquid other than water. This will cause damage to the dispensing systems and void the warranty. Starting the Ice Making Cycle • Turn the unit ON by pressing the "Power ON / OFF" button. • Select desired ice cube size by pressing the "SELECT" BUTTON (S or L). • The ice-maker will automatically check the water level in the reservoir periodically. The ice maker will detect any shortage of water and will stop the ice-making cycle, the ADD WATER indicator will be lit. Turn the unit OFF by pressing the Power ON / OFF button and fill the reservoir with water. Press the Power ON / OFF button again to restart the ice-making cycle after the ADD WATER indicator goes out the ice-maker will begin It's normal operation cycle automatically. • When the ice cubes are collected and reach the bin-full sensor, the ice maker will stop operating and the ICE FULL indicator will be illuminated. • There are two sizes of ice cubes available, therefore the larger the ice cube selected, the longer the time it will take to complete the cycle. When the ambient temperature is lower than 15°C (59ºF), the small or medium ice cubes sizes are recommended to avoid ice cubes clumping together. Dispensing ice. • Place the glass or cup directly below the dispenser and press gently against the dispenser actuator. • Remove the amount of ice as desired by continuously pressing against the dispenser actuator. • Once the desired amount of ice has been dispensed release the dispenser actuator and the machine will stop dispensing ice. • Never remove the cup from below the dispensing outlet before the ice or water are finished dispensing. 10
-
 1
1 -
2
-
3
-
4
-
 5
5 -
 6
6 -
 7
7 -
 8
8 -
 9
9 -
 10
10 -
 11
11 -
 12
12 -
 13
13 -
 14
14 -
 15
15 -
16
-
17
-
18
-
19
-
20
-
21
-
22
-
23
-
24
 |
 |