Behringer MONITOR2USB Quick Start Guide - Page 9
MONITOR2USB Getting started - monitor usb monitor controller
 |
View all Behringer MONITOR2USB manuals
Add to My Manuals
Save this manual to your list of manuals |
Page 9 highlights
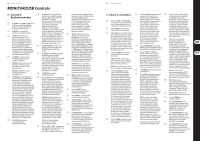
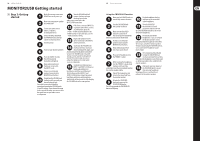
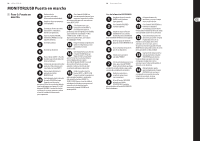
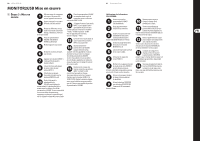
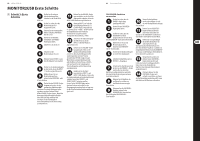
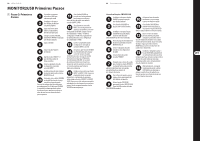
16 MONITOR2USB MONITOR2USB Getting started (EN) Step 3: Getting started Make all necessary connections. DO NOT turn on the power yet. Make sure your monitor speakers are switched off. Turn on your audio sources (mixers, computers, recording interfaces). Set the VOLUME, CROSSFEED and PHONES knobs to the full counter-clockwise position. Turn the unit on. Power on your monitor speakers. Press the SOURCE 1 button. The LED ring around the button will light up. Begin audio playback on the device connected to the INPUT 1 jacks. Choose a set of monitor speakers by pressing the MONITOR A or B buttons. Slowly turn the VOLUME knob clockwise until you reach your desired listening level. Your ideal listening level should be somewhere between the VOLUME knob's 20 and 80 settings. If your favored listening level is outside this range, increase or reduce the signal levels on your audio sources to compensate. Turn the VOLUME knob full counter-clockwise to begin checking levels for the audio source connected to the INPUT 2/USB connections. If the device connected INPUT 2 is a consumer audio device, such as a CD/DVD player, place the +4 dBu / -10 dBV sensitivity button in the -10 dBV setting. For pro audio gear, use the +4 dBu sensitivity setting. Begin audio playback on the device connected to the INPUT 2 or USB connections. Slowly turn the VOLUME knob clockwise until you reach your desire listening level. Again, your ideal listening level should be somewhere between the VOLUME knob's 20 and 80 settings. If your favored listening level is outside this control range, increase or reduce the signal levels on your audio source to compensate. Calibrate levels between your INPUT 1 and INPUT 2/USB sources. Begin audio playback on both devices, and then switch back and forth by the using the SOURCE 1 and SOURCE 2/USB buttons. Adjust the output level from each device until you achieve similar levels between sources while keeping the VOLUME knob in the same position. 17 Quick Start Guide Using the CROSSFEED function Make sure the PHONES knobs are turned fully counter-clockwise. Turn the CROSSFEED knob fully counter-clockwise. Make sure the CROSSFEED function is switched off. The LED around the CROSSFEED ON button should not be illuminated. Activate a set of monitor speakers by pressing the MONITOR A or B buttons. Begin audio playback from one of your audio devices. Plug a set of headphones into the PHONES 1 output. While wearing the headphones, turn the PHONES 1 volume knob clockwise until you find a comfortable level that perceptually matches the monitor speaker volume. Take off the headphones and listen to the stereo field from the monitor speakers. Activate the CROSSFEED function by pressing the CROSSFEED ON button. The LED ring around the CROSSFEED ON button will light up. Put the headphones back on and listen to the stereo field in the headphones. Turn the CROSSFEED knob clockwise in small increments and listen to how the CROSSFEED function affects the stereo field in the headphones. Periodically take off the headphones so you can compare the monitor speakers' stereo panorama with the headphone stereo field. (If necessary, switch the monitor speakers off and on by pressing the MONITOR buttons so you can hear the headphone sound more clearly.) Keep comparing and gradually turning the CROSSFEED knob clockwise until you find a setting that makes the headphone stereo field sound as similar as possible to the sound from the monitor speakers. Alternately, you may simply set the CROSSFEED knob to a level that suits your headphone listening preferences, without direct reference to the monitor speakers.
-
 1
1 -
2
-
3
-
 4
4 -
 5
5 -
 6
6 -
 7
7 -
 8
8 -
 9
9 -
 10
10 -
 11
11 -
 12
12 -
 13
13 -
 14
14 -
15
-
16
 |
 |