Behringer U-CONTROL UMA25S Manual - Page 6
System requirements, 1.3 Hardware configuration - keyboard
 |
View all Behringer U-CONTROL UMA25S manuals
Add to My Manuals
Save this manual to your list of manuals |
Page 6 highlights
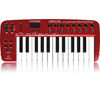
6 U-CONTROL UMA25S User Manual External power supply: If you neither want to draw the power supply via USB nor power the device with batteries, there is yet another possibility to connect the UMA25S to an external power supply unit. Please observe the correct operational data (DC 9 V; 200 mA) and correct polarity of the connector. Further information can be found above the DC input on the rear panel of the device. Reverse polarity may cause damage to the electronics. IMPORTANT Installation information: ◊ The sound quality may diminish within the range of powerful broadcasting stations and high-frequency sources. Increase the distance between the transmitter and the device and use shielded cables for all connections. 1.3 Hardware configuration To connect the UMA25S to your computer, use the provided USB cable. Connect the supplied headset as shown in Fig. 1.3. Optionally, hook up further units to the UMA25S as can be seen from the diagram. ◊ Some headsets may cause interferences (humming). Should this be the case, make sure the UMA25S is sufficiently grounded, for example, by connecting a grounded mixer to the LINE OUT connectors. If necessary, reduce the microphones's input volume level with the LEVEL control (19). MIDI Sound Module 1.1.3 Online registration Please register your new BEHRINGER equipment right after your purchase by visiting http://behringer.com and read the terms and conditions of our warranty carefully. Should your BEHRINGER product malfunction, it is our intention to have it repaired as quickly as possible. To arrange for warranty service, please contact the BEHRINGER retailer from whom the equipment was purchased. Should your BEHRINGER dealer not be located in your vicinity, you may directly contact one of our subsidiaries. Corresponding contact information is included in the original equipment packaging (Global Contact Information/European Contact Information). Should your country not be listed, please contact the distributor nearest you. A list of distributors can be found in the support area of our website (http://behringer.com). Registering your purchase and equipment with us helps us process your repair claims more quickly and efficiently. Thank you for your cooperation! 1.1.4 Product contents • 1 UMA25S keyboard with 2 strap buttons • 1 shoulder strap • 1 BEHRINGER HS1000 stereo headset with separate 1/�" connectors for headphone and microphone • 1 printed manual • 1 printed quick-start guide "Podcasting with the UMA25S" • 1 USB cable • 1 soft gig bag with shoulder strap MONITOR SPEAKERS HS1000* USB* MIDI Expression Sustain * included Fig. 1.3: Hookup example Operating modes There are different ways of using the UMA25S as a controller: a) Connect the MIDI output of the UMA25S to external MIDI equipment (rack synthesizers, samplers and similar); b) Connect the UMA25S to your computer via USB to control your music software. The first option does not include the functionality of the UMA25S' audio interface. The MIDI routing changes depending on the operating mode you are working in. 1.2 System requirements A current Windows PC or Mac computer with one USB port is required for USB operation. Both USB 1.1 and USB 2.0 are supported. ◊ The UMA25S supports the USB MIDI compatibility of Windows XP/Vista and Mac OS X operating systems. ◊ The UMA25S can also be operated as a stand-alone MIDI controller with no PC connected. Software control via MIDI is also possible, provided your computer has a MIDI interface.


