Behringer X1622USB Manual - Page 2

Table of Contents - rack mount

Page 2 highlights

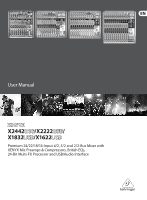
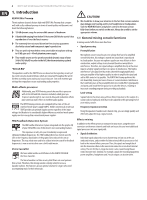
2 XENYX X2442USB/X2222USB/X1832USB/X1622USB User Manual Table of Contents Thank you 2 Important Safety Instructions 3 Legal Disclaimer 3 Limited warranty 3 1. Introduction 4 1.1 General mixing console functions 4 1.2 The user's manual 5 1.3 Before you get started 5 2. Control Elements and Connectors 5 2.1 Mono channels 5 2.2 Stereo channels 7 2.3 Interface panel and main section 8 3. Graphic 9-Band Equalizer (X1832USB only 12 4. Digital Effects Processor 13 5. Rear Panel Connectors 13 5.1 Main mix outputs, insert points and control room outputs 13 5.2 Subgroup outputs 13 5.3 Inserts 14 5.4 Direct outputs (X2442USB only 14 5.5 USB input/output 14 5.6 Voltage supply, phantom power supply and fuse 14 6. Installation 15 6.1 Rack mounting 15 6.2 Cable connections 15 7. Specifications 16 Thank you Congratulations! In purchasing the BEHRINGER XENYX you have acquired a mixer whose small size belies its incredible versatility and audio performance. The XENYX Series represents a milestone in the development of mixing console technology. With the new XENYX microphone preamps including phantom power as an option, balanced line inputs and a powerful effects section, th xing consoles in the XENYX Series are optimally equipped for live and studio applications. Owing to state-of-the-art circuitry, your XENYX console produces a warm analog sound that is unrivalled. With the addition of the latest digital technology, these best-in-class consoles combine the advantages of both analog and digital technology.

  • 1
  • 2
  • 3
  • 4
  • 5
  • 6
  • 7
  • 8
  • 9
  • 10
  • 11
  • 12
  • 13
  • 14
  • 15
  • 16
  • 17
  • 18
  • 19

2
XENYX X2442USB/X2222USB/X1832USB/X1622USB User Manual
Thank you
Congratulations! In purchasing the BEHRINGER XENYX you have acquired a mixer
whose small size belies its incredible versatility and audio performance.
The XENYX Series represents a milestone in the development of mixing console
technology. With the new XENYX microphone preamps including phantom
power as an option, balanced line inputs and a powerful effects section,
th xing consoles in the XENYX Series are optimally equipped for live and studio
applications. Owing to state-of-the-art circuitry, your XENYX console produces
a warm analog sound that is unrivalled. With the addition of the latest digital
technology, these best-in-class consoles combine the advantages of both analog
and digital technology.
Table of Contents
Thank you
.......................................................................
2
Important Safety Instructions
......................................
3
Legal Disclaimer
.............................................................
3
Limited warranty
............................................................
3
1.
Introduction
...............................................................
4
1.1
General mixing console functions
................................
4
1.2
The user’s manual
...............................................................
5
1.3
Before you get started
......................................................
5
2.
Control Elements and Connectors
..........................
5
2.1
Mono channels
....................................................................
5
2.2
Stereo channels
...................................................................
7
2.3
Interface panel and main section
.................................
8
3.
Graphic 9-Band Equalizer (X1832USB only)
..........
12
4.
Digital Effects Processor
.........................................
13
5.
Rear Panel Connectors
............................................
13
5.1
Main mix outputs, insert points and
control room outputs
..............................................................
13
5.2
Subgroup outputs
............................................................
13
5.3
Inserts
...................................................................................
14
5.4
Direct outputs (X2442USB only)
..................................
14
5.5
USB input/output
.............................................................
14
5.6
Voltage supply, phantom power supply
and fuse
........................................................................................
14
6.
Installation
...............................................................
15
6.1
Rack mounting
...................................................................
15
6.2
Cable connections
...........................................................
15
7.
Specifications
...........................................................
16