Beko VRT94929VI Owners Manual - Page 11
Part assembling
 |
View all Beko VRT94929VI manuals
Add to My Manuals
Save this manual to your list of manuals |
Page 11 highlights
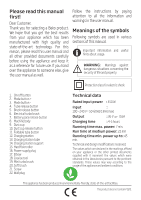
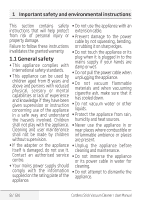
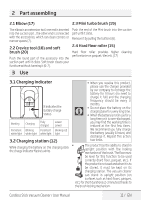
2 Part assembling 2.1 Elbow (17) 2.3 Mini turbo brush (19) The elbow is an extension tool, one end is inserted into the suction port , the other end is connected with the accessories, which can clean corners or narrow spaces (7). 2.2 Crevice tool (18) and soft brush (20) Push the round part of the accessory into the suction part until it clicks. Soft brush cleans your furniture without harming it (6-7). Push the end of the Mini-brush into the suction part until it clicks. Remove it by pulling the buttons (6). 2.4 Hard floor roller (15) Hard floor roller provides higher cleaning performance on parquet, tiles etc. (17) 3 Use 3.1 Charging Indicator It indicates the battery charge status. Working Persistent white light Charging Blinking white light Fully charged Persistent white light Lower power Blinking red light 3.2 Charging station (12) While charging the battery on the charging dock the charge indicator flashes white. C •• When you receive this product, please use the charger provided by our company to recharge the battery for 3 hours (no need to charge it full) and the charging frequency should be every 3 months. •• Do not place the battery on the charging base for a very long time. •• When the battery is not in use for a long time or it is over-discharged, you may find the working time is reduced at the first few times. We recommend you fully charge the battery (usually 6 hours) and discharge it. Repeat this action two times. •• The product has the ability to stand in upright position with the locking mechanism of the brush. The floor must be level for this function to be used correctly (hard floor, parquet, etc.). If the product is not used and when it is to be stored, it must be kept on its charging station. The vacuum cleaner can stand in upright position (on surfaces such as hard floors, parquet, etc.) for short durations (2-3 minutes) thanks to the brush locking mechanism. Cordless Stick Vacuum Cleaner / User Manual 11 / EN
-
 1
1 -
2
-
3
-
4
-
5
-
 6
6 -
 7
7 -
 8
8 -
 9
9 -
 10
10 -
 11
11 -
 12
12 -
 13
13 -
 14
14 -
 15
15 -
 16
16
 |
 |