Belkin F1DE101N F1DE101N Manual - Page 11
Hardware Installation
 |
View all Belkin F1DE101N manuals
Add to My Manuals
Save this manual to your list of manuals |
Page 11 highlights
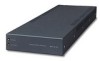
HARDWARE INSTALLATION INSTALLING THE UNIT INTO A SERVER RACK The Unit includes mounting brackets for installation in 19-inch racks. 1. Remove the first two Phillips screws located on the left and right side of the Unit. 2. Attach the two included brackets to the side of the Unit with the provided Phillips screws (Fig. 2). 3. Mount the Unit to the rack rail assembly. Fig. 2 Note: Mounting screws for the rack are not included. Please use the specified screws from your rack's manufacturer. *** Cautions and Warnings *** Before attempting to connect anything to the Unit or your computer(s), please ensure that everything is powered off. Belkin Components is not responsible for damage caused in this way. 9
-
 1
1 -
2
-
3
-
4
-
5
-
 6
6 -
 7
7 -
 8
8 -
 9
9 -
 10
10 -
 11
11 -
 12
12 -
 13
13 -
 14
14 -
 15
15 -
 16
16 -
17
-
18
-
19
-
20
-
21
-
22
-
23
-
24
-
25
-
26
-
27
-
28
-
29
-
30
-
31
-
32
-
33
-
34
-
35
-
36
-
37
 |
 |

9
HARDWARE INSTALLATION
INSTALLING THE UNIT INTO A SERVER RACK
The Unit includes mounting brackets for installation in 19-inch racks.
1.
Remove the first two Phillips screws located on the left and right side of the Unit.
2.
Attach the two included brackets to the side of the Unit with the provided
Phillips screws (Fig. 2).
3.
Mount the Unit to the rack rail assembly.
Note
: Mounting screws for the rack are not included. Please use the specified screws
from your rack’s manufacturer.
*** Cautions and Warnings ***
Before attempting to connect anything to the Unit or your computer(s), please ensure
that everything is powered off. Belkin Components is not responsible for damage
caused in this way.
Fig. 2