Belkin F5D8000 User Manual - Page 15
Installation is now complete
 |
View all Belkin F5D8000 manuals
Add to My Manuals
Save this manual to your list of manuals |
Page 15 highlights
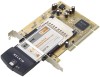
section Installing and Setting Up the Card 1 4.6 Select a network to connect to by double-clicking on a network from the Network List. 2 Note: In order to see your available 3 networks, you must be near a working wireless router or access point. If using with the Belkin 4 Wireless Pre-N Router, connect to the "Belkin_Pre-N_" SSID network name. The network name may be 5 followed by six numbers, which are specific to your router. 6 4.7 The Profile screen will appear to save the settings to the network selected. Click "Save & Activate" to save the Profile and activate it. 4.8 The Signal Indicator icon should appear green in your system tray (bottom right corner of most screens). The color of the icon reflects the connection link: green for good, yellow for weak, red if it is not active, and a red X if the radio is turned off. Installation is now complete! 13
-
 1
1 -
2
-
3
-
4
-
5
-
6
-
7
-
8
-
9
-
 10
10 -
 11
11 -
 12
12 -
 13
13 -
 14
14 -
 15
15 -
 16
16 -
 17
17 -
 18
18 -
 19
19 -
 20
20 -
21
-
22
-
23
-
24
-
25
-
26
-
27
-
28
-
29
-
30
-
31
-
32
-
33
-
34
-
35
-
36
-
37
-
38
-
39
-
40
-
41
-
42
-
43
-
44
-
45
-
46
-
47
 |
 |
