Belkin F6D3230-4 Quick Start Guide - Page 1
Belkin F6D3230-4 Manual
 |
View all Belkin F6D3230-4 manuals
Add to My Manuals
Save this manual to your list of manuals |
Page 1 highlights
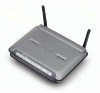
Make sure you have the following: 1. Install Installation Software CD Dual-Band Wireless A+G Router Power Supply Ethernet Cable Manual Setup Users without a CD-ROM drive can go to "Alternate Setup Method" on page 22 in your User Manual. Auto CD Setup Users of Windows® 98SE Windows Me Windows 2000 Windows XP Mac OS® 9.2 and X can use the Easy Install Wizard software to set up the Router. Make sure you have the following 1 Important: Run the Easy Install Wizard Software first! 1.1 Do not connect the Router at this time. From the computer that is directly connected to your high-speed cable or DSL modem, shut down any programs, firewall, and Internet-sharing software applications that are running. 1.2 Windows Users: Insert the Easy Install Wizard software CD into your CD-ROM drive. The Easy Install Wizard screen will automatically appear on your screen within 15 seconds. Click "Next" to start the setup. Mac OS Users: Insert the CD into your CD-ROM drive. A drive will appear on your desktop called "Belkin Easy Install". Double-click the drive to open it. Mac OS 9 users-double-click the program called "Easy Install OS 9". Mac OS X users-double-click the program called "Easy Install OSX.dmg". The Easy Install Wizard screen will appear. Click "Next" to start the setup. (click) Next NOTE for Windows Users: If the Easy Install Wizard does not start up automatically, select your CD-ROM drive from "My Computer" and double-click on the file named "EasyInstall.exe" on the CD-ROM. Install 2 1.3 You will now see the first of a series of progress screens to help you know where you are in the setup process. Click "Next" to continue. (click) Next 2. Connect 1.4 The next screen will tell you that the Wizard is examining your network settings. When the Wizard is finished examining your settings, click "Next". Connect your Router to your computer and modem 2.1 This step instructs you to locate the cable connected between your modem and the networking port on your computer. Unplug this cable from the computer and plug it into the GREEN port on the Router. Click "Next" to continue. (The color of your modem cable may vary from this setup image.) (click) Next 2.2 This step instructs you to locate the BLUE cable that is included with your Router. Plug one end of this cable into ANY one of the BLUE ports on your Router. Plug the other end of the cable into the networking port on your computer. Click "Next" to continue. (click) Next Install 3 Connect 4 2.3 This step instructs you to locate the power supply that is included with your Router. Plug the power supply's small connector into the GRAY port on the Router. Plug the power supply into an empty power outlet. Click "Next" to continue. (click) Next 2.4 This step instructs you to look at the lights on the front of your Router. Make sure the appropriate lights are ON. Refer to the Easy Install Wizard software on your computer's screen for more details. Click "Next" to continue. (click) Next Connect 5
-
 1
1 -
 2
2
 |
 |
