Belkin F7D5301 User Manual - Page 12
Manually, Using the WPS Button - troubleshooting
 |
View all Belkin F7D5301 manuals
Add to My Manuals
Save this manual to your list of manuals |
Page 12 highlights
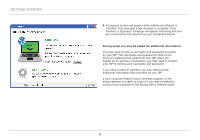
Getting Started Manually If you choose not to use the included Setup CD for adding additional computers or wireless devices, you can manually add these items to your network. 1. Locate the wireless-network-connections option on your computer or wireless device. 2. Select your Belkin Router from the list of available networks. You can identify your Belkin Router by locating the network name (SSID) from the card located underneath the foot of your Router. 3. Enter your network password (located on your network information card). Your wireless device will take a few moments to connect to your network. If the connection is not made the first time, try this process again. If you still have difficulty connecting to your network after trying this process a few times, see the "Troubleshooting" section in this manual for help with connecting to your network. Note: In some cases you may be prompted to select the security type. It is printed on the card for your convenience. Using the WPS Button 1. Start WPS Push Button Connection (WPS PBC) on your computer or other Wi-Fi device that you would like to connect wirelessly to your Router. Often there will be a button for this purpose in software that came with the device, or a physical "WPS," "PBC," or "Security" button on the device itself. 2. Within two minutes, press the WPS button on your Router. The WPS light (small light above WPS button) will blink green while it listens for your Wi-Fi device. Once a connection is established, the light will turn green and then go out. If a connection is not established, the light will blink amber. You may repeat the process to try again. You can repeat this process for each WPS-enabled device you'd like to add to your network. 10
-
 1
1 -
2
-
3
-
4
-
5
-
6
-
 7
7 -
 8
8 -
 9
9 -
 10
10 -
 11
11 -
 12
12 -
 13
13 -
 14
14 -
 15
15 -
 16
16 -
 17
17 -
18
-
19
-
20
-
21
-
22
-
23
-
24
-
25
-
26
-
27
-
28
-
29
-
30
 |
 |
