BenQ G925HDA User Manual - Page 9
Route the cables via the cable clip., Connect-to and turn-on the power.
 |
View all BenQ G925HDA manuals
Add to My Manuals
Save this manual to your list of manuals |
Page 9 highlights
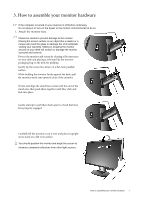
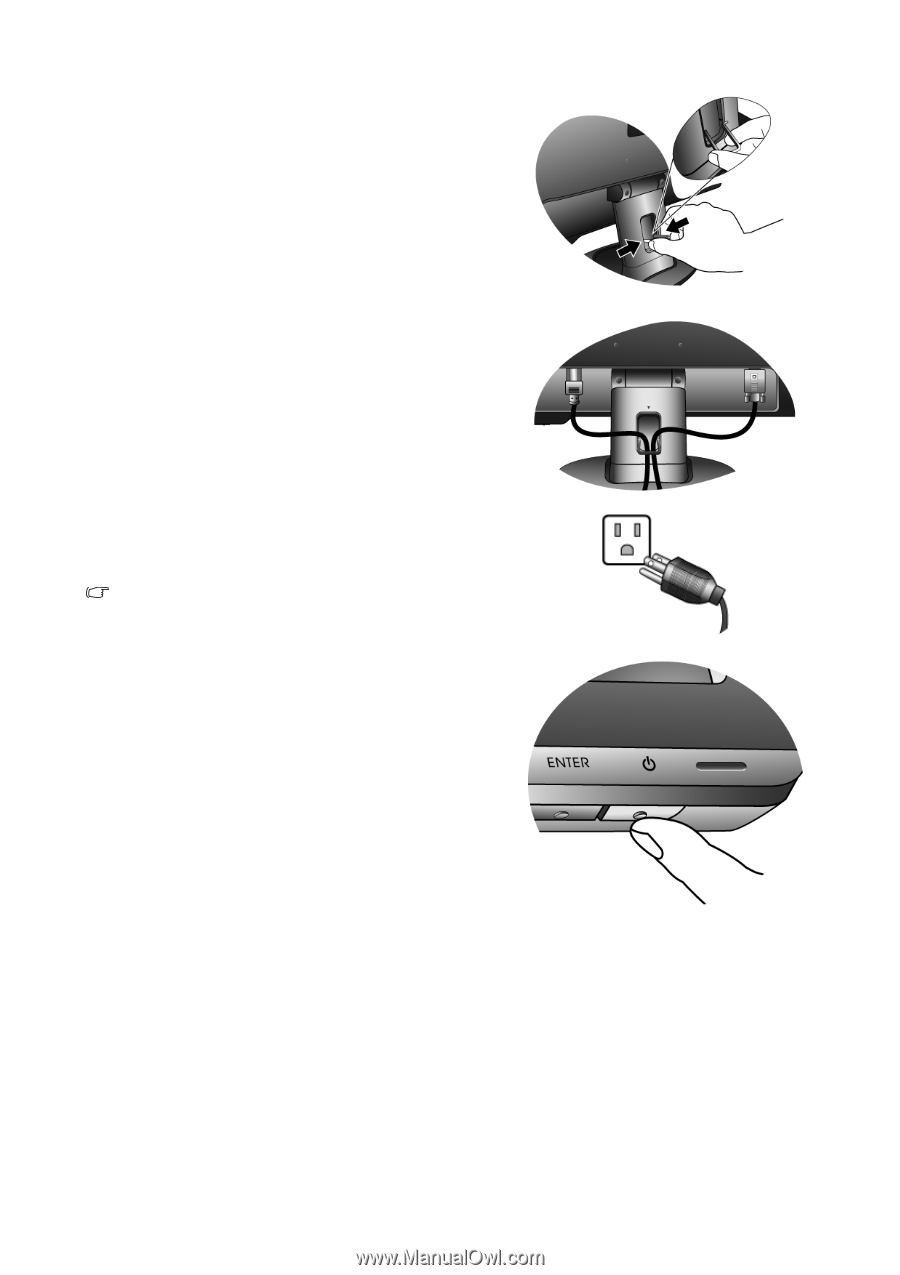
4. Route the cables via the cable clip. Release the cable retaining clip by squeezing the clip inwards as illustrated. Position the cables together and reinsert the clip over them to retain the cables neatly in place behind the monitor stand. 5. Connect-to and turn-on the power. Plug the other end of the power cord into a power outlet and turn it on. Picture may differ from product supplied for your region. Turn on the monitor by pressing the power key. Turn on the computer too, and follow the instructions in Section 4: Getting the most from your BenQ monitor on page 11 to install the monitor software. How to assemble your monitor hardware 9
-
 1
1 -
2
-
3
-
 4
4 -
 5
5 -
 6
6 -
 7
7 -
 8
8 -
 9
9 -
 10
10 -
 11
11 -
 12
12 -
 13
13 -
 14
14 -
15
-
16
-
17
-
18
-
19
-
20
-
21
-
22
-
23
-
24
-
25
-
26
-
27
-
28
-
29
-
30
 |
 |
9
How to assemble your monitor hardware
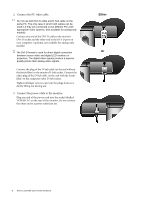
4.
Route the cables via the cable clip.
Release the cable retaining clip by squeezing the clip
inwards as illustrated. Position the cables together and
reinsert the clip over them to retain the cables neatly in
place behind the monitor stand.
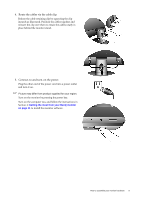
5.
Connect-to and turn-on the power.
Plug the other end of the power cord into a power outlet
and turn it on.
Picture may differ from product supplied for your region.
Turn on the monitor by pressing the power key.
Turn on the computer too, and follow the instructions in
Section 4:
Getting the most from your BenQ monitor
on page 11
to install the monitor software.