BenQ PE8700 User Manual - Page 4
Location - mount
 |
UPC - 840046003234
View all BenQ PE8700 manuals
Add to My Manuals
Save this manual to your list of manuals |
Page 4 highlights
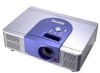
BenQ PE8700 User's Manual Location ❚ Front/Upper Side 1. Front Lamp Cover Remove this cover when replacing the lamp. 2. Projection Lens 3. Front IR Sensor 4. Ventilation Holes (exhaust) 5. Focus Ring and Zoom Ring Adjusts the focus and zoom of the projection lens. ❚ Rear/Bottom Side 6. Control Panel Show lamp status and whether the projector is on or off. For more details, see "Control Panel" on page 5. 7. Kensington Lock This lock can withstand 150 N of force. 1. Connector Panel For more details, see "Connector Panel" on page 6. 2. Back IR Sensor 3. AC Power IN Socket. 4. AC Power Switch AC main power switch. 5. Ventilation Holes (intake) 6. Rear Adjusters Adjusts the height or projection angle. 7. Front Adjusters Adjusts the height or projection angle. 8. Ceiling Mount Holes For attaching the prjector to a ceiling mount rack. 4 1. Overview
-
 1
1 -
 2
2 -
 3
3 -
 4
4 -
 5
5 -
 6
6 -
 7
7 -
 8
8 -
 9
9 -
 10
10 -
11
-
12
-
13
-
14
-
15
-
16
-
17
-
18
-
19
-
20
-
21
-
22
-
23
-
24
-
25
-
26
-
27
 |
 |
