Beretta A400 Xplor Light Beretta A400 Xplor User Manual - Page 31
Trigger Plate Fig. 39, Breech Bolt Assembly Fig. 35, Barrel - in 12 ga
 |
View all Beretta A400 Xplor Light manuals
Add to My Manuals
Save this manual to your list of manuals |
Page 31 highlights
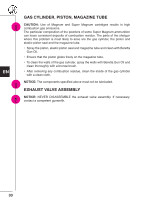
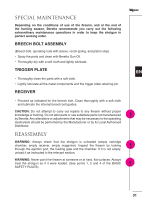
EN ! 32 TRIGGER PLATE (Fig. 39) • Work in reverse order to assembly, taking care to ensure that the hammer is cocked, the safety is engaged and the carrier stop push button is pressed down. • Keeping the release button pressed well down, make the rear part of the trigger plate adhere precisely to the receiver and push firmly towards the stock, as far as it will go. • Rotate the trigger plate until it is inserted in its housing in the receiver. • Insert the trigger guard retaining pin only when the hole of the trigger guard is centred on the receiver. BREECH BOLT ASSEMBLY (Fig. 35) (Breech bolt, operating rods with sleeve, recoil spring, and piston stop). • Working on a flat surface with the ejection port turned up, mount the breech bolt assembly, operating rods with sleeve, recoil spring and piston stop on the magazine tube (Fig. 34). • Push the operating rods with sleeve all the way in to insert the breech bolt into the receiver. • Press the head of the breech bolt until the groove on its neck corresponds to the edge of the bolt body (Fig. 32). • Keeping the head pressed down in this position, insert the cocking handle on the breech bolt. Fasten it into position by hitting it firmly (Fig. 33). BARREL • Check the barrel. The barrel and cartridge chamber must be clean and free from obstructions. • Insert the piston into the gas cylinder of the barrel, tightening the elastic seal with the fingers to make it easier to install the piston in the cylinder (Fig. 5). • Check that the carrier stop push button is pressed all the way down. If it is not, push it all the way down (Fig. 6). • Pull the breech bolt all the way back so that it remains open (Fig. 7). CAUTION: When the release button is pressed, the breech bolt is pushed forward by the recoil spring, until it is stopped at the ejection port by the cocking handle, with the likelihood of damage to both parts. • Insert the barrel into the receiver, ensuring that the magazine tube enters the piston hole as well as that of the gas cylinder and the valve assembly (Fig. 10,11,12). • Push it all the way into the receiver until it stops.
-
 1
1 -
2
-
3
-
4
-
5
-
6
-
7
-
8
-
9
-
10
-
11
-
12
-
13
-
14
-
15
-
16
-
17
-
18
-
19
-
20
-
21
-
22
-
23
-
24
-
25
-
 26
26 -
 27
27 -
 28
28 -
 29
29 -
 30
30 -
 31
31 -
 32
32 -
 33
33 -
 34
34 -
 35
35 -
 36
36 -
37
-
38
 |
 |
