Binatone MBP30 User Manual - Page 12
Selecting camera channel for multi-pack only, Pairing camera channels, Night vision, Talk function, - additional camera
 |
View all Binatone MBP30 manuals
Add to My Manuals
Save this manual to your list of manuals |
Page 12 highlights
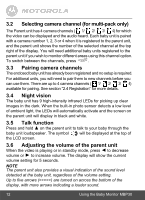
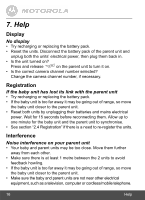
3.2 Selecting camera channel (for multi-pack only) The Parent unit has 4 camera channels ( 1/ 2/ 3/ 4) for which the video can be displayed and the audio heard. Each baby unit is paired with a camera number 1, 2, 3 or 4 when it is registered to the parent unit, and the parent unit shows the number of the selected channel at the top right of the display. You will need additional baby units registered to the F parent unit if you wish to monitor different areas using this channel option. To switch between the channels, press . 3.3 Pairing camera channels The enclosed baby unit has already been registered and no setup is required. For additional units, you will need to pair them to new channels before you can use them. There are up to 4 camera channels ( 1/ 2/ 3/ 4) available for pairing. See section "2.4 Registration" for more details. 3.4 Night vision The baby unit has 9 high-intensity infrared LEDs for picking up clear images in the dark. When the built-in photo sensor detects a low level of ambient light, the LEDs will automatically activate and the screen on the parent unit will display in black and white. ( 3.5 Talk function Press and hold on the parent unit to talk to your baby through the baby unit loudspeaker. The symbol will be displayed at the top of the LCD screen. 3Wvo.hl6uemnethoeAr v-didjuetoosiitsnicnprlegaaystinhegevoorvluionmlseut.amTnhdeebyodimfspotlhdaeye,wppirlael ssrhseo+nwttthuoendceiutcrrreeanste volume setting for 5 seconds. NOTE The parent unit also provides a visual indication of the sound level detected at the baby unit, regardless of the volume setting. Up to five arrows (>>>>>) are turned on across the bottom of the display, with more arrows indicating a louder sound. 12 Using the Baby Monitor MBP30
-
 1
1 -
2
-
3
-
4
-
5
-
6
-
 7
7 -
 8
8 -
 9
9 -
 10
10 -
 11
11 -
 12
12 -
 13
13 -
 14
14 -
 15
15 -
 16
16 -
 17
17 -
18
-
19
-
20
-
21
-
22
-
23
-
24
-
25
-
26
-
27
 |
 |
