Bissell Pet Hair Eraser Cordless Hand Vacuum 94V5A User Guide - Page 5
Attention
 |
View all Bissell Pet Hair Eraser Cordless Hand Vacuum 94V5A manuals
Add to My Manuals
Save this manual to your list of manuals |
Page 5 highlights
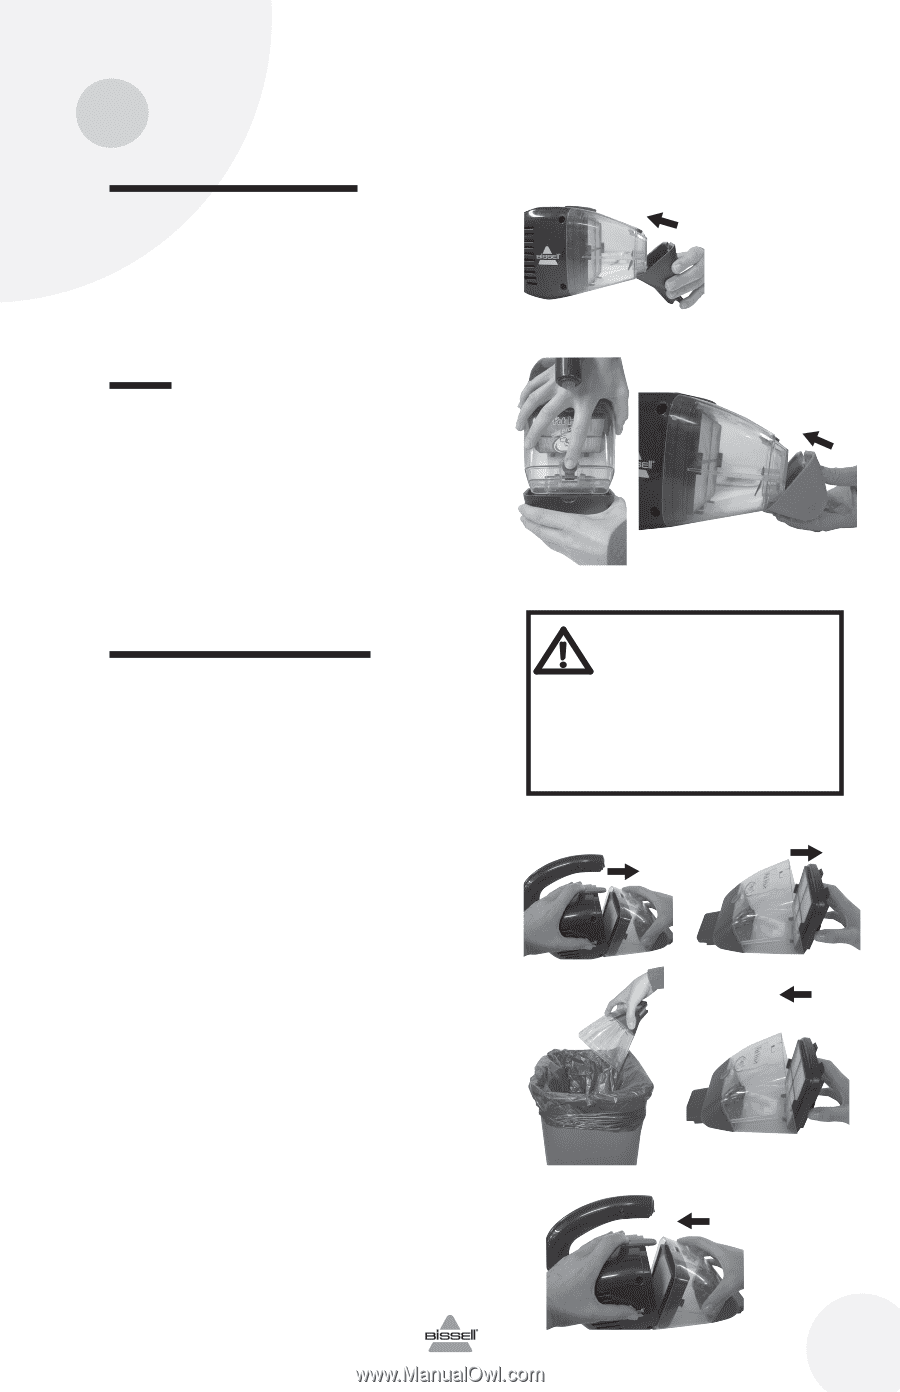
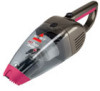
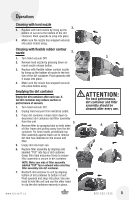
Operations Cleaning with hard nozzle 3. 3. Replace with hard nozzle by lining up the bottom of nozzle to the bottom of the dirt container. Pivot upwards to snap into place. 4. Make sure the nozzle has snapped securely into place before using. Cleaning with flexible rubber contour nozzle 2. 1. Turn hand vacuum OFF. 2. Remove hard nozzle by pressing down on round nozzle release button. 3. Replace with flexible rubber contour nozzle by lining up the bottom of nozzle to the bottom of the dirt container. Pivot upwards until it snaps into place. 4. Make sure the nozzle has snapped securely into place before using Emptying the dirt container Empty the dirt container after each use. A full dirt container may reduce suction or performance of vacuum. 1. Turn hand vacuum OFF. 2. Unplug hand vacuum from electrical outlet. 3. Press dirt container release latch down to disconnect dirt container and filter assembly from the unit. 3. 4. Remove filter by grasping tabs on both sides of filter frame and pulling away from the dirt container. For best results, periodically tap filter assembly against trash can to remove dirt that has collected on the screen and filter. 5. Empty dirt into trash can. 6. Replace filter assembly by aligning side 5. labelled "TOP" into top of dirt container. Grasp filter tabs and press firmly to ensure filter assembly is secure in dirt container. NOTE: Make sure side of filter assembly labelled "TOP" faces outward when inserting filter assembly into dirt container. 7. Reattach dirt container to unit by aligning 7. bottom of dirt container to bottom of unit. Pivot upwards and snap into place. Use one hand to hold the unit and use the other hand to clip the dirt container securely in place. www.bissell.ca 3. ATTENTION: For best performance, dirt container and filter assembly should be cleaned after every use. 4. 6. 800.263.2535 5
-
 1
1 -
 2
2 -
 3
3 -
 4
4 -
 5
5 -
 6
6 -
 7
7 -
 8
8
 |
 |