Bissell PowerForce Compact 1520 User Guide - Page 5
As²mbly
 |
View all Bissell PowerForce Compact | 1520 manuals
Add to My Manuals
Save this manual to your list of manuals |
Page 5 highlights
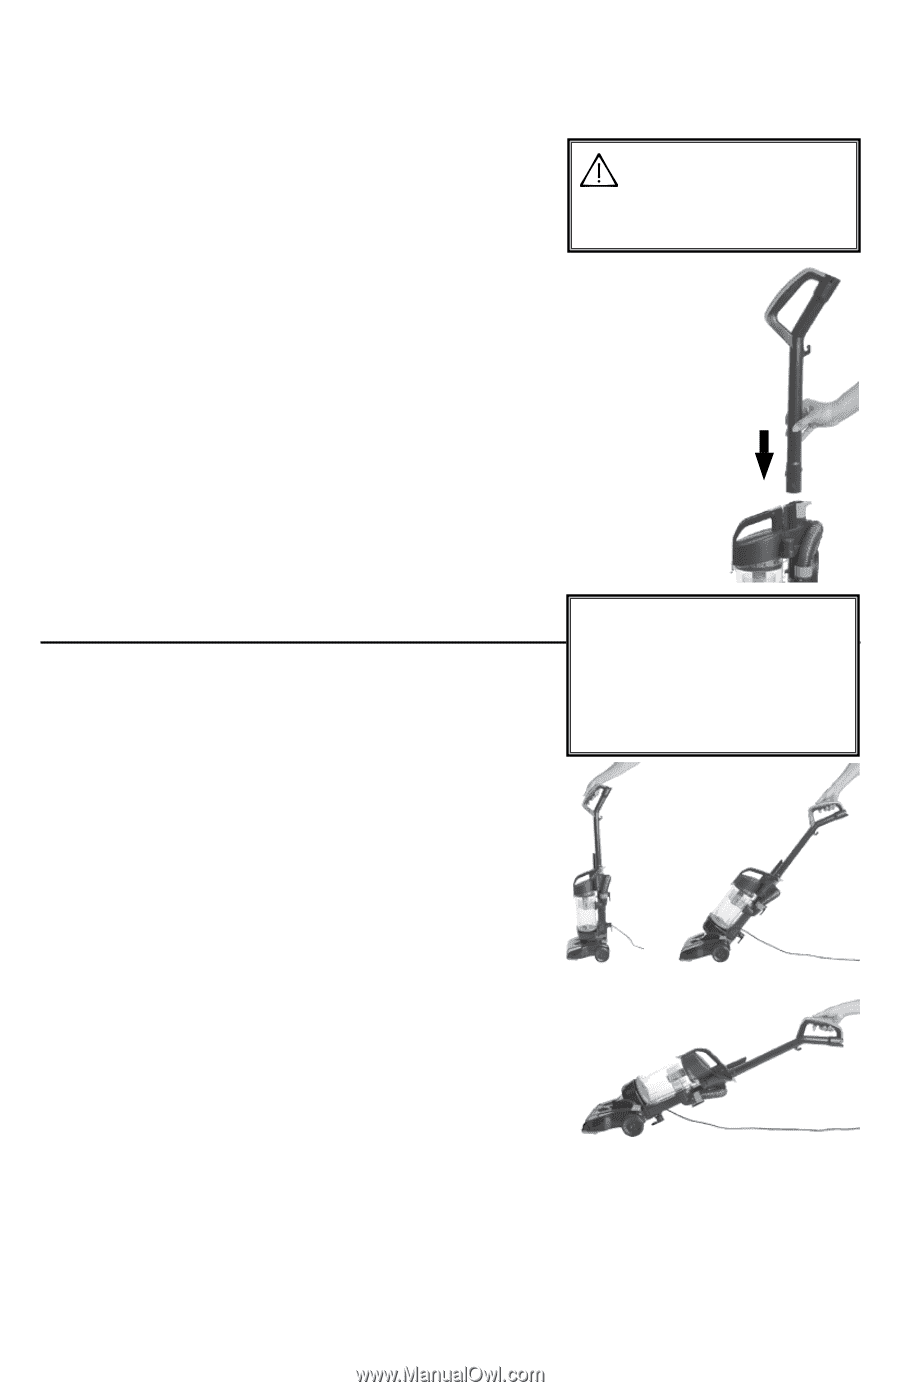
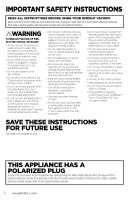
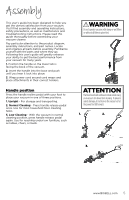
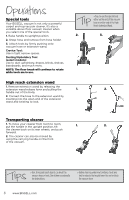
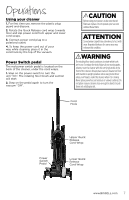
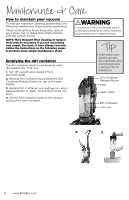
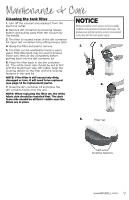
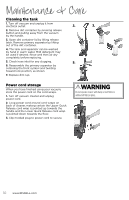
Assembly This user's guide has been designed to help you get the utmost satisfaction from your vacuum. You'll find assembly and operating instructions, safety precautions, as well as maintenance and troubleshooting instructions. Please read this guide thoroughly before assembling your vacuum cleaner. Pay particular attention to the product diagram, assembly instructions, and part names. Locate and organize all parts before assembly. Familiarize yourself with the parts and where they go. Following this user's guide will greatly enhance your ability to get the best performance from your vacuum for many years. 1. Position the handle so the lower tab is facing the back of the vacuum. 2. Insert the handle into the base and push until you hear it lock into place. 3. Wrap power cord around cord wraps and place attachments in their correct holders. Handle position Press the handle recline pedal with your foot to place your vacuum in one of three positions. 1. Upright - For storage and transporting. 2. Normal Cleaning - Press handle release pedal once. Use for most household floor cleaning tasks. 3. Low Cleaning - With the vacuum in normal cleaning position, press handle release pedal again. Use for reaching under low furniture, such as tables, chairs, or beds. WARNING Do not operate vacuum with damp or wet filters or without all filters in place first. ATTENTION The floor brush will continue to rotate while using your vacuum for above floor cleaning. To prevent carpet damage, do not lean on the vacuum or let the power foot tilt forward. 1. 2. 3. www.BISSELL.com 5
-
 1
1 -
 2
2 -
 3
3 -
 4
4 -
 5
5 -
 6
6 -
 7
7 -
 8
8 -
 9
9 -
 10
10 -
 11
11 -
12
-
13
-
14
-
15
-
16
 |
 |