Black & Decker BDCDMT120 Type 1 Manual - BDCDMT112 - Page 11
Warning, Warning - drill
 |
View all Black & Decker BDCDMT120 manuals
Add to My Manuals
Save this manual to your list of manuals |
Page 11 highlights
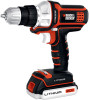
Keyless Chuck - figure H WARNING: To reduce the risk of injury, turn off and remove battery from the tool before making any adjustments or removing or installing attachments or accessories. H 12 WARNING: Do not attempt to tighten or loosen drill bits (or any other accessory) by gripping the front part of the chuck and turning the tool on. Damage to the chuck and personal injury may occur when changing accessories. To insert a drill bit or other accessory: 1. Grasp the rear half of the chuck (12) with one hand and use your other hand to rotate the front half in the counterclockwise direction, as viewed from the chuck end. 2. Insert the bit or other accessory fully into the chuck, and tighten securely by holding the rear half of the chuck and rotating the front portion in the clockwise direction as viewed from the chuck end. Torque Control - figure I This tool is fitted with a torque adjustment collar (13) to select the I 13 operating mode and to set the torque for tightening screws. Large screws and hard workpiece materials require a higher torque setting than small screws and soft workpiece materials. • For drilling in wood, metal and plastics, set the collar to the drilling position symbol • For screwdriving, set the collar to the desired setting. If you do not yet know the appropriate setting, proceed as follows: • Set the collar to the lowest torque setting. • Tighten the first screw. • If the clutch ratchets before the desired result is achieved, increase the collar setting and continue tightening the screw. Repeat until you reach the correct setting. Use this setting for the remaining screws. on-board bit storage A bit storage slot (10) is built-in to the area just above the battery pack for easy bit storage and access. Drilling • Use sharp drill bits only. • Support and secure work properly, as instructed in the Safety Instructions. • Use appropriate and required safety equipment, as instructed in the Safety Instructions. • Secure and maintain work area, as instructed in the Safety Instructions. • Run the drill very slowly, using light pressure, until the hole is started enough to keep the drill bit from slipping out of it. • Apply pressure in a straight line with the bit. Use enough pressure to keep the bit biting but not so much as to stall the motor or deflect the bit. • Hold the drill firmly with two hands to control its twisting action. • DO NOT CLICK THE TRIGGER OF A STALLED DRILL OFF AND ON IN AN ATTEMPT TO START IT. DAMAGE TO THE DRILL CAN RESULT. • Minimize stalling on breakthrough by reducing pressure and slowly drilling through the last part of the hole. • Keep the motor running while pulling the bit out of a drilled hole. This will help reduce jamming. • Make sure switch turns drill on and off. Drilling in Wood Holes in wood can be made with the same twist drill bits used for metal or with spade bits. These bits should be sharp and should be pulled out frequently when drilling to clear chips from the flutes. Drilling in Metal Use a cutting lubricant when drilling metals. The exceptions are cast iron and brass which should be drilled dry. The cutting lubricants that work best are sulfurized cutting oil or lard oil. 11
-
 1
1 -
2
-
3
-
4
-
5
-
 6
6 -
 7
7 -
 8
8 -
 9
9 -
 10
10 -
 11
11 -
 12
12 -
 13
13 -
 14
14 -
 15
15 -
 16
16 -
17
-
18
-
19
-
20
-
21
-
22
-
23
-
24
-
25
-
26
-
27
-
28
-
29
-
30
-
31
-
32
-
33
-
34
-
35
-
36
-
37
-
38
-
39
-
40
-
41
-
42
-
43
-
44
-
45
-
46
-
47
-
48
 |
 |
