Black & Decker BDCDMT120 Type 1 Manual - BDCDMT112 - Page 8
Warning, 20volt Max** Battery Pack Bdcdmt120 Charging, Installing, And Removing
 |
View all Black & Decker BDCDMT120 manuals
Add to My Manuals
Save this manual to your list of manuals |
Page 8 highlights
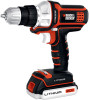
4. The battery pack should be recharged when it fails to produce sufficient power on jobs which were easily done previously. DO NOT CONTINUE to use under these conditions. Follow the charging procedure. You may also charge a partially used pack whenever you desire with no adverse affect on the battery pack. 5. Foreign materials of a conductive nature such as, but not limited to, steel wool, aluminum foil, or any buildup of metallic particles should be kept away from charger cavities. Always unplug the charger from the power supply when there is no battery pack in the cavity. Unplug charger before attempting to clean. B 6. Do not freeze or immerse charger in water or any other liquid. WARNING: Shock hazard. Do not allow any liquid to get inside charger.Never attempt to open the battery pack for any reason. If the plastic housing of the battery pack breaks or cracks, return to a service center for recycling. 12volt max* Installing and Removing the Battery Pack From the power unit Always ensure the forward/reverse slider (7) is in the center position when installing and removing batteries. C WARNING: Make certain the lock-off button is engaged to prevent switch actuation before removing or installing battery. To install battery pack: Insert battery pack into the Power Unit, until an audible click is heard as shown in Figure B. Make sure the battery pack is fully seated and latched into position. To remove battery pack: Depress the battery release button (3) as shown in Figure C and pull battery pack out of the Power Unit. 20volt Max** Battery Pack (BDCDMT120) Charging, Installing, and Removing 20volt Max** Charging Procedure Black & Decker chargers are designed to charge Black & Decker D battery packs in 3.5-4 hours depending on the pack being charged. 1. Plug the charger (4) into an appropriate outlet before inserting the battery pack (5). 2. Insert the battery pack into the charger as shown in Figure D. 3. The green LED will flash indicating that the battery is being charged. 4. The completion of charge is indicated by the green LED remaining on continuously. The pack is fully charged and may be used at this time or left on the charger. Recharge discharged batteries as soon as possible after use or battery life may be greatly diminished. For longest battery life, do not discharge batteries fully. It is recommended that the batteries be recharged after each use. Leaving the battery in the charger The charger and battery pack can be left connected with the green LED glowing indefinitely. The charger will keep the battery pack fresh and fully charged. Important Charging Notes 1. Longest life and best performance can be obtained if the battery pack is charged when the air temperature is between 65°F and 75°F (18°- 24°C). DO NOT charge the battery pack in an air temperature below +40°F (+4.5°C), or above +105°F (+40.5°C). This is important and will prevent serious damage to the battery pack. 2. The charger and battery pack may become warm to touch while charging. This is a normal condition, and does not indicate a problem. To facilitate the cooling of the battery pack after use, avoid placing the charger or battery pack in a warm environment such as in a metal shed, or an uninsulated trailer. 8
-
 1
1 -
2
-
 3
3 -
 4
4 -
 5
5 -
 6
6 -
 7
7 -
 8
8 -
 9
9 -
 10
10 -
 11
11 -
 12
12 -
 13
13 -
14
-
15
-
16
-
17
-
18
-
19
-
20
-
21
-
22
-
23
-
24
-
25
-
26
-
27
-
28
-
29
-
30
-
31
-
32
-
33
-
34
-
35
-
36
-
37
-
38
-
39
-
40
-
41
-
42
-
43
-
44
-
45
-
46
-
47
-
48
 |
 |
