Black & Decker BDH2000PL Type 1 Manual - BDH2000PL - Page 4
Product Features - pivot
 |
View all Black & Decker BDH2000PL manuals
Add to My Manuals
Save this manual to your list of manuals |
Page 4 highlights
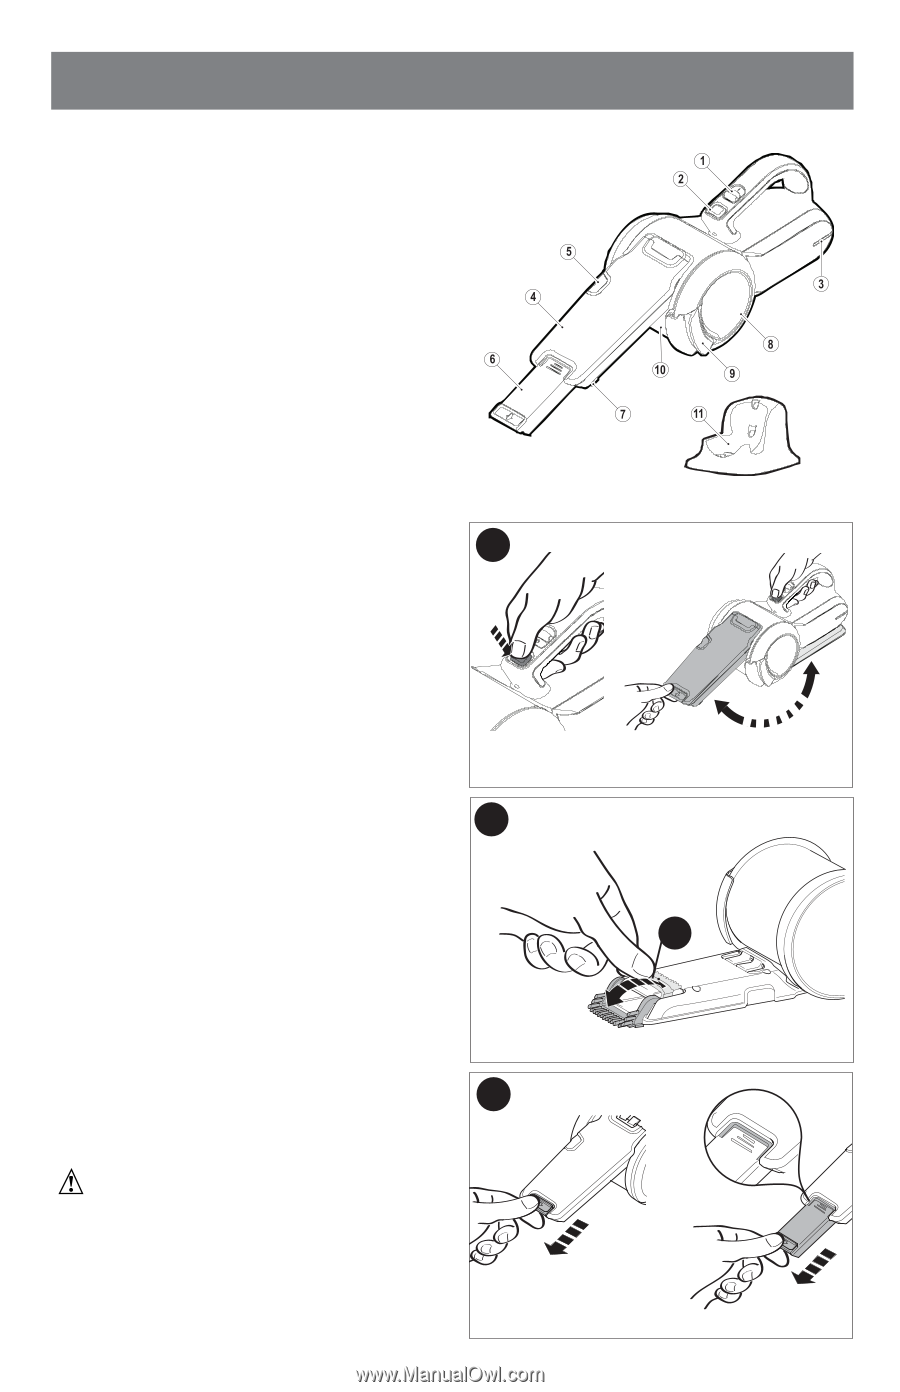
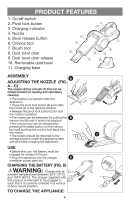
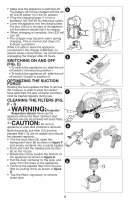
Product Features 1. On/off switch 2. Pivot lock button 3. Charging indicator 4. Nozzle 5. Bowl release button 6. Crevice tool 7. Brush tool 8. Dust bowl door 9. Dust bowl door release 10. Removable dust bowl 11. Charging base Assembly A Adjusting the nozzle (fig. A - C) The nozzle (4) has a brush (7) that can be folded forward for dusting and upholstery cleaning. • The nozzle (4) is stored under the appliance. • Press the pivot lock button (2) and rotate the nozzle (4) to the required position. • Release the pivot lock button (2) to lock the nozzle in position • The nozzle can be extended by pulling the B crevice tool (6) until it locks into position. • The crevice tool can be retracted by pressing the raised button on the crevice tool and pushing the crevice tool back into the nozzle. • The nozzle should be returned to the 7 storage position under the appliance after use and while charging the appliance. Use • Before first use, the battery must be charged for at least 24 hours. • Plug the appliance into the charger C whenever power gets low. Charging the battery (fig. D) WARNING: Charge only at ambient temperatures between 50°F (10°C) and 104°F (40°C). The charger supplied with this product is intended to be plugged in such that it is correctly oriented in a vertical or floor mount position. To charge the appliance: 4
-
 1
1 -
 2
2 -
 3
3 -
 4
4 -
 5
5 -
 6
6 -
 7
7 -
 8
8 -
 9
9 -
 10
10 -
11
-
12
-
13
-
14
-
15
-
16
-
17
-
18
-
19
-
20
-
21
-
22
-
23
-
24
-
25
-
26
-
27
-
28
 |
 |