Blackberry 7510 Getting Started - Page 7
Turn wireless on, Set up email - desktop manager
 |
View all Blackberry 7510 manuals
Add to My Manuals
Save this manual to your list of manuals |
Page 7 highlights
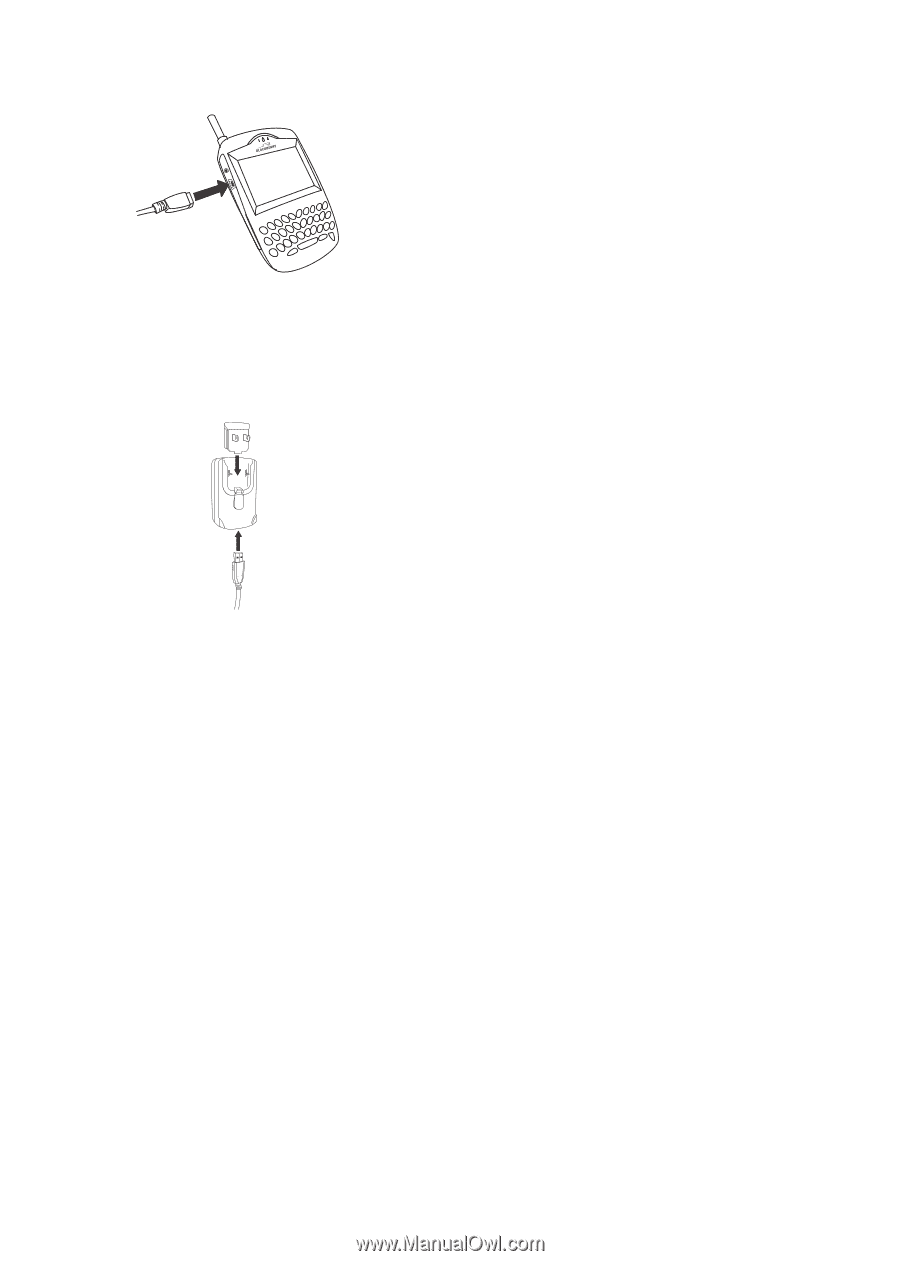
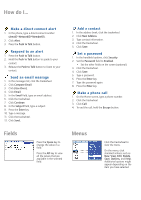
2. Connect the larger end of the USB cable to the power adapter. 3. Slide the attachment piece into the power adapter. PUSH 4. Plug the power adapter into a power outlet. 5. Charge the battery to full power (approximately 3 to 4 hours). Using your computer To charge your handheld battery using the computer, the following system requirements must be met: • Intel®-compatible 486 or higher computer that is compliant with USB 1.1 or later • Available USB port • Windows®98, Windows ME, Windows 2000, or Windows XP • BlackBerry Desktop Software or BlackBerry Handheld Manager must be installed to obtain the required USB driver on your computer.See "Setting up for email using BlackBerry Enterprise Server" on page 5 or Setting up your handheld "Setting up for email using BlackBerry Web Client" on page 6 for more information. Note: If you use Windows 98 (not Windows 98 Second Edition), you must download an update from http://www.microsoft.com/com/dcom/ dcom98/dcom1_3.asp for the USB driver to operate as expected. 1. Connect the smaller end of the USB cable to your handheld. 2. Connect the larger end of the USB cable to an available USB port on your computer. Note: If you connect your handheld to the computer using a USB hub, the hub must be self powered. 3. Charge the battery to full power (approximately 3 to 4 hours). Turn wireless on Your handheld connects to the wireless network using an internal radio. When your SIM card is inserted and the battery is charged, turn on the radio in an area of wireless coverage. Note: If you use BlackBerry Web Client, the account setup process might begin automatically the first time that you turn on the wireless radio. See "Setting up for email using BlackBerry Web Client" on page 6 for more information. Set up email To begin using email on your handheld, you must integrate with an email account using one of the setup options listed in the next sections of this guide. 3
-
 1
1 -
 2
2 -
 3
3 -
 4
4 -
 5
5 -
 6
6 -
 7
7 -
 8
8 -
 9
9 -
 10
10 -
 11
11 -
 12
12 -
13
 |
 |