Bosch B20CS80SNB Operating Instructions - Page 23
Electrical, connection, Checking, water, for leaks, Aligning the, appliance
 |
View all Bosch B20CS80SNB manuals
Add to My Manuals
Save this manual to your list of manuals |
Page 23 highlights
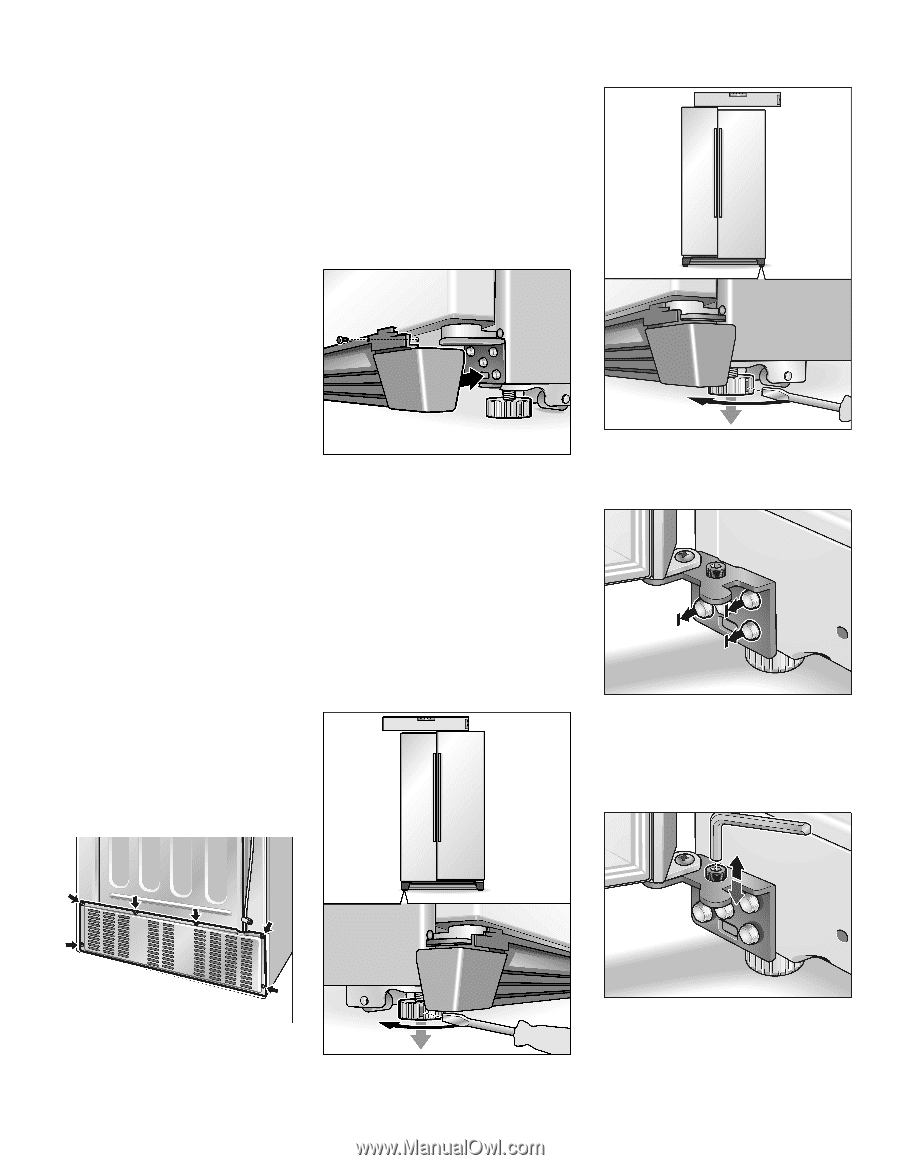
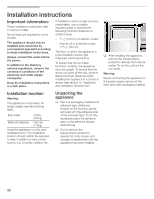
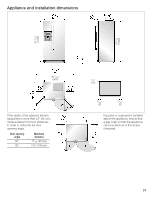
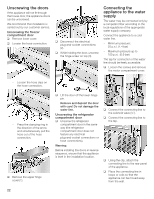
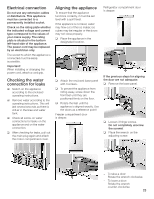
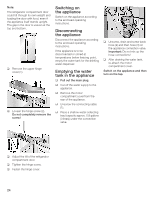
Electrical connection Do not use any extension cables or distributors. This appliance must be connected to a permanently installed socket. Check on the rating plate whether the indicated voltage and current type correspond to the values of your mains supply. The rating plate is situated in the bottom leftĆhand side of the appliance. The power cord may be replaced by an electrician only. The socket to which the appliance is connected must be easily accessible. Important! When installing or changing the power cord, attach a cord grip. Checking the water connection for leaks q Switch on the appliance according to the enclosed operating instructions. q Remove water according to the operating instructions. This will last several seconds as there is still air in the lines and water tank. q Check all screwĆon water connections for leaks on the appliance and on the water connection. q After checking for leaks, pull out the main plug again and attach the motor compartment cover. Aligning the appliance To ensure that the appliance functions correctly, it must be set level with a spirit level. If the appliance is not level, water may flow out of the ice maker, ice cubes may be irregular or the doors may not close properly. q Place the appliance in the designated location. q Attach the enclosed base panel with 3 screws. q To prevent the appliance from rolling away, screw down the front feet until they are positioned firmly on the floor. q Rotate the feet until the appliance is aligned exactly. Use the doors as a reference point! Freezer compartment door is deeper: Refrigerator compartment door is deeper: If the previous steps for aligning the door are not adequate: q Remove the base panel. q Loosen 3 hinge screws. Do not completely unscrew the screws! q Place the wrench on the adjusting screw: - To raise a door: Rotate the wrench clockwise. - To lower a door: Rotate the wrench counterĆclockwise. 23
-
 1
1 -
2
-
3
-
4
-
5
-
6
-
7
-
8
-
9
-
10
-
11
-
12
-
13
-
14
-
15
-
16
-
17
-
 18
18 -
 19
19 -
 20
20 -
 21
21 -
 22
22 -
 23
23 -
 24
24 -
 25
25 -
 26
26 -
 27
27 -
 28
28 -
29
-
30
-
31
-
32
-
33
-
34
-
35
-
36
-
37
-
38
-
39
-
40
-
41
-
42
-
43
-
44
-
45
-
46
-
47
-
48
-
49
-
50
-
51
-
52
-
53
-
54
-
55
-
56
-
57
-
58
-
59
-
60
-
61
-
62
-
63
-
64
-
65
-
66
-
67
-
68
-
69
-
70
-
71
-
72
-
73
-
74
-
75
-
76
-
77
-
78
-
79
 |
 |