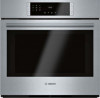
Bosch HBL8453UC Use and Care Manual - Page 12
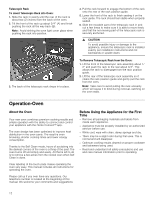
Operation-Oven
 |
View all Bosch HBL8453UC manuals
Add to My Manuals
Save this manual to your list of manuals |
Page 12 highlights
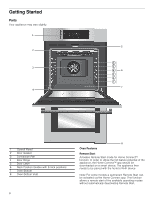
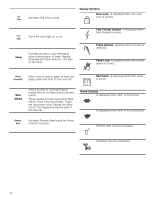
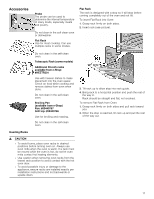
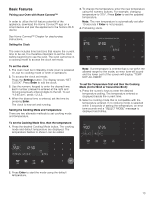
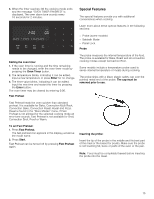
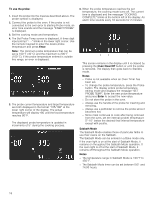
Telescopic Rack To insert Telescopic Rack into Oven: 1. Slide the rack in evenly until the rear of the rack is about two (2) inches from the back of the oven. 2. Tilt the front of the rack up about 3/4" (A) and finish pushing the rack all the way back (B). Note: Avoid striking the oven light cover glass when pushing the rack into position. 3. The back of the telescopic rack drops in to place. 4. Pull the rack forward to engage the bottom of the rack onto the rear of the rack position guide. 5. Lower the front of the rack to finish seating it on the rack guide. The rack should feel stable when properly seated. 6. Slide the movable part of the telescopic rack in and out a few times to make sure it is able to move freely and that the non-moving part of the telescopic rack is securely anchored. 9 CAUTION To avoid possible injury or damage to the appliance, ensure the telescopic rack is installed exactly per installation instructions and not backwards or upside down. To Remove Telescopic Rack from the Oven: 1. Lift the front of the telescopic rack assembly about 1/ 2" and push the rack to the rear about 3/4". This allows the rack to disengage from the rack position guide. 2. Lift the rear of the telescopic rack assembly so it clears the rack position guide and gently pull the rack from the oven. Note: Take care to avoid pulling the rack unevenly which will cause it to bind during removal, catching on the oven walls. Operation-Oven About the Oven Your new oven combines premium cooking results and simple operation with the ability to connect and control your appliance with the Home Connect™ app. The oven design has been optimized to improve heat distribution in the oven cavity. The result is even browning, shorter cooking times and lower energy consumption. Thanks to the Self Clean mode, hours of scrubbing into the darkest corners of the oven is a thing of the past. The oven burns off soil simply and easily. All that is left to do is to remove a few ashes from the cooled oven when Self Clean is done. Clear labeling of the touch pads makes operating the oven very easy. This manual includes all instructions for operating the oven. Please call us if you ever have any questions. Our telephone number is located at the beginning of this manual. We welcome your comments and suggestions. Before Using the Appliance for the First Time ▯ Remove all packaging materials and labels from inside each appliance. ▯ Appliance must be properly installed by an authorized servicer before use. ▯ While cool, wipe with clean, damp sponge and dry. ▯ There may be a slight odor during first uses. This is normal and will disappear. ▯ Optimum cooking results depend on proper cookware and bakeware being used. ▯ Read and understand all safety precautions and use and care manual information prior to operating. 12
-
 1
1 -
2
-
3
-
4
-
5
-
6
-
 7
7 -
 8
8 -
 9
9 -
 10
10 -
 11
11 -
 12
12 -
 13
13 -
 14
14 -
 15
15 -
 16
16 -
 17
17 -
18
-
19
-
20
-
21
-
22
-
23
-
24
-
25
-
26
-
27
-
28
-
29
-
30
-
31
-
32
-
33
-
34
-
35
-
36
-
37
-
38
-
39
-
40
-
41
-
42
-
43
-
44
-
45
-
46
-
47
-
48
-
49
-
50
-
51
-
52
-
53
-
54
-
55
-
56
-
57
-
58
-
59
-
60
-
61
-
62
-
63
-
64
-
65
-
66
-
67
-
68
-
69
-
70
-
71
-
72
-
73
-
74
-
75
-
76
 |
 |
