Bosch HBL87M52UC Installation Instructions - Page 8
Removing Packaging, Installation
 |
View all Bosch HBL87M52UC manuals
Add to My Manuals
Save this manual to your list of manuals |
Page 8 highlights
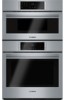
Removing Packaging 1. Cut straps on the outside of the boxes. 2. Remove the upper boxed unit of the combination oven and place on floor so that both shipping cartons can be opened. 3. Perform the following steps on both units of the combination oven. ▯ Remove the cardboard box by lifting it up and off the unit ▯ Remove all top and side cardboard and foam braces. ▯ Place the unit (leaving it on the shipping base) in front of the cabinet where it is to be installed. ▯ Remove all accessories, racks, packing materials and literature from the oven cavities. ▯ Unscrew unit from packaging brackets as shown in "Packaging Bracket Removal-Left and Right Sides". Notes ▯ The screws near the base mounting bracket of each unit are all Star-head (T-20 size). Only the one screw that goes through the slotted hole in the mounting bracket on the left and right sides of the unit needs to be removed in order to lift the unit from the mounting base. The screw circled in the image below and marked as (A) is the screw that needs to be removed. ▯ Remove one screw only from each bracket. This will release the oven from the shipping base. Do not remove any additional screws from the oven. Packaging Bracket Removal-Left and Right Sides Note: Actual bracket varies in appearance. The bracket remains in the packaging base. The unit should stay on the packaging base until ready to be lifted into cabinet cutout or onto the lower oven. Preparing Ovens Place ovens in front of the cabinet where it is to be installed so that they are in line with the cabinet cutout. Check to be sure all packing materials have been removed from the unit. Also remove the accessories, oven racks, literature pack and any shipping materials from inside the oven cavity. Check both ovens for a double oven or combination oven installation. Installation Pre-Assembly of the Combination Oven Combination ovens require the two components to be assembled prior to installing the combination unit into the wall cabinet. Note: The installation procedures differ between the microwave, speed oven and steam convection oven combination units. The parts contained in the square tube parts box are common to all three installations. Parts Provided Parts Provided Universal connector bracket (2)--in parts box on top of oven Screws (16)--in red bag inside parts box on top of oven. 8
-
 1
1 -
2
-
 3
3 -
 4
4 -
 5
5 -
 6
6 -
 7
7 -
 8
8 -
 9
9 -
 10
10 -
 11
11 -
 12
12 -
 13
13 -
14
-
15
-
16
-
17
-
18
-
19
-
20
-
21
-
22
-
23
-
24
-
25
-
26
-
27
-
28
-
29
-
30
-
31
-
32
-
33
-
34
-
35
-
36
-
37
-
38
-
39
-
40
-
41
-
42
-
43
-
44
-
45
-
46
-
47
-
48
-
49
-
50
-
51
-
52
-
53
-
54
-
55
-
56
 |
 |
