Bosch HGS7282UC Instructions for Use
Bosch HGS7282UC - 30" Pro-Style Gas Range Manual
 |
UPC - 825225843955
View all Bosch HGS7282UC manuals
Add to My Manuals
Save this manual to your list of manuals |
Bosch HGS7282UC manual content summary:
- Bosch HGS7282UC | Instructions for Use - Page 1
Use and Care Manual Gas Free-Standing Ranges with European Convection - Bosch HGS7282UC | Instructions for Use - Page 2
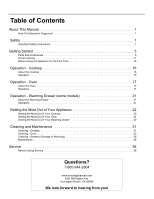
Safety Instructions 1 Getting Started 5 Parts and Accessories 6 Control (Panel 11 Before Using the Appliance for the First Time 16 Operation - Cooktop 16 About the Cooktop 16 Operation 16 Operation - Oven 17 About the Oven 17 Operation 17 Operation - Warming Drawer (some models 21 - Bosch HGS7282UC | Instructions for Use - Page 3
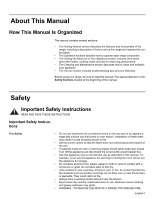
Important Safety Instructions Fire Safety • Do not use aluminum foil or protective liners to line any part of an appliance, especially surface unit drip bowls or oven bottom. Installation of these liners may result in a risk of electric shock or fire. • Set the burner control so that the - Bosch HGS7282UC | Instructions for Use - Page 4
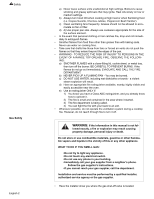
a neighbor's phone. Follow the gas supplier's instructions. •If you cannot reach your gas supplier, call fire department. Installation and service must be performed by a qualified installer, authorized service agency or the gas supplier. • Have the installer show you where the gas shut-off valve is - Bosch HGS7282UC | Instructions for Use - Page 5
burner goes out and gas escapes, open windows and doors. Wait until gas dissipates before using the appliance. • If you smell gas, your installer instructed in safe practices by qualified persons. • Do not allow anyone to climb, stand, lean, sit, or hang on any part of an appliance, especially a door - Bosch HGS7282UC | Instructions for Use - Page 6
gas. 2) Providing good ventilation during and immediately after self cleaning the oven. 3) Operating the unit according to the instructions in this manual of cookware to burner flame reduces safety risks. Proper Installation and Maintenance • • • Have the installer show you the location - Bosch HGS7282UC | Instructions for Use - Page 7
properly, or if it has been damaged. Contact an authorized servicer. • Do not obstruct oven vents. • Do not repair or replace any part of the appliance unless specifically recom- mended in this manual. Refer all servicing to a factory authorized service center. • In the event of an error the display - Bosch HGS7282UC | Instructions for Use - Page 8
Parts and Accessories Table 1: Parts and Accessories Key 1 2 3 4 5 12 6 7 8 11 9 or 10 (model dependent) # Part 1 Oven Control Panel and Knob 2 Burner Caps (4) 3 Burner Grates (2) 4 Cooktop Control Knob 5 Probe Receptacle (some models) 6 Rack Positions/ Rack Guides 7 Oven - Bosch HGS7282UC | Instructions for Use - Page 9
on the cooktop. It is well suited for gentle cooking of small amounts of food. Use the burner to melt butter or chocolate or to prepare delicate sauces. Depending on model, the range is equipped with one of the following combinations: • Three flat racks • Two flat racks and one full extension rack - Bosch HGS7282UC | Instructions for Use - Page 10
toward the back wall of the range. Figure 4: Inserting a Rack Removing Flat Racks From Oven 1. Grasp rack firmly on both sides and pull rack toward you. 2. When the stop is reached, tilt rack up and pull the rest of the way out. Extension Oven Rack (some models) The Full Extension Rack allows for - Bosch HGS7282UC | Instructions for Use - Page 11
be in the closed position when removing and replacing. Grasp the entire rack it is not installed correctly. Reinstall it so that the pan stop is in the back of the oven. Disassembly (for rack is installed correctly after reassembly. The back edges of the top rack must be under the rack guide on the - Bosch HGS7282UC | Instructions for Use - Page 12
foil or protective liners to line any part of an appliance, especially surface unit drip bowls or oven bottom. Installation of these liners may result in a risk of electric shock or fire. The oven vent is located below the display above the rear left cooktop burner. It is normal to see steam - Bosch HGS7282UC | Instructions for Use - Page 13
off automatically when the door is opened. The convection fan does run during self-clean, although not at the beginning of the mode. Note: On some models, the convection fan also runs during preheat for the bake mode. Oven Control Panel Clock Oven Temperature Control Knob Light AM PM Time - Bosch HGS7282UC | Instructions for Use - Page 14
The Clock You control the operation of the range by using the touch pads, dial and control knobs. The touchpads, in conjunction with the dial, are used to select an oven mode, set the oven temperature, set the time(s) and to set up your range. To use the touchpad, press the center part of the pad - Bosch HGS7282UC | Instructions for Use - Page 15
is the section of the menu where you can set or change the range features listed below. To access the SELECT FUNCTION menu 1. Press and hold control default for beep volume is Medium. 1. Access SELECT FUNCTIONS Menu. 2. Turn knob clockwise until VOLUME is displayed. 3. Press Start. 4. Turn knob - Bosch HGS7282UC | Instructions for Use - Page 16
language change. Lock / Unlock the Oven Control Panel The oven keypad can be locked for safety purposes. This feature can be used to prevent changes to the oven function. This function DOES NOT lock the oven door. 1. Access SELECT FUNCTIONS Menu. 2. Turn knob clockwise until LOCK KEYS is flashing - Bosch HGS7282UC | Instructions for Use - Page 17
clockwise until SABBATH OPTION appears. 4. Press START. BAKE will show in display and temperature will flash. 5. Turn knob to set oven temperature. 6. Turn oven light on if desired (press LIGHT). Note: The light cannot be changed after this point. It will stay on or off, as selected, during the - Bosch HGS7282UC | Instructions for Use - Page 18
selection. Before Using the Appliance for the First Time • Remove all packing materials and labels from range. Remove packing materials from inside the oven and inside the drawer. • While cool, wipe with a clean, damp sponge and dry. • For models with a glass ceramic cooktop, apply the glass ceramic - Bosch HGS7282UC | Instructions for Use - Page 19
extend beyond the edge of the pan. Turn knob clockwise to the OFF position. Note: an "pop" may be heard when the burner is turned off. The "pop" may be louder with LP gas than with natural gas. This is normal. Operation - Oven About the Oven Operation Setting the Cooking Mode and Temperature This - Bosch HGS7282UC | Instructions for Use - Page 20
knob to select new temperature and press START. 11. Once cooking has been completed, press OFF to turn off oven. Automatic Convection Conversion (models and the range calculates the correct temperature. The Automatic Convection Conversion feature can be turned off to allow for manual temperature - Bosch HGS7282UC | Instructions for Use - Page 21
Cancelling Operation - Oven 2. Turn knob to select CLEAR TIMER 1(2). Press TIME. 3. If Time pad is not pressed, range will beep and display will continue flashing. 4. Press TIME to return to the main screen. 0: 00 CLEAR TIMER 1 If operation is not completed, the oven will beep periodically as a - Bosch HGS7282UC | Instructions for Use - Page 22
the knob to desired temperature and press START again. Note: Always remove probe from oven when cooking is complete. The probe symbol will remain in the display until the probe is removed. Do not leave probe attachment in oven during self-clean. Oven will not self-clean with the probe installed in - Bosch HGS7282UC | Instructions for Use - Page 23
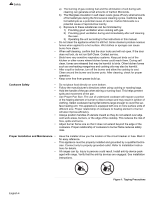
Operation - Warming Drawer (some models) This section explains how to operate the warming are Low, Medium, and High. Warming Drawer Specifi- cations Parts Key: 1 1. Stainless Steel Drawer Interior 2. Gasket 3. Rail Lock 2 3 Figure 12: Warming Drawer Parts Drawer Interior: 25" W x 17" D x 5" - Bosch HGS7282UC | Instructions for Use - Page 24
cooking container. If it melts onto the drawer, it may not be removable. Preheating For best results, preheat the warming drawer when warming food. Preheat When Using the Warming Drawer and the Oven 1. Press OFF. 2. Turn knob to select CANCEL DRWR, CANCEL OVEN, or CANCEL BOTH. 3. Press OFF. - Bosch HGS7282UC | Instructions for Use - Page 25
for heat settings. A range of heat settings are listed because the actual setting depends on: • type and quality of pan (See "Selecting Cookware"), • type, quantity and temperature of the food, • burner used and • the cook's preference. Table 3: Cooking Guide Uses Heat Settings Bringing water - Bosch HGS7282UC | Instructions for Use - Page 26
can lick up the sides of the pan. Place oversized pans that span two burners front to rear, not side to side. Tight Fitting Lids - A lid above. Use only a flat-bottomed wok. Getting the Most Out of Your Oven Oven Cooking Guide Rack Position 6 5 4 3 2 1 Multiple Rack Cooking Pan Placement • - Bosch HGS7282UC | Instructions for Use - Page 27
and the retained heat will continue to cook the meat after the oven has shut off. For this reason, remove the meat from the oven as soon as the control beeps. • Since meat continues to cook after being removed from the oven, set the internal (probe) temperature 5 - 10 degrees below the desired final - Bosch HGS7282UC | Instructions for Use - Page 28
model, you may hear the convection fan while the oven is preheating for the bake mode. This is normal. In the Proofing mode, the oven uses the lower burner door closed and use the oven light to check the rising of the dough. In Warming mode, the lower burner maintains a low temperature in the oven - Bosch HGS7282UC | Instructions for Use - Page 29
-24 14-18 45-55 11-15 16-20 23-26 12-15 a. This temperature must be manually reduced by 25° F if the Automatic Convection Conversion feature has been turned off. b. This chart is a guide. Actual times depend on the mixes or recipes baked. Follow recipe or package directions. Broil Broiling uses - Bosch HGS7282UC | Instructions for Use - Page 30
with a preheated broil burner. Convection Roast Convection Roast uses heat from the lower burner and an element behind the or use cooking bags. • Use the broil pan and grid provided with the range for roasting. A low-sided, uncovered pan can also be used. • Use removing from the oven. English 28 - Bosch HGS7282UC | Instructions for Use - Page 31
This mode holds an optimum low temperature (100° F - 160° F) while circulating the heated air to slowly remove moisture. The oven will stay on for 48 hours before shutting off automatically. Note: The lower burner operates at the beginning of this mode. This is normal. For Best Results: • Dry most - Bosch HGS7282UC | Instructions for Use - Page 32
cup lemon juice and 2 cups water; 1/4" slices Dipped in 1/4 cup lemon juice and 2 cups water; 1/4" slices Wash, towel dry. Fresh cherries, remove pits. 1/4" slices of orange; orange part of skin thinly peeled from oranges 11-15 10-15 10-15 Peels: 2-4 Slices: 12-16 Towel dried. Wash and towel dry - Bosch HGS7282UC | Instructions for Use - Page 33
to cool. Clean around the burner and burner ports. Reassemble burner(s) and check for proper operation. Avoid these Cleaners • Glass cleaners which contain ammonia or chlorine bleach. These ingredients may permanently etch or stain the cooktop. • Caustic Cleaners • Oven cleaners such as Easy Off - Bosch HGS7282UC | Instructions for Use - Page 34
Cleaning and Maintenance Table 9: Cooktop Cleaning Chart Cooktop Part/Material Burner Base / Enameled Steel Burner Cap and exterior finish / Porcelain Enamel Control Knobs / Plastic or Nickel Plated (varies by model) Exterior Finish / Stainless Steel • Soap-filled scouring pads such as SOS® can - Bosch HGS7282UC | Instructions for Use - Page 35
in "Self Cleaning the Oven" on page 34. See "Oven Cleaning Chart" on page 33 for instructions for specific surfaces and items. Avoid these cleaners • Do not use caustic cleaners such as Easy Off®. They may etch the surface. Table 10: Oven Cleaning Chart Part Recommendations Racks Fiberglass - Bosch HGS7282UC | Instructions for Use - Page 36
-cleaning function that eliminates the manual labor involved with cleaning your oven. During self-cleaning, the oven uses a very high temperature to burn away food soil and grease. Preparing the Oven for Self Clean • Do not clean parts or accessories in the self-clean oven. • It is common to see - Bosch HGS7282UC | Instructions for Use - Page 37
to remove oven racks. 6. Press START again to begin the self- 4: 00 SELF CLEAN clean. REMOVE RACKS Note: The door locks at the beginning of the cycle; The door lock symbol will appear in the display at this point. If door does not lock, press OFF and do not self-clean; phone service. Note - Bosch HGS7282UC | Instructions for Use - Page 38
Cooktop Models Oven Maintenance Removing the Door English 36 No maintenance is required other than daily cleaning as described in "Cleaning Guidelines" on page 31 1. Be sure to read the above WARNING before attempting to remove oven door. 2. Open the door completely. 3. Flip lever on hinge toward - Bosch HGS7282UC | Instructions for Use - Page 39
both levers are securely in place before removing door. Also, do not force door open or closed - the hinge could be damaged and injury could result. Replacing the Oven Door Replacing an Oven Light 4. Close the door to approximately halfway open. 5. Holding the door firmly on both sides using both - Bosch HGS7282UC | Instructions for Use - Page 40
before calling for service to avoid service charges Troubleshooting Charts The Cooktop Table 11: Cooktop Troubleshooting Chart Cooktop Problem Cooking results are not what was expected. Water takes too long to boil Burners click continuously Burners click intermittently Surface burners do not - Bosch HGS7282UC | Instructions for Use - Page 41
cool. Dry burner cap and base thoroughly. Uneven flame - LP gas users • Call service The Oven Table 12: Oven Troubleshooting Chart Oven Problem Possible Causes and Suggested Solutions The oven mode or temperature selected or the numbers selected do not appear in the display Oven door is locked - Bosch HGS7282UC | Instructions for Use - Page 42
Service Table 12: Oven Troubleshooting Chart Oven Problem Oven light will not turn off Cannot remove lens cover on light Oven will not Self-Clean properly Clock and timer are not working properly Porcelain chips "F" and a number appears in display and control beeps With a new range there is a - Bosch HGS7282UC | Instructions for Use - Page 43
the Product have been made without success, then Bosch will replace your Product (upgraded models may be available to you, in Bosch 's sole discretion, for an additional charge). All removed parts and components shall become the property of Bosch at its sole option. All replaced and/or repaired - Bosch HGS7282UC | Instructions for Use - Page 44
parts; Products on which the serial numbers have been altered, defaced, or removed; service visits to teach you how to use the Product, or visits where there is nothing wrong with the Product; correction of installation problems ARE DEFINITIVELY CAUSED EXCLUSIVELY BY Bosch, OR OTHERWISE. SOME STATES - Bosch HGS7282UC | Instructions for Use - Page 45
Notes: - Bosch HGS7282UC | Instructions for Use - Page 46
- Bosch HGS7282UC | Instructions for Use - Page 47
- Bosch HGS7282UC | Instructions for Use - Page 48
5551 McFadden Avenue, Huntington Beach, CA 92649 • 800-944-2904 • www.boschappliances.com 9000155044 • 5V0AQ6 • Rev. B • 01/08 © BSH Home Appliances Corporation, 2007 • All rights reserved Litho in USA
-
 1
1 -
 2
2 -
 3
3 -
 4
4 -
 5
5 -
 6
6 -
 7
7 -
8
-
9
-
10
-
11
-
12
-
13
-
14
-
15
-
16
-
17
-
18
-
19
-
20
-
21
-
22
-
23
-
24
-
25
-
26
-
27
-
28
-
29
-
30
-
31
-
32
-
33
-
34
-
35
-
36
-
37
-
38
-
39
-
40
-
41
-
42
-
43
-
44
-
45
-
46
-
47
-
48
 |
 |

Gas Free-Standing Ranges
with European Convection
Use and Care Manual