Bosch HGS7282UC Instructions for Use - Page 14
The Clock - installation instructions
 |
UPC - 825225843955
View all Bosch HGS7282UC manuals
Add to My Manuals
Save this manual to your list of manuals |
Page 14 highlights
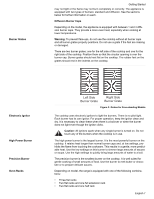
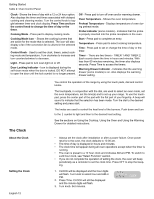
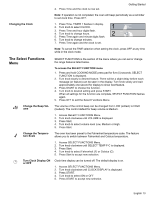
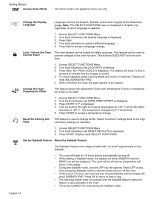
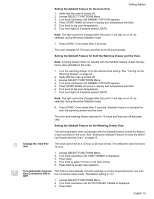
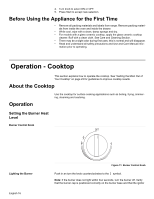
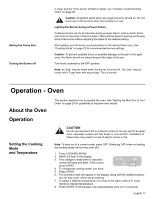
Getting Started Table 2: Oven Control Panel Clock- Shows the time of day with a 12 or 24 hour option. Also displays the timer and times associated with delayed cooking and cleaning modes. Turn the control knob to toggle between timer and clock display. Press Time and turn the control knob to change the time of day or the timer. Cooking Mode - Press pad to display cooking mode. Off - Press pad to turn off oven and/or warming drawer. Oven Temperature - Shows the oven temperature. Preheat Temperature - Displays temperature of oven during preheat mode. Probe Indicator (some models) - Indicates that the probe is properly inserted into the probe receptacle in the oven. Cooking Mode Icon - Shows the cooking burners that are active for the mode that is selected. The icon will also display a fan if the convection fan is utilized in the selected mode. Control Knob - Used to set the clock, timers, select cooking mode and temperature. Turn clockwise to increase and turn counterclockwise to decrease. Light - Press pad to turn oven light on or off. Door Locking Indicator - Icon is displayed during the self-clean mode when the door is locked. DO NOT attempt to open the door until the lock symbol is no longer present. Start - Press pad to complete an entry. Temperature - Press pad to select cooking temperature. Time - Press pad to set or change the time of day or the timer. Timer - There are two timers - TIMER 1 AND TIMER 2; Each counts down the time in hours and minutes. With less than 60 minutes remaining, the timer also displays seconds. Press Time to access the timers. Warming Drawer Indicator - Indicates that the warming drawer (some models) is on. Also displays the warming drawer setting. The Clock You control the operation of the range by using the touch pads, dial and control knobs. The touchpads, in conjunction with the dial, are used to select an oven mode, set the oven temperature, set the time(s) and to set up your range. To use the touchpad, press the center part of the pad with the flat part of your fingertip. A beep will sound to indicate that the selection has been made. Turn the dial to the desired setting and press start. The knobs are used to control the heat level of the burners. Push down and turn to the symbol to light and then to the desired heat setting. See the sections on Using the Cooktop, Using the Oven and Using the Warming Drawer for detailed instructions. About the Clock Setting the Clock • Always set the clock after installation or after a power failure. Once power returns to the oven, the clock defaults to 12:00 am. • The time of day is displayed in hours and minutes. • The clock time will appear during all oven operations except when the timer is running. • The oven is preset to a 12 hour clock and indicates AM and PM. To switch to a 24 hour clock, see "Select Function" section. • If you do not complete the operation of setting the clock, the oven will beep periodically as a reminder to set the clock time. Press OFF to stop the beeping. 1. CLOCK will be displayed and the hour digits will flash. Turn knob to select hour and AM or PM. 2. Press Time. CLOCK will still be displayed and the minute digits will flash. 3. Turn knob. Set minutes. 12: 00 AM CLOCK English 12
-
 1
1 -
2
-
3
-
4
-
5
-
6
-
7
-
8
-
 9
9 -
 10
10 -
 11
11 -
 12
12 -
 13
13 -
 14
14 -
 15
15 -
 16
16 -
 17
17 -
 18
18 -
 19
19 -
20
-
21
-
22
-
23
-
24
-
25
-
26
-
27
-
28
-
29
-
30
-
31
-
32
-
33
-
34
-
35
-
36
-
37
-
38
-
39
-
40
-
41
-
42
-
43
-
44
-
45
-
46
-
47
-
48
 |
 |
