Bosch NGM5024UC Installation Instructions - Page 4
Installation - tools
 |
UPC - 825225858355
View all Bosch NGM5024UC manuals
Add to My Manuals
Save this manual to your list of manuals |
Page 4 highlights
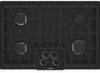
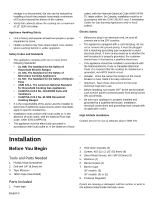
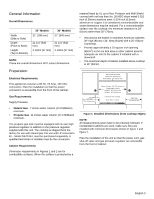
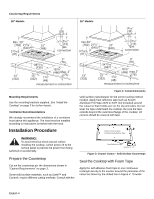
storage is to be provided, the risk can be reduced by installing a hood that projects horizontally a minimum of 5 inches beyond the bottom of the cabinet. • Verify that cabinets above the cooktop are a maximum of 13" (330 mm) deep. Appliance Handling Safety • Unit is heavy and requires at least two people or proper equipment to move. • Hidden surfaces may have sharp edges. Use caution when reaching behind or under appliance. Safety Codes and Standards • This appliance complies with one or more of the following Standards: • UL 858, The Standard for the Safety of Household Electric Ranges • UL 923, The Standard for the Safety of Microwave Cooking Appliances • UL 507, The Standard for the Safety of Electric Fans • ANSI Z21.1, The American National Standard for Household Cooking Gas Appliances • CAN/CSA-C22.2 No. 113-M1984 Fans and Ventilators • CAN/CSA-C22.2 No. 61-M89 Household Cooking Ranges • It is the responsibility of the owner and the installer to determine if additional requirements and/or standards apply to specific installations. • Installation must conform with local codes or, in the absence of local codes, with the National Fuel Gas Code, ANSI Z223.1/NFPA 54. • The appliance must be electrically grounded in accordance with local codes or, in the absence of local codes, with the National Electrical Code ANSI/ NFPA 70, latest edition. (In Canada, installation must be in accordance with the CAN 1-B149.1 and .2 Installation Codes for Gas Burning Appliances and/ or local codes). Electric Safety • Before you plug in an electrical cord, be sure all controls are in the OFF position. • For appliances equipped with a cord and plug, do not cut or remove the ground prong. It must be plugged into a matching grounding type receptacle to avoid electrical shock. If there is any doubt as to whether the wall receptacle is properly grounded, the customer should have it checked by a qualified electrician. • This appliance should be installed in accordance with the National Electric Code or Canadian Electrical Code. It is required that the cooktop be installed on a grounded, non-GFCI branch circuit. • Installer - show the owner the location of the circuit breaker or fuse. Mark it for easy reference. • Important - Save these instructions for the local electrical inspector's use. • Before installing, turn power OFF at the service panel. Lock service panel to prevent power from being turned ON accidentally. • Be sure your appliance is properly installed and grounded by a qualified technician. Installation, electrical connections and grounding must comply with all applicable codes. High Altitude Installation Contact service for use at altitudes above 2000 feet. Installation Before You Begin Tools and Parts Needed 1. Phillips Head Screwdriver 2. Drill with 1/4" (6.5mm) bit 3. Tape Measure 4. Teflon Tape (Gas Rated) Parts Included 1. Foam tape English 2 2. Hold down brackets (4) 3. Screws, #10-32 x 2 1/2" (63.8mm) (4) 4. Sheet Metal Screws, #8 x 3/8" (9.5mm) (4) 5. Washers (4) 6. Burner Grates (3) 7. Burner Caps 36" models: (5) 30" models: (4) or (5) 8. Pressure Regulator If parts are missing or damaged, call the number or write to the address listed inside the back cover.
-
 1
1 -
 2
2 -
 3
3 -
 4
4 -
 5
5 -
 6
6 -
 7
7 -
 8
8 -
 9
9 -
 10
10 -
11
-
12
-
13
-
14
-
15
-
16
-
17
-
18
-
19
-
20
-
21
-
22
-
23
-
24
-
25
-
26
-
27
-
28
-
29
-
30
-
31
-
32
 |
 |
