Bosch SHX3AR72UC Instructions for Use - Page 16
Care and Maintenance - installation
 |
View all Bosch SHX3AR72UC manuals
Add to My Manuals
Save this manual to your list of manuals |
Page 16 highlights
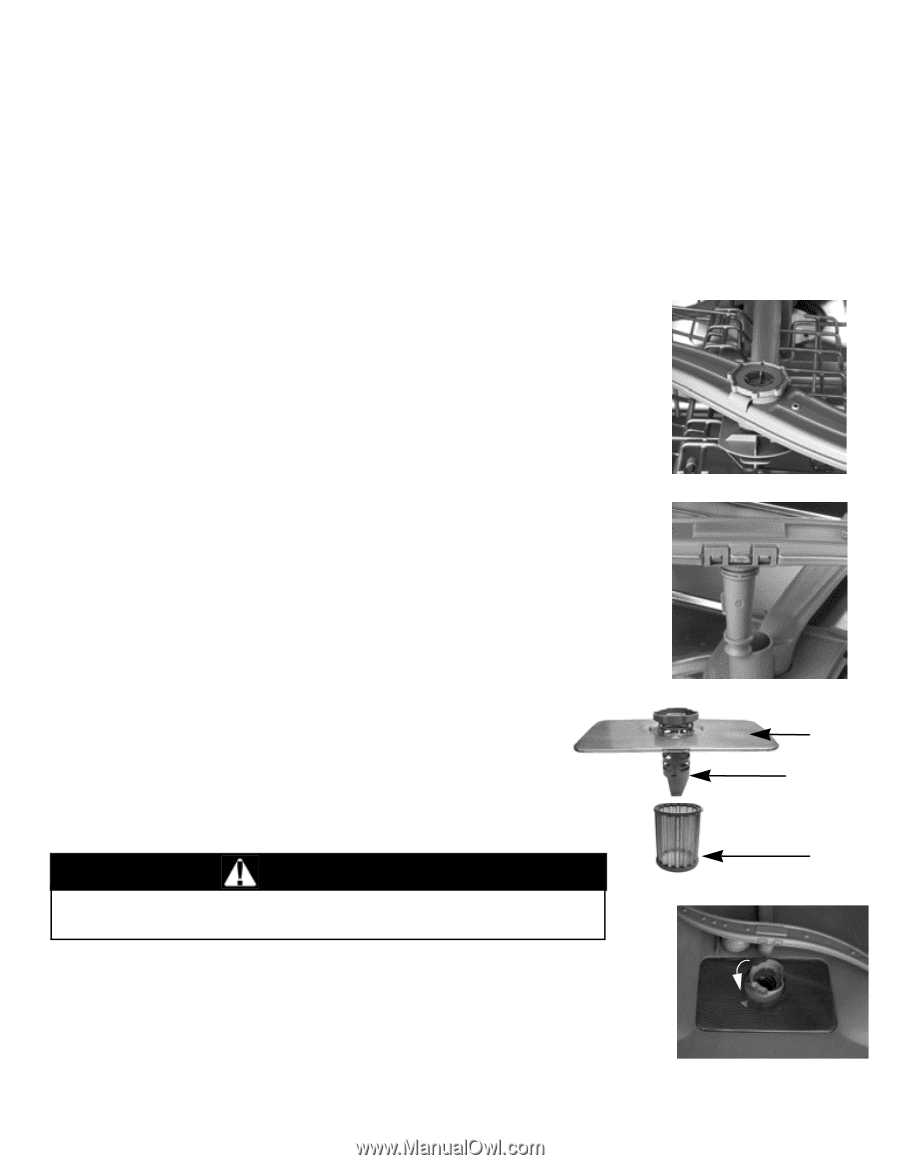
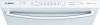
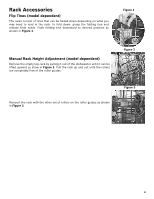
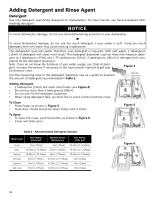
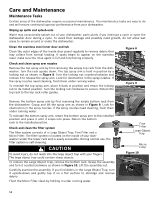
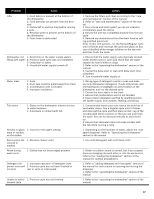
Care and Maintenance Maintenance Tasks Certain areas of the dishwasher require occasional maintenance. The maintenance tasks are easy to do and will ensure continued superior performance from your dishwasher. Wiping up spills and splash-outs Water may occasionally splash out of your dishwasher, particularly if you interrupt a cycle or open the dishwasher door during a cycle. To avoid floor damage and possibly mold growth, do not allow wet areas to remain around or under the dishwasher. Clean the stainless steel inner door and tub Clean the outer edges of the inside door panel regularly to remove debris that may collect from normal loading. If spots begin to appear on the stainless steel, make sure the rinse agent is full and functioning properly. Figure 8 Check and clean spray arm nozzles Remove the top spray arm by first removing the empty top rack from the dishwasher. Turn the rack upside down. The top spray arm is held in position by a locking nut as shown in Figure 8. Turn the locking nut counterclockwise and remove it to release the spray arm. Look for obstruction in the spray nozzles. If the spray nozzles need cleaning, flush them under running water. To reinstall the top spray arm, place it back in position and return the locking nut to its install position. Turn the locking nut clockwise to secure. Return the top rack to the top rack roller guides. Figure 9 Remove the bottom spray arm by first removing the empty bottom rack from the dishwasher. Grasp and lift the spray arm as shown in Figure 9. Look for obstruction in the spray nozzles. If the spray nozzles need cleaning, flush them under running water. To reinstall the bottom spray arm, return the bottom spray arm to the installed position and press it until it snaps into place. Return the bottom rack to the installed position. Check and clean the filter system The filter system consists of a Large Object Trap, Fine Filter and a Micro Filter. The filter system is located on the inside of your dishwasher under the lower rack and is easily accessible. During normal use, the filter system is self-cleaning. CAUTION To avoid injury, do not reach into the large object trap with your fingers. The large object trap could contain sharp objects. To remove the Large Object Trap, remove the bottom rack. Grasp the assembly and turn it counterclockwise as shown in Figure 10. Lift the assembly out. Carefully examine the assembly. If you find debris in the Large Object Trap, turn it upside-down and gently tap it on a flat surface to dislodge and remove debris. Flush the Micro Filter clean by holding it under running water. Fine Filter Large Object Trap Micro Filter Figure 10 14
-
 1
1 -
2
-
3
-
4
-
5
-
6
-
7
-
8
-
9
-
10
-
 11
11 -
 12
12 -
 13
13 -
 14
14 -
 15
15 -
 16
16 -
 17
17 -
 18
18 -
 19
19 -
 20
20 -
 21
21 -
22
-
23
-
24
-
25
-
26
-
27
-
28
-
29
-
30
-
31
-
32
-
33
-
34
-
35
-
36
-
37
-
38
-
39
-
40
-
41
-
42
-
43
-
44
-
45
-
46
-
47
-
48
-
49
-
50
-
51
-
52
-
53
-
54
-
55
-
56
-
57
-
58
-
59
-
60
-
61
-
62
-
63
-
64
 |
 |