Bosch SRV53C13UC Instructions for Use - Page 76
DOOR PANEL INSTALLATION, DOOR TENSION ADJUSTMENT only on, fully integrated models with custom, door
 |
View all Bosch SRV53C13UC manuals
Add to My Manuals
Save this manual to your list of manuals |
Page 76 highlights
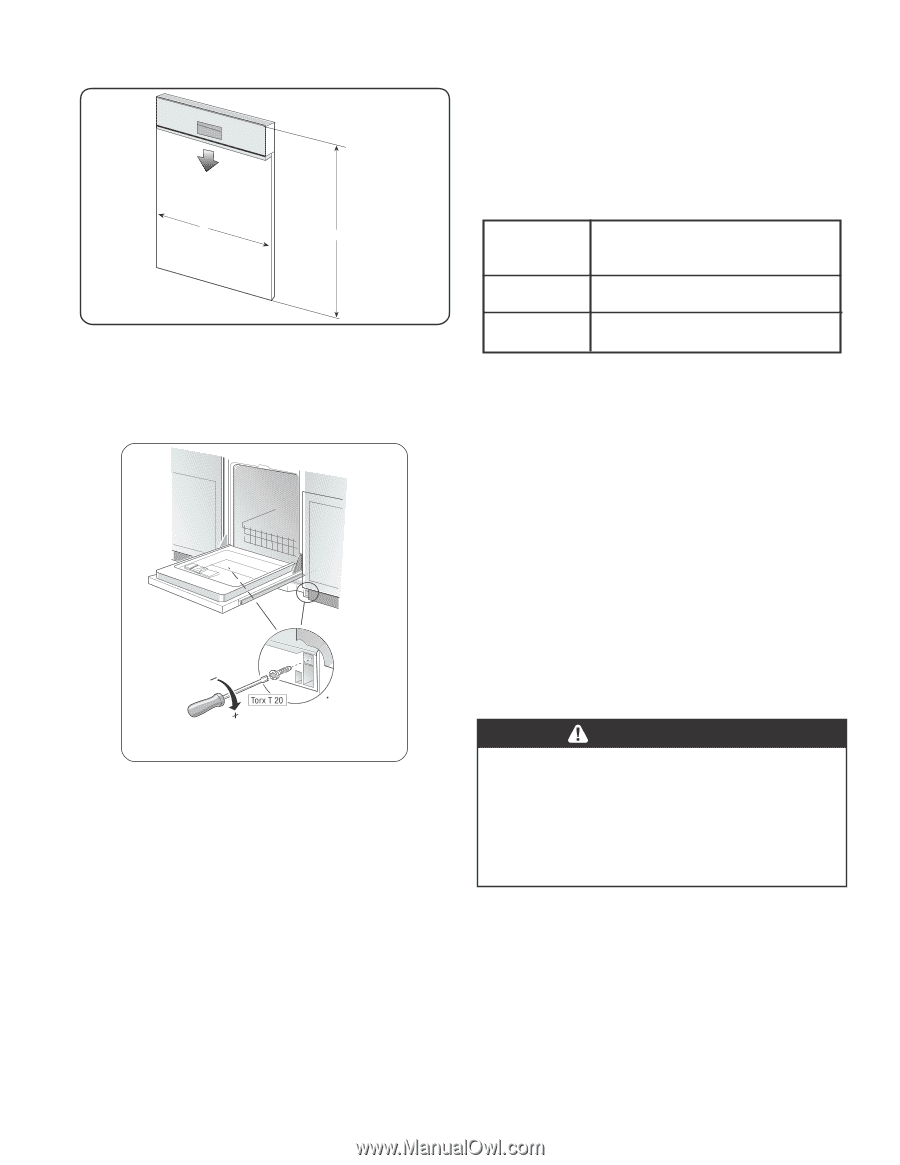
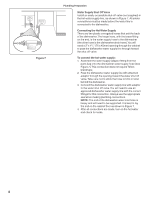
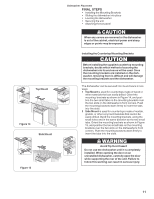
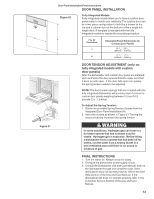
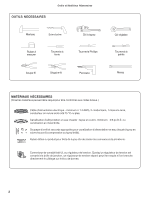
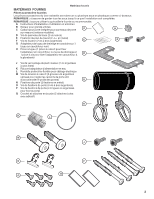
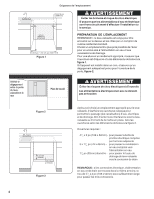
B Figure 21 Door Panel Installation/Final Instructions DOOR PANEL INSTALLATION Figure 20 Fully Integrated Models Fully integrated models allow you to have a custom door panel made to match your cabinetry. The custom door can be a two-piece configuration to look like a drawer at the top and a cabinet door at the bottom or like a single fulllength door. A template is included with the fully integrated models to explain the mounting procedure. A Fig. 20 Dimension Integrated Panel Dimensions for Custom Door Panels A 25 3/16" - 28 5/16" (640mm - 719mm) B 17 5/16" - 17 9/16" (440mm - 446mm) DOOR TENSION ADJUSTMENT (only on fully integrated models with custom door panels) After the dishwasher and custom door panel are installed, open and close the door several times to make sure that it does so with ease. If the door falls open too quickly, the spring tension needs to be adjusted. NOTE: The door tension springs that are included with this fully integrated dishwasher will provide proper function for custom door panels weighing between 5.5 and 16.5 pounds (2.5 - 7.5 kilos). To Adjust the Spring Tension: 1. Obtain the provided Spring Tension Screws from the Integrated Door Panel Installation Kit. 2. Insert the screws as shown in Figure 21. Turning the screw clockwise increases the spring tension. WARNING In some conditions, Hydrogen gas can form in a hot water system that has not been used for weeks. Hydrogen gas is explosive. Before filling a dishwasher from a system that has been off for weeks, run the water from a nearby faucet in a well ventilated area until there is no sound or evidence of gas. FINAL INSTRUCTIONS 1. Turn the water on. Always check for leaks. 2. Energize the dishwasher power supply circuit. 3. Consult the Dishwasher Use and Care Manual, and run the dishwasher through one complete cycle. If the dishwasher does not operate properly, refer to the SelfHelp section of the Use and Care Manual. If the dishwasher still does not operate properly, refer to the Customer Service Section of the Use and Care Manual. 13
-
 1
1 -
2
-
3
-
4
-
5
-
6
-
7
-
8
-
9
-
10
-
11
-
12
-
13
-
14
-
15
-
16
-
17
-
18
-
19
-
20
-
21
-
22
-
23
-
24
-
25
-
26
-
27
-
28
-
29
-
30
-
31
-
32
-
33
-
34
-
35
-
36
-
37
-
38
-
39
-
40
-
41
-
42
-
43
-
44
-
45
-
46
-
47
-
48
-
49
-
50
-
51
-
52
-
53
-
54
-
55
-
56
-
57
-
58
-
59
-
60
-
61
-
62
-
63
-
64
-
65
-
66
-
67
-
68
-
69
-
70
-
 71
71 -
 72
72 -
 73
73 -
 74
74 -
 75
75 -
 76
76 -
 77
77 -
 78
78 -
 79
79 -
 80
80 -
 81
81 -
82
-
83
-
84
-
85
-
86
-
87
-
88
-
89
-
90
-
91
-
92
-
93
-
94
-
95
-
96
-
97
-
98
-
99
-
100
-
101
-
102
-
103
-
104
-
105
-
106
 |
 |