Bose Acoustimass 6 Owner's guide - Page 12
Check the connections, - wiring
 |
View all Bose Acoustimass 6 manuals
Add to My Manuals
Save this manual to your list of manuals |
Page 12 highlights
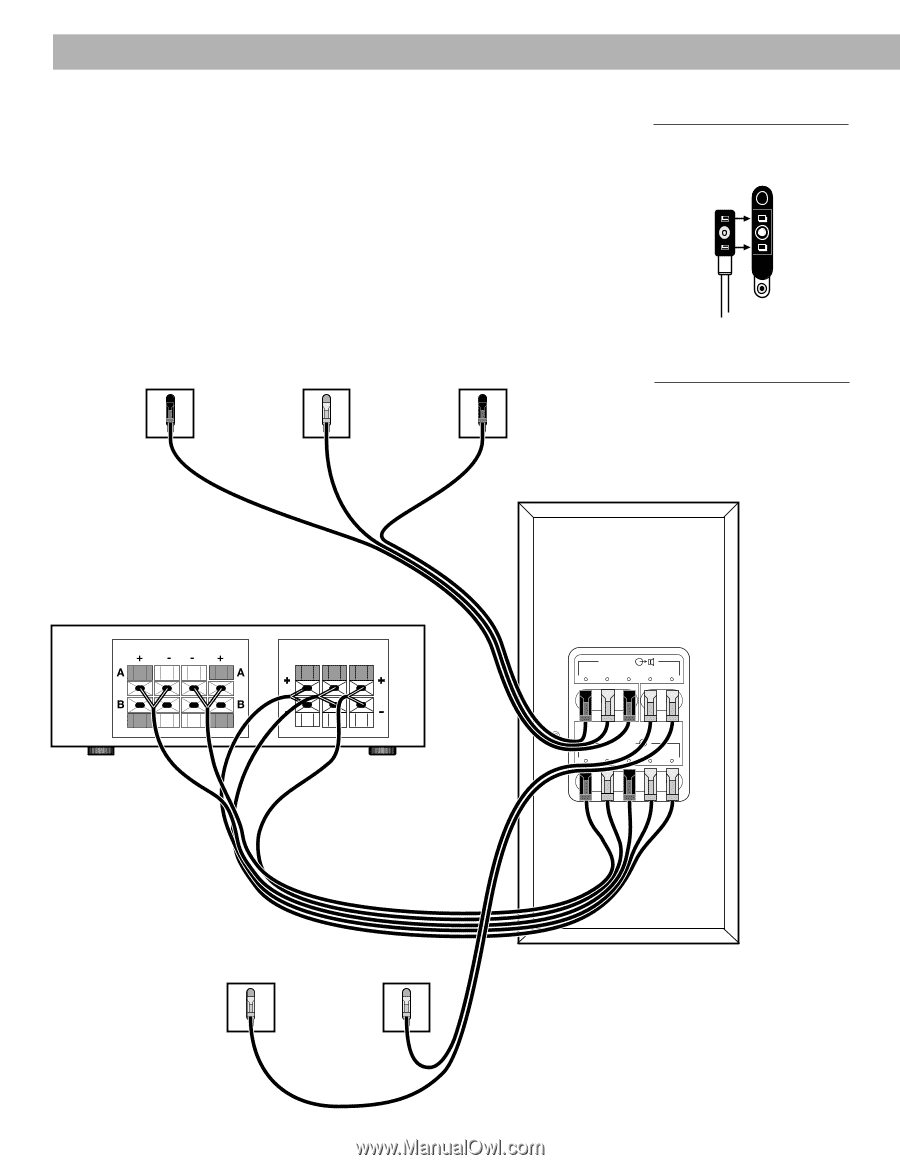
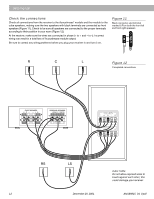
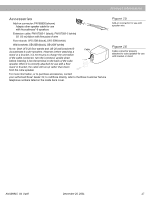
Setting Up Check the connections Check all connections from the receiver to the Acoustimass® module and the module to the cube speakers, making sure the two speakers with black terminals are connected as front speakers (Figure 11). Check to be sure all speakers are connected to the proper terminals according to their position in your room (Figure 12). At the receiver, make sure the wires are connected in phase (+ to + and - to -). Incorrect wiring can result in a total loss of Acoustimass module output. Be sure to correct any wiring problems before you plug your receiver in and turn it on. Figure 11 Black connector and terminal marked L/R on both the front left and front right speakers L/R R C L Figure 12 Completed connections FRONT SPEAKERS R L SURROUND SPEAKERS L REAR R CENTER OUTPUTS TO CUBE SPEAKERS L C R LS RS LEFT CENTER RIGHT LEFT RIGHT SURROUND SURROUND INPUTS FROM RECEIVER OR AMPLIFIER L C R LS RS RS LS CAUTION: Do not allow exposed wires to brush against each other; this could damage your receiver. 12 December 20, 2001 AM189815_04_V.pdf
-
 1
1 -
2
-
3
-
4
-
5
-
6
-
 7
7 -
 8
8 -
 9
9 -
 10
10 -
 11
11 -
 12
12 -
 13
13 -
 14
14 -
 15
15 -
 16
16 -
 17
17 -
18
-
19
-
20
 |
 |