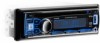
Boss Audio 742RGB User Manual - Page 5
Remote Control Operation
 |
View all Boss Audio 742RGB manuals
Add to My Manuals
Save this manual to your list of manuals |
Page 5 highlights
REMOTE CONTROL OPERATION 12 5 1. Power On/Off 1 2. Mute Button 2 3. TA Button 8 4. SEL/MENU Button 5&6. VOL UP/DOWN Button 7. AF Button 14 9 10 17 16 8. A.P Button Press the A.P button to preview the current preset stations.(18stations in FM ) Press and hold the AP button to activate the auto storage function. The unit scans and preset the stations with strongest signal.(18stations in FM ) 19 20 MUTE DN SELECT UP CLK - A.P. AF SRC BAND PTY TA TOP/ INT RPT SCN 1 2 3 RDM 4 56 4 11 6 7 15 3 13 18 21 9. Band Button 10. SRC Button 11. Tune/Seek Up And Track Skip Up/FF Button 12. Tune/Seek Down And Track Skip Down/REW Button 13. SCAN BUTTON Press the SCAN button to scan the radio frequency. If a valid signal has detected, the current frequency will be hold and blinking for 5 seconds, then press SCAN again to stop scan and remain the current frequency; otherwise, the radio will go on to scan the other radio frequency 5 seconds later. 14. CLOCK button 15. PTY Button 16. Track TOP/>||/Radio Preset 1 17. Track INT/Radio Preset 2 18. Track RPT/Radio Preset 3 19. Track RDM/Radio Preset 4 20. Radio Preset 5 and USB/CARD DIR- 21. Radio Preset 6 and USB/CARD DIR+ Page 9 6) MASK DPI/MASK ALL: MASK DPI mode: masks only the AF which has different PI. MASK ALL mode: masks the AF which has different PI and NO RDS signal with high field strength. 7)BEEP ON/BEEP OFF BEEP ON mode: The beep is generated when any key is pressed. BEEP OFF mode: The beep sound is disabled.. 8)VOL LAST/VOL DEFA VOL LAST: The radio switches on at the actual volume it had when it was last switched off. VOL DEFA: After pressing SEL button, AVOL will be displayed. Then you can pre-select a constant switch-on volume by using the VOL knob. 9)BL AUTO(WHITE,ORANGE,YELLOW,RED PURPLE,BLUE,CYAN,GREEN) This Menu is for selecting the backlight color mode of your desired. You can select the single color backlight mode or BL AUTO mode. When selecting BL AUTO mode, the 8 backlight colors will be changing automatically in certain order. 10)CLK ON/OFF CLK ON: Clock will always show on the display when power off. CLK OFF: Clock will disappear on the display when power off. 9-14. PRESET STATION MEMORY AND TOP/>||, INT, RPT, RDM BUTTONS a) During radio mode: Go to any preset station by pressing one of the 6 preset station buttons (1-6). If one of these buttons is pressed for more than 2 seconds, the station currently being listened to will be memorized into the selected preset button. b) During disc, MMC/SD or USB mode: 1) Press the TOP/ >|| button briefly to interrupt the playback of the disc, MMC/SD or USB. Press again to resume normal playback of the disc, MMC/SD or USB. Press the TOP/>|| button and hold for approximately 1 second to play the first track of the disc, MMC/SD or USB. 2) Press the INT button to sample the first 10 seconds part of each track, and the INTRO will be visible on the LCD display. In the process of INT, press INT button again to stop sampling and to continue playing the current track, and the LCD will display INTRO. 3) Press the RPT button once to play the current track repeatedly, and the RPT ONE will be visible on the LCD display. During MP3/WMA disc, MMC/SD or USB mode, press the RPT button twice continuously to play the current folder repeatedly, and the RPT DIR will be visible on the LCD display. In the process of RPT, press RPT button again to stop playing repeatedly mode and the LCD will display OFF. 4) Press the RDM button to play all tracks on disc in random order, and the RANDOM will be visible on the LCD display. In the process of RDM, press RDM button again to stop playing in random order and the LCD will display OFF. Page 4
-
 1
1 -
 2
2 -
 3
3 -
 4
4 -
 5
5 -
 6
6 -
 7
7
 |
 |
