Boss Audio BV9986BI User Manual in Spanish - Page 39
Speaker Setup, Downmix, 23.6 Digital Setup, Op Mode, Dynamic Range, Dual Mono - remote
 |
View all Boss Audio BV9986BI manuals
Add to My Manuals
Save this manual to your list of manuals |
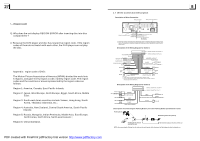
Page 39 highlights
5.23.5 SPEAKER SETUP DOWNMIX It is for selecting your desired sound effect when there is not central speaker and subwoofer. There are 3 mode: LT/RT, STEREO, VSS. LT/RT: When playing a disc with PRO LOGIC stereo effect, choose the item, so it will output audio signal with vivid theatre effect. STEREO: If you choose this item, when outputting audio signal with 5.1 channels, it will output the left and right channels of signal ; when outputting audio signal with 2 channels, it will output the common 2 channels of stereo signal. VSS: If you choose this item, when playing a disc recorded with 5.1 channels, the main channel speakers can output audio signal with VSS effect. 5.23.6 DIGITAL SETUP OP MODE It is for selecting audio output mode LINE OUT: It can linearly compress the audio signal. So the volume level is lower. You should select the item at night. RF REMOD: It can make the volume level higher. You should select it at daylight. DYNAMIC RANGE After selecting the compression mode of LINE OUT, set the item, so you can adjust the linear compression ratio. If you set it to be FULL, the Peak-to-Peak value of the audio signal is the minimum; if you set it to be OFF, the Peak-toPeak value is the maximum. DUAL MONO It is for selecting a desired audio output mode for the left and right ways of signal. It is mainly for Karaoke of Ac3. There are 4 modes in all as follows: STEREO, MONO L, MONO R, MIX MONO. PDF created with FinePrint pdfFactory trial version http://www.pdffactory.com 2. Common Operation 1. To turn on/off the unit In power off mode, short press the POWER button to turn on the unit. In power on mode, long press the POWER button on the front panel or short press the POWER button on the remote control to turn off the unit. 2. To slide the monitor of the Car Audio System out of/into the chassis Pressing the OPEN button can slide the monitor of the Car Audio System out of the chassis or slide it into the chassis. 3. To select an optimal angle of the monitor of the Car Audio System To select an up-down optimal angle of the monitor of the Car Audio System, press the DOWN/UP button on the monitor or ANG button on the remote control repeatedly. 4. To select function mode Press the MODE button to select RADIO, DISC (After inserting a disc), USB(After inserting a USB storage), CARD(After inserting a card), AUX, BLUETOOTH or Ipod mode. During playback, tapping the icon after popping up Keyboard interface can pop up Mode Menu as right. then tap one icon in it to select your desired mode. Mode Menu Note: This unit has front and rear USB. Only one will work at a time. 5. To adjust sound level Rotate the VOL knob on the front panel or press or hold the + or - button on the remote control to directly adjust the volume level. 6. To mute sound Press the MUTE button on the remote control to turn on/off MUTE mode. pressing the POWER button on the front panel shortly also can turn on/off MUTE mode. 7. To display clock time Press the CLK button to display clock time on the small monitor of the front panel. After sliding the monitor into the chassis, pressing the CLK button can display clock time on the small LCD. 8. To select a desired EQ mode Press the EQ button on the remote control to select one of the preset music equalizer curves: POP, ROCK, CLAS, FLAT. The sound effect will be changed. 9. To turn on/off LOUD mode Press the LOUD button to turn on/off LOUD mode. When turning on LOUD mode, it will enhance bass level immediately when bass is not enough. 10.To remove the front panel and reset the player When the monitor or the small LCD display wrongly or some buttons are not available or sound is distorted, press the REL button on the front panel to detach the front panel and then pull it rightward and then leftward to remove it, then press the RESET button to rehabilitate the distorted program to zero.
-
 1
1 -
2
-
3
-
4
-
5
-
6
-
7
-
8
-
9
-
10
-
11
-
12
-
13
-
14
-
15
-
16
-
17
-
18
-
19
-
20
-
21
-
22
-
23
-
24
-
25
-
26
-
27
-
28
-
29
-
30
-
31
-
32
-
33
-
 34
34 -
 35
35 -
 36
36 -
 37
37 -
 38
38 -
 39
39 -
 40
40 -
 41
41 -
 42
42 -
 43
43 -
 44
44 -
45
-
46
 |
 |
