Boss Audio CPBK2 User Manual in English - Page 5
B.8.0
 |
View all Boss Audio CPBK2 manuals
Add to My Manuals
Save this manual to your list of manuals |
Page 5 highlights
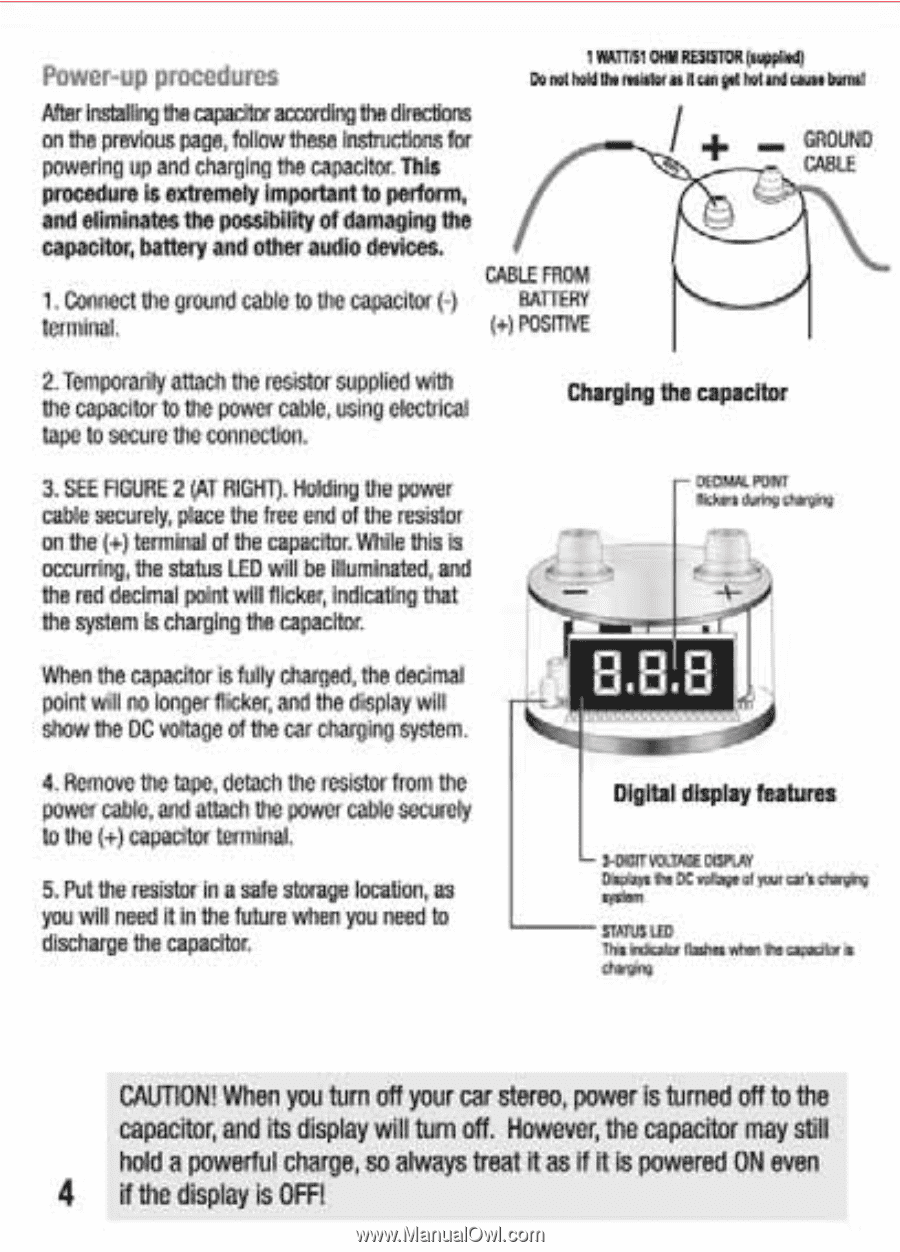
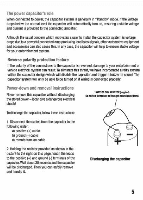
Puwer up procedures MITI, OM RESISTOR *Wed/ Doml Me the ittoki tt dun Vet 1.'1.Na:ohm! After Installing the capacity aoxeding the directions on the previous page, follow these Instructions for powering up and charging the capacitor. This procedure is extremely Important to perform, and eliminates the possibility 01 damaging the capacitor, battery and other audio devices. CABLE FROM 1. Connect the ground cable to the capacitor (-) (Wray terminal. (+) POSITIVE I CROW - CA8u b 2. Temporarily attach the resistor SuPPliell with the capacitor to the power cable, using electrical tape to secure the connection.. Charging the capacitor 3. SEE FIGURE 2 (AT RIGHT). Holding the power cable securely, place the free end of the resistor on the (4) terminal of the capacitor. While this is occuning, the status LED will be illuminated, and the red decimal point will flicker, Indicating that the system Is charging the capacitor. When the capacitor is fully charged, the decimal point will no longer flicker, and the display will show the DC voltage of the car charging system. ... 0 VA. PONT B.8.0 4. Remove the tape, detach the resistor from the power cable. and attach We power cable seemly to the (+)capatator tormnal. 5. Put the resistor in a sale storage location, as you will need it in the future when you need to discharge the capacitor. Digital display features i-oar MINX cep.p. Mini N DC neap al wail Onto roam SIAM UM The make MON Mw N gaiety• tined CAUTION! When you turn off your car stereo, power Is turned off to the capacitor, and its display will turn off. However, the capacitor may still hold a powerful charge, so always treat it as it it is powered ON even 4 if the display is OFF!
-
 1
1 -
 2
2 -
 3
3 -
 4
4 -
 5
5 -
 6
6 -
 7
7
 |
 |