Brother International AX325 Owner's Manual - English - Page 10
Replacing, cassette, ribbon
 |
View all Brother International AX325 manuals
Add to My Manuals
Save this manual to your list of manuals |
Page 10 highlights
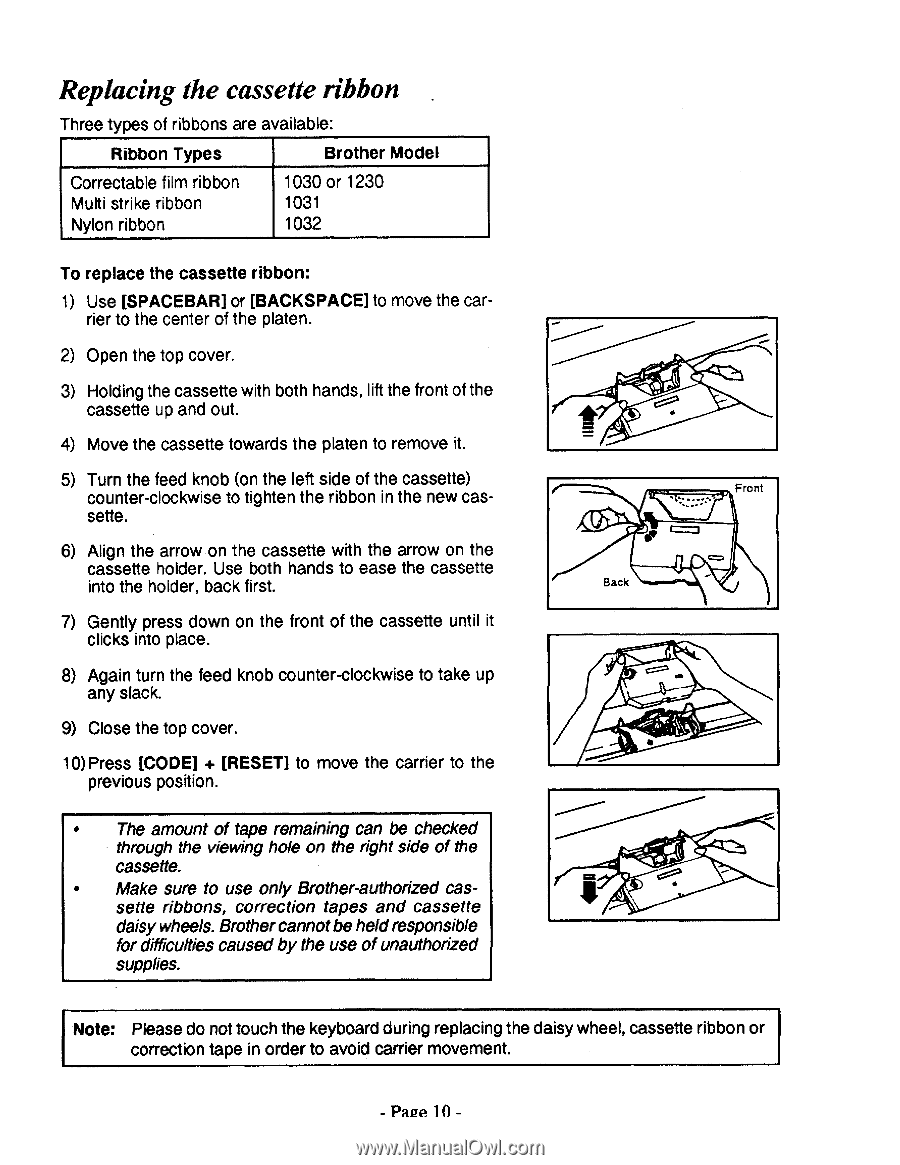
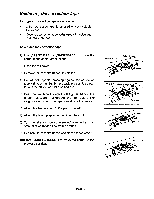
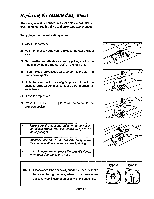
Replacing the cassette ribbon . Three types of ribbons are available: Ribbon Types Brother Model Correctable film ribbon Multi strike ribbon Nylon ribbon 1030 or 1230 1031 1032 To replace the cassette ribbon: 1) Use [SPACEBAR] or [BACKSPACE] to move the car- rier to the center of the platen. 2) Open the top cover. 3) Holding the cassette with both hands, lift the front of the cassette up and out. 4) Move the cassette towards the platen to remove it. 5) Turn the feed knob (on the left side of the cassette) counter-clockwise to tighten the ribbon in the new cassette. 6) Align the arrow on the cassette with the arrow on the cassette holder. Use both hands to ease the cassette into the holder, back first. 7) Gently press down on the front of the cassette until it clicks into place. 8) Again turn the feed knob counter-clockwise to take up any slack. 9) Close the top cover. 10) Press [CODE] + [RESET] to move the carrier to the previous position. • The amount of tape remaining can be checked through the viewing hole on the right side of the cassette. • Make sure to use only Brother-authorized cassette ribbons, correction tapes and cassette daisy wheels. Brother cannotbe heldresponsible for difficulties caused by the use of unauthorized supplies. • Back Front c=M • Note: Please do not touch the keyboard during replacing the daisy wheel, cassette ribbon or correction tape in order to avoid carrier movement. -Pace 10 -
-
 1
1 -
2
-
3
-
4
-
 5
5 -
 6
6 -
 7
7 -
 8
8 -
 9
9 -
 10
10 -
 11
11 -
 12
12 -
 13
13 -
 14
14 -
 15
15 -
16
 |
 |