Brother International AX325 Owner's Manual - English - Page 5
Underline
 |
View all Brother International AX325 manuals
Add to My Manuals
Save this manual to your list of manuals |
Page 5 highlights
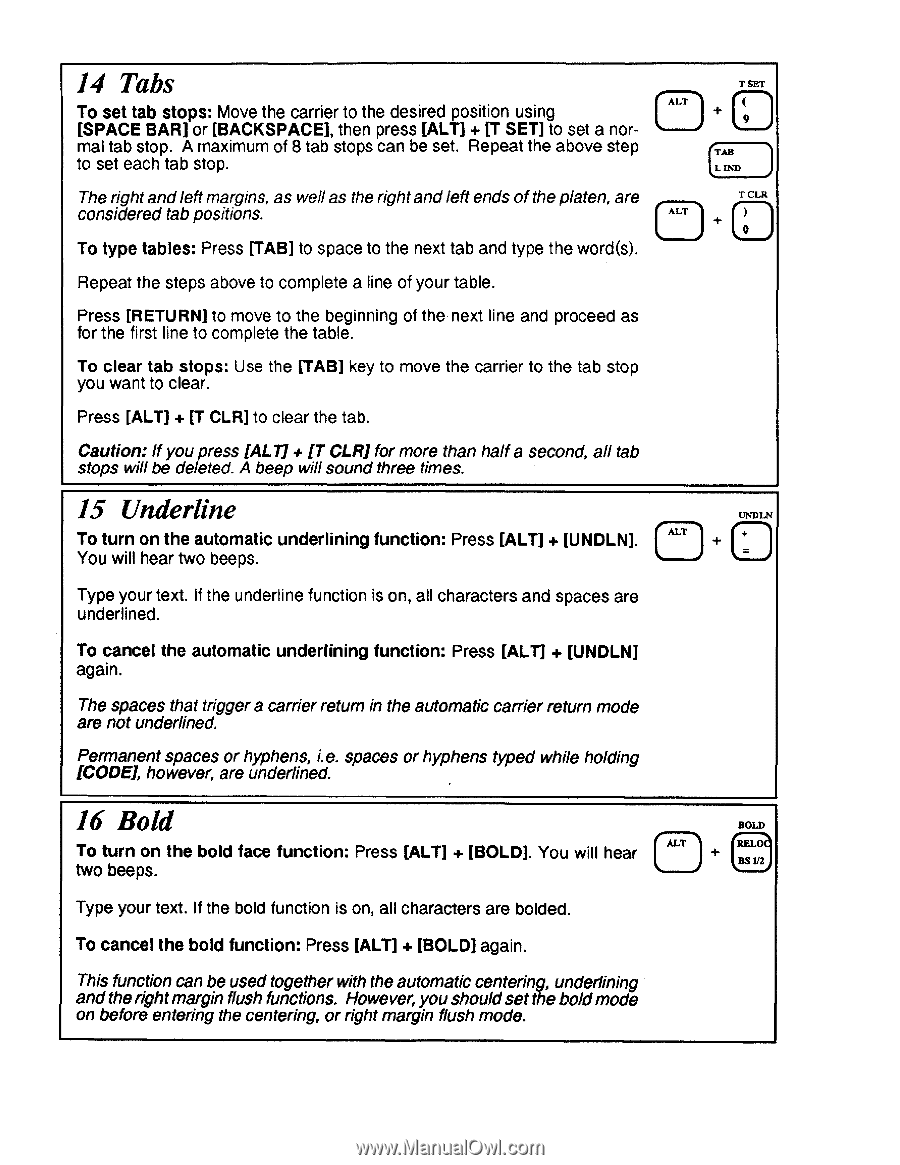
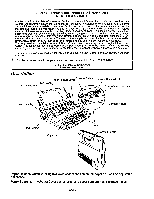
14 Tabs [ALT To set tab stops: Move the carrier to the desired position using [SPACE BAR] or [BACKSPACE], then press [ALT] + [T SET] to set a normal tab stop. A maximum of 8 tab stops can be set. Repeat the above step to set each tab stop. The right andleft margins, as wellas the rightandleft ends of the platen, are considered tab positions. ALT To type tables: Press [TAB] to space to the next tab and type the word(s). Repeat the steps above to complete a line of your table. Press [RETURN] to move to the beginning of the next line and proceed as for the first line to complete the table. To clear tab stops: Use the [TAB] key to move the carrier to the tab stop you want to clear. Press [ALT] + [T CLR] to clear the tab. Caution: If you press [ALT] + CLR] for more than half a second, all tab stops will be deleted. A beep will sound three times. T SET 9 TAB L IND T CLR 0 • 15 Underline To turn on the automatic underlining function: Press [ALT] + [UNDLN]. You will hear two beeps. •UNDLN Type your text. If the underline function is on, all characters and spaces are underlined. To cancel the automatic underlining function: Press [ALT] + [UNDLN] again. The spaces that trigger a carrier return in the automatic carrier return mode are not underlined. Permanent spaces or hyphens, i.e. spaces or hyphens typed while holding [CODE], however, are underlined. 16 Bold BOLD To turn on the bold face function: Press [ALT] + [BOLD]. You will hear two beeps. ♦ 1 Type your text. If the bold function is on, all characters are bolded. To cancel the bold function: Press [ALT] + [BOLD] again. This function can be used together with the automatic centering, underlining and therightmargin flush functions. However, youshouldset theboldmode on before entering the centering, or right margin flush mode.
-
 1
1 -
 2
2 -
 3
3 -
 4
4 -
 5
5 -
 6
6 -
 7
7 -
 8
8 -
 9
9 -
 10
10 -
 11
11 -
12
-
13
-
14
-
15
-
16
 |
 |