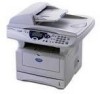
Brother International DCP8020 Users Manual - English - Page 263
If the Status LED turns Red for a Service Error, please coll Brother, NC-9100h Network User's Guide
 |
UPC - 012502606581
View all Brother International DCP8020 manuals
Add to My Manuals
Save this manual to your list of manuals |
Page 263 highlights
8 Reconnect any additional interface cables that you removed. 9 Reconnect the power cable and then turn on the DCP power switch. ■ To check that you have installed the DIMM correctly, print the printer settings by using the selection in the driver and check the printout to make sure it shows the additional memory. ■ You can check the current memory size in the user settings list. (See the NC-9100h Network User's Guide on the CD-ROM.) WARNING If the Status LED turns Red for a Service Error, please coll Brother Custome Service at: 1-800-284-4329 (in USA), 1-877-BROTHER (in Canada) or (514) 685-6464 (in Montreal). OPTIONAL ACCESSORIES 15 - 4
-
 1
1 -
2
-
3
-
4
-
5
-
6
-
7
-
8
-
9
-
10
-
11
-
12
-
13
-
14
-
15
-
16
-
17
-
18
-
19
-
20
-
21
-
22
-
23
-
24
-
25
-
26
-
27
-
28
-
29
-
30
-
31
-
32
-
33
-
34
-
35
-
36
-
37
-
38
-
39
-
40
-
41
-
42
-
43
-
44
-
45
-
46
-
47
-
48
-
49
-
50
-
51
-
52
-
53
-
54
-
55
-
56
-
57
-
58
-
59
-
60
-
61
-
62
-
63
-
64
-
65
-
66
-
67
-
68
-
69
-
70
-
71
-
72
-
73
-
74
-
75
-
76
-
77
-
78
-
79
-
80
-
81
-
82
-
83
-
84
-
85
-
86
-
87
-
88
-
89
-
90
-
91
-
92
-
93
-
94
-
95
-
96
-
97
-
98
-
99
-
100
-
101
-
102
-
103
-
104
-
105
-
106
-
107
-
108
-
109
-
110
-
111
-
112
-
113
-
114
-
115
-
116
-
117
-
118
-
119
-
120
-
121
-
122
-
123
-
124
-
125
-
126
-
127
-
128
-
129
-
130
-
131
-
132
-
133
-
134
-
135
-
136
-
137
-
138
-
139
-
140
-
141
-
142
-
143
-
144
-
145
-
146
-
147
-
148
-
149
-
150
-
151
-
152
-
153
-
154
-
155
-
156
-
157
-
158
-
159
-
160
-
161
-
162
-
163
-
164
-
165
-
166
-
167
-
168
-
169
-
170
-
171
-
172
-
173
-
174
-
175
-
176
-
177
-
178
-
179
-
180
-
181
-
182
-
183
-
184
-
185
-
186
-
187
-
188
-
189
-
190
-
191
-
192
-
193
-
194
-
195
-
196
-
197
-
198
-
199
-
200
-
201
-
202
-
203
-
204
-
205
-
206
-
207
-
208
-
209
-
210
-
211
-
212
-
213
-
214
-
215
-
216
-
217
-
218
-
219
-
220
-
221
-
222
-
223
-
224
-
225
-
226
-
227
-
228
-
229
-
230
-
231
-
232
-
233
-
234
-
235
-
236
-
237
-
238
-
239
-
240
-
241
-
242
-
243
-
244
-
245
-
246
-
247
-
248
-
249
-
250
-
251
-
252
-
253
-
254
-
255
-
256
-
257
-
 258
258 -
 259
259 -
 260
260 -
 261
261 -
 262
262 -
 263
263 -
 264
264 -
 265
265 -
 266
266 -
 267
267 -
 268
268 -
269
-
270
-
271
-
272
-
273
-
274
-
275
-
276
-
277
-
278
-
279
-
280
-
281
-
282
 |
 |

OPTIONAL ACCESSORIES
15 - 4
8
Reconnect any additional interface cables that you removed.
9
Reconnect the power cable and then turn on the DCP power
switch.
WARNING
If the Status LED turns Red for a Service Error, please coll Brother
Custome Service at: 1-800-284-4329 (in USA), 1-877-BROTHER (in
Canada) or (514) 685-6464 (in Montreal).
■
To check that you have installed the DIMM correctly, print
the printer settings by using the selection in the driver and
check the printout to make sure it shows the additional
memory.
■
You can check the current memory size in the user settings
list. (See the
NC-9100h Network User’s Guide
on the
CD-ROM.)