Brother International HL 5370DW Quick Setup Guide - English - Page 32
Set as Default Printer
 |
UPC - 012502622482
View all Brother International HL 5370DW manuals
Add to My Manuals
Save this manual to your list of manuals |
Page 32 highlights
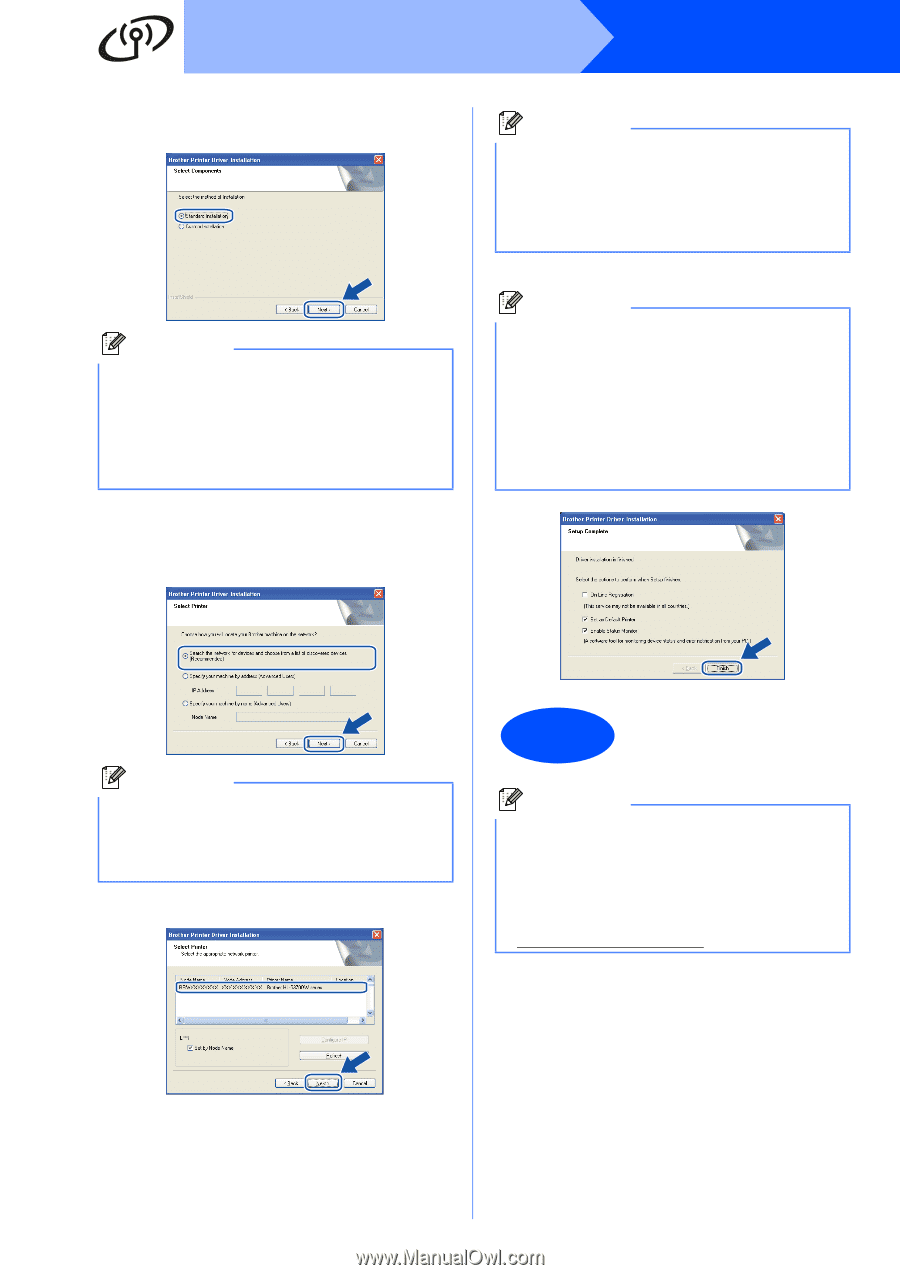
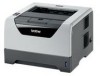
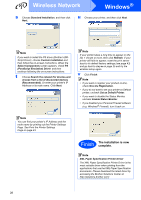
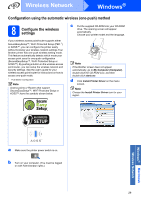
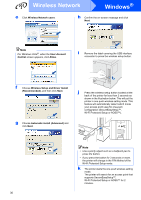
Wireless Network Windows® q Choose Standard Installation, and then click Next. Note If you want to install the PS driver (Brother's BRScript Driver), choose Custom Installation and then follow the on-screen instructions. When the Select Components screen appears, check PS (PostScript Emulation) Driver, and then continue following the on-screen instructions. r Choose Search the network for devices and choose from a list of discovered devices (Recommended). Or enter your printer's IP Address or its node name. Click Next. Note If your printer takes a long time to appear on the list, 1 minute or more, then click Refresh. If your printer still fails to appear, reset the print server back to its default factory settings (see page 43) and go back to step e on page 30 and try the wireless setup again. t Click Finish. Note • If you want to register your product on-line, check On-Line Registration. • If you do not want to set your printer as Default printer, uncheck Set as Default Printer. • If you want to disable the Status Monitor, uncheck Enable Status Monitor. • If you disabled your Personal Firewall software (e.g. Windows® Firewall), turn it back on. Note You can find your printer's IP Address and the node name by printing out the Printer Settings Page. See Print the Printer Settings Page on page 43. s Choose your printer, and then click Next. Finish The installation is now complete. Note XML Paper Specification Printer Driver The XML Paper Specification Printer Driver is the most suitable driver when printing from the applications that use the XML Paper Specification documents. Please download the latest driver by accessing the Brother Solutions Center at http://solutions.brother.com/. 32
-
 1
1 -
2
-
3
-
4
-
5
-
6
-
7
-
8
-
9
-
10
-
11
-
12
-
13
-
14
-
15
-
16
-
17
-
18
-
19
-
20
-
21
-
22
-
23
-
24
-
25
-
26
-
 27
27 -
 28
28 -
 29
29 -
 30
30 -
 31
31 -
 32
32 -
 33
33 -
 34
34 -
 35
35 -
 36
36 -
 37
37 -
38
-
39
-
40
-
41
-
42
-
43
-
44
-
45
-
46
-
47
-
48
-
49
-
50
-
51
-
52
-
53
-
54
-
55
 |
 |