Brother International HL-630 Users Manual - English - Page 48
REPLACING THE TONER CARTRIDGE for more, Plug the power cord.
 |
View all Brother International HL-630 manuals
Add to My Manuals
Save this manual to your list of manuals |
Page 48 highlights
USER'S GUIDE 7. Hold the drum unit flat and install the new drum unit into the printer. Fig. 5-13 Installing the Drum Unit 8. Close the drum cover and press until the locking pegs click into position and then close the top cover. 9. Install the toner cartridge into the drum unit inside the printer. See the chapter "REPLACING THE TONER CARTRIDGE" for more information. 10. Plug the power cord. 5-8
-
 1
1 -
2
-
3
-
4
-
5
-
6
-
7
-
8
-
9
-
10
-
11
-
12
-
13
-
14
-
15
-
16
-
17
-
18
-
19
-
20
-
21
-
22
-
23
-
24
-
25
-
26
-
27
-
28
-
29
-
30
-
31
-
32
-
33
-
34
-
35
-
36
-
37
-
38
-
39
-
40
-
41
-
42
-
 43
43 -
 44
44 -
 45
45 -
 46
46 -
 47
47 -
 48
48 -
 49
49 -
 50
50 -
 51
51 -
 52
52 -
 53
53 -
54
-
55
-
56
-
57
-
58
-
59
-
60
-
61
-
62
-
63
-
64
-
65
-
66
-
67
-
68
-
69
-
70
-
71
-
72
-
73
-
74
-
75
-
76
-
77
-
78
-
79
-
80
-
81
-
82
-
83
-
84
 |
 |
USER’S GUIDE
5–8
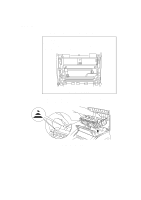
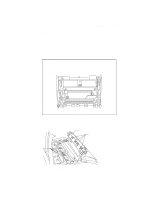
7.
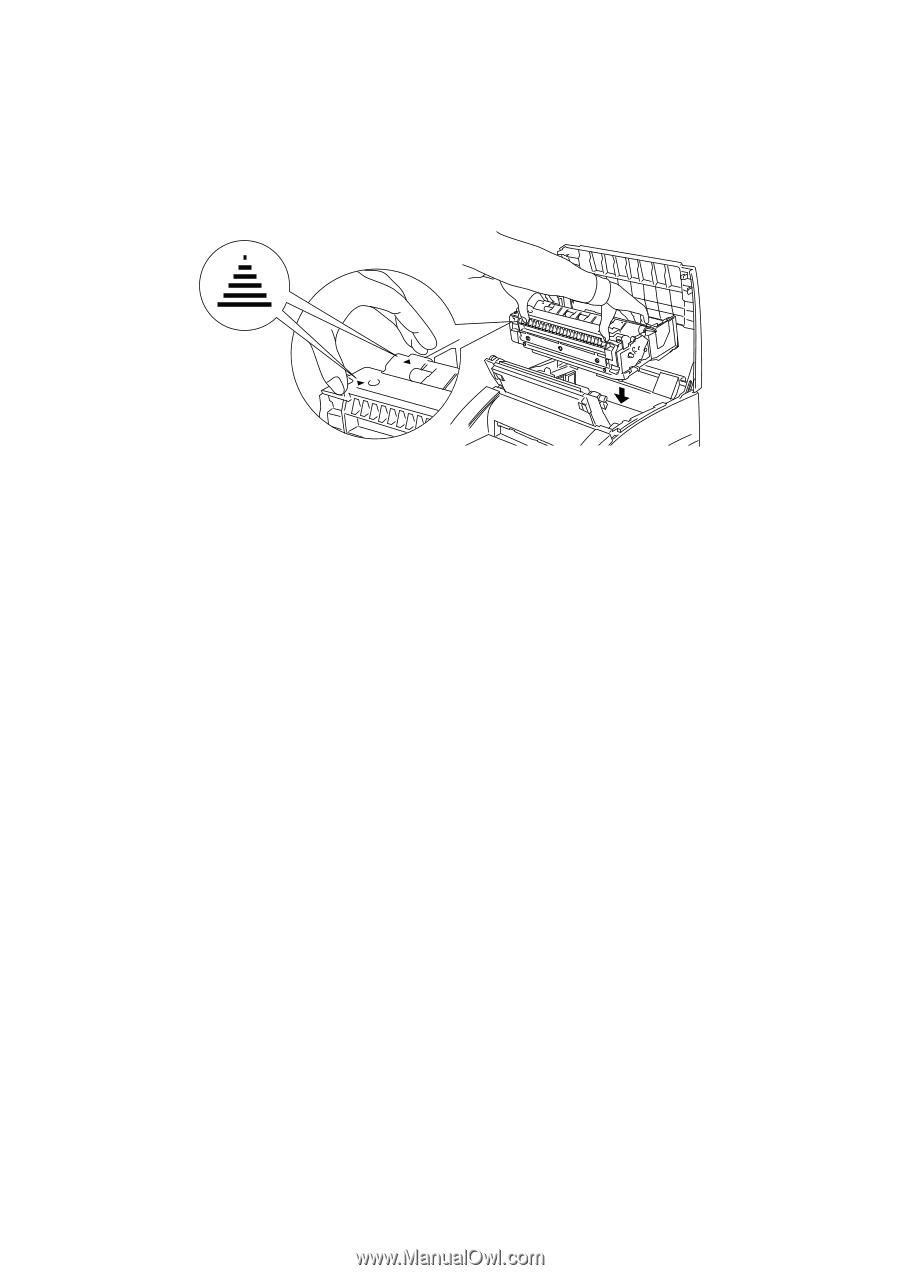
Hold the drum unit flat and install the new drum unit into the printer.
Fig. 5-13 Installing the Drum Unit
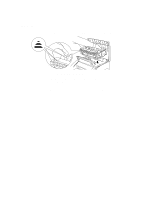
8.
Close the drum cover and press until the locking pegs click into
position and then close the top cover.
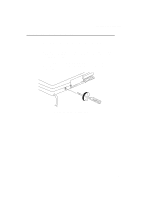
9.
Install the toner cartridge into the drum unit inside the printer. See the
chapter “REPLACING THE TONER CARTRIDGE” for more
information.
10. Plug the power cord.