Brother International HL-641 Quick Setup Guide - English - Page 7
Action 5: Plug in and Turn on Your Printer, Printing a Test Sample
 |
View all Brother International HL-641 manuals
Add to My Manuals
Save this manual to your list of manuals |
Page 7 highlights
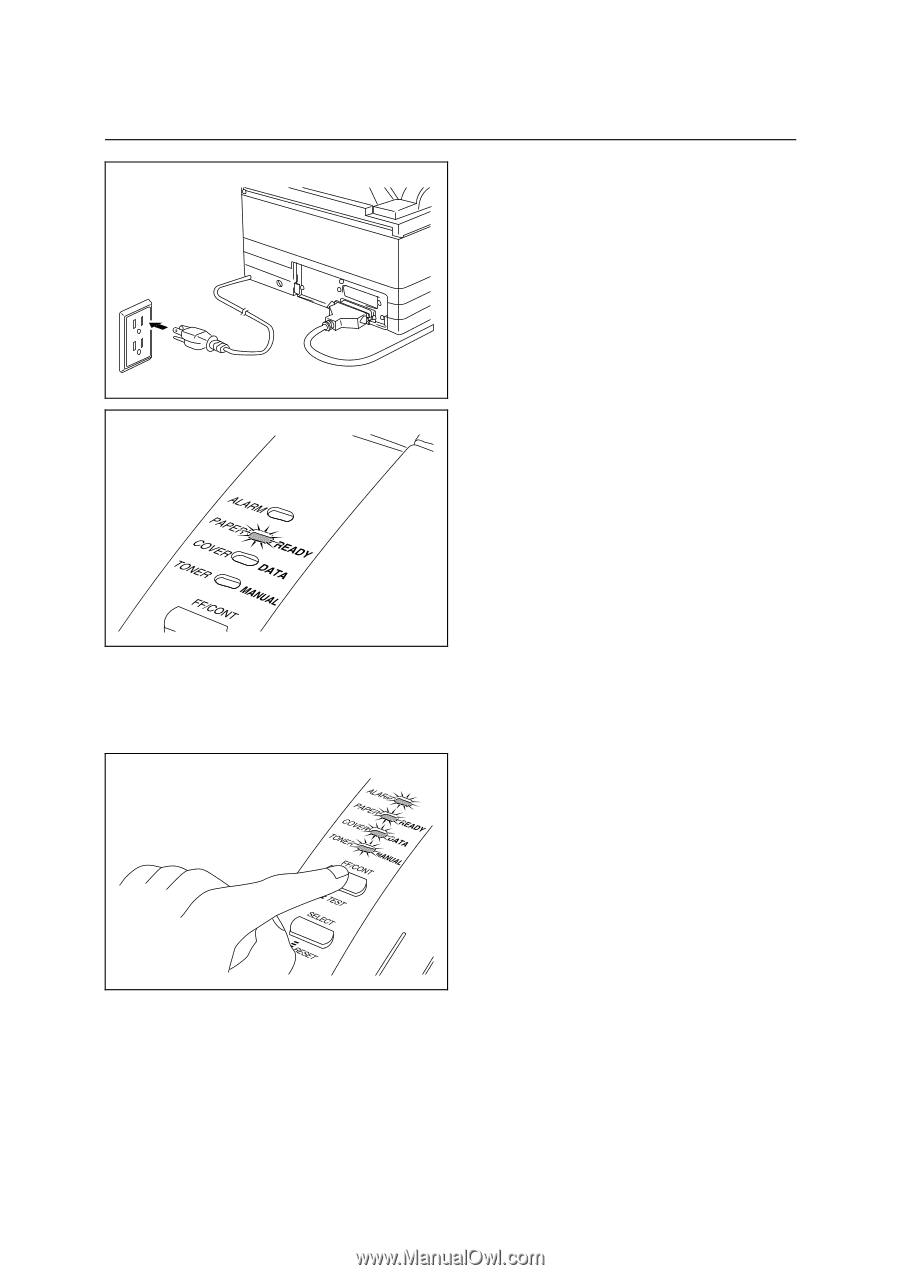
Action 5: Plug in and Turn on Your Printer 1 Plug the power cord into the AC power outlet. NOTE This printer has no power switch. The printer has a sleep mode which allows the printer to automatically reduce power consumption when not in use. 2 Make sure that the READY lamp is ON after the printer has warmed up (about 60 seconds). Printing a Test Sample Page We recommend that you print a test page. Refer to the instructions below. 1 Depress the TEST (FF/CONT) switch until all lamps are turned ON. The printer starts printing a test sample page. The printed page shows the basic control panel operations. NOTE If the printer does not print a test sample page exactly, see "CHAPTER 6 Troubleshooting - Q & A" of the User's Guide. If after reviewing the information in the User's Guide, your printer still cannot print the test sample page exactly, consult your dealer. 7
-
 1
1 -
 2
2 -
 3
3 -
 4
4 -
 5
5 -
 6
6 -
 7
7 -
 8
8
 |
 |