Brother International HL-760PLUS Email Printing Users Manual - English - Page 7
INSTALL AUTOMATIC E-MAIL PRINTING, 1. Install with the Supplied Disk
 |
View all Brother International HL-760PLUS manuals
Add to My Manuals
Save this manual to your list of manuals |
Page 7 highlights
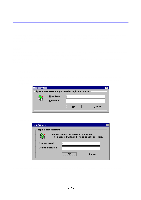
CHAPTER 3 INSTALL AUTOMATIC E-MAIL PRINTING 1. INSTALL WITH THE SUPPLIED DISK Install the Automatic E-Mail Printing software with the disk supplied with the printer. (1) Insert the floppy disk labeled 'Automatic E-Mail Printing for Microsoft Windows 95, Printer driver disk for Microsoft Windows NT 4.0' into the drive A (or B) of your computer. (2) Click Start, then select Run. (3) Type A:\SETUP and press the Enter key. (4) Click the Next button.
-
 1
1 -
 2
2 -
 3
3 -
 4
4 -
 5
5 -
 6
6 -
 7
7 -
 8
8 -
 9
9 -
 10
10 -
 11
11 -
 12
12 -
13
-
14
-
15
-
16
-
17
-
18
-
19
-
20
-
21
-
22
-
23
-
24
-
25
 |
 |

CHAPTER 3
INSTALL AUTOMATIC E-MAIL PRINTING
1.
INSTALL WITH THE SUPPLIED DISK
Install the Automatic E-Mail Printing software with the disk supplied with the printer.
(1)
Insert the floppy disk labeled ‘Automatic E-Mail Printing for Microsoft Windows 95, Printer driver
disk for Microsoft Windows NT 4.0’ into the drive A (or B) of your computer.
(2) Click
Start
, then select
Run
.
(3) Type
A:\SETUP
and press the Enter key.
(4) Click the
Next
button.